How do you STOP auto backup in Google Photos? If you have the app on your phone and you need to turn the Google Photos auto backup off, I'll show you step-by-step where to find back up. It's then easy to stop Google Photos backup and turn it off!
THIS IS THE TRANSCRIPT - CLICK PLAY ON THE VIDEO ABOVE!
Hello, I'm Neil. Welcome back to the Happy Hut.
How do you back up to Google Photos?
Or more importantly, how do you stop backup to Google Photos?
Maybe like me, you've hit your storage limit in Google Drive, which means we need to turn off Backup in Google Photos while we fix the problem.
It's really easy, and I'm going to stop backup using the Google Photo app on my phone here, so you can follow along step by step. I'll also share a link to another video that might help you fix your Google Drive storage problem for good.
First thing, obviously, is to make sure we're logged in to the right Google account for the app.
Just click on the Avatar, that's your picture in the top right-hand corner.
We can login to different Google accounts here and even choose a different Google account from the rest of the phone.
That can be useful for fixing your storage problem.
The next thing we can do here is to scroll down to photos settings.
By the way, do not click here on free up space.
This will delete things from your phone because they're backed up to Google, which is no help if your account is over the limit.
If we click on settings, we can see the first section at the top here is backup.
Let's click on that, and you can see these options down here for our Google photos.
But at the top is this blue toggle switch, which turns backup on and off.
And be aware, this is a little sneaky.
Every time you turn on backup, even if you're in storage saver quality, Google sets the backup quality back to original quality, which takes up more of your Limited storage allowance.
So you might want to just check that storage saver is turned back on every time you turn on backup.
If you are over your storage limit and your Google account has been shut down, I'm so sorry.
I've completely gone through this myself.
There's a link down in the description and on screen now where I walk you through step by step how to bring your storage back under 15GB and hopefully keep it under forever for free!
How do you check your Spotify Wrapped 2024? Where do you find wrapped on the Spotify app?
I walk you through Spotify Wrapped: your personal year in music review. Step-by-step instructions on where and how to access wrapped, on phone or desktop app. From exploring your top artists and genres to revealing your most-played songs and playlists, with helpful tips on sharing your stats and even accessing past year's Wrapped! Plus where to see your top artists and top songs for any year. 🎶📱✨
THIS IS THE TRANSCRIPT - CLICK PLAY ON THE VIDEO ABOVE!
Hello I'm Neil welcome back to the Happy Hut!
How do you check your own Spotify Wrapped?
The new thing we're trying today is: where can you see Spotify wrapped and where can I find my top artists on Spotify?
You probably know this already but Spotify wrapped is a review of the year of our top artists inside Spotify.
It tracks our listening through the year by genre, artist, album, and song.
If you're watching this outside of December it might not be available but I'll also show you how to find your top artists for the year - for any year!
Let's put my phone on screen now, slight disclaimer: this is my daughter's login and I think you'll guess which songs might be mine.
I think Granddad even uses this login but anyway.
Usually you can find wrapped as a button or Banner on the homepage of the Spotify app but if it's not there on your phone or you want to see it on a PC, desktop, laptop, MacBook, or iPad - all we need to do is open our browser. That's Chrome if you're on an Android phone or Safari on an iPhone, iPad, or Mac.
We'll tap “login” and sign into the same account as the app.
This plays the Spotify wrapped slideshow.
I'll show you how to share this on Instagram or look up your top artists in a moment.
There's this, there's the genre sandwich and this shows us our genre preferences as a sandwich. I think the soft rock might be mine or granddad's.
There's a “sound town” which is a real-life City where Spotify users listen to similar music to you. Doesn’t that make it a sound City? I don't know.
The total number of songs and your most listened to song of the year.
Your top five songs of the year and a link to your “top songs playlist”.
Which we can save in our playlists by clicking this button on the bottom here.
Our total listening time in minutes and days including where you rank for listening time worldwide. How many artists we listen to and our most listened to artist of the year, hey of course Olivia Rodrigo. That... wasn't me.
We can share this though by pressing the button on the bottom: the these apps will be different for you.
We'll see our top five artists over the months as a cool countdown and we also get this!
Hey guys it's Olivia! I just want to thank you so much for all the support and love you've shown me in 2023.
I can't wait for all this to come next year and I'm so grateful for you sending you all my love!
My pleasure Olivia!
Then a “me card”.
This shows our listening habits as a character.
And now here's a summary and a link to share your Spotify wrapped statistics on Instagram story, WhatsApp, Snapchat, anywhere.
Or you can save it to your phone.
But how do I find my Spotify wrapped from other years or your top songs or top artists?
It's really easy: just go into the Spotify app.
Click on search and type in your top songs 2024 or whatever year you like...
And there they are!
Or you can type in "your top artists” and you can see it's brought up the Spotify wrapped for that year.
And you can save this playlist by clicking on the “plus" button here or the three dots.
I am calling this a dad delivers success!
Say hi in the comments if this works for you and thank you for being awesome by hitting the thumbs up or the Subscribe button it really helps me out so thank you.
And right here are all my other Spotify tips and tricks.
How do you make a playlist on YouTube using the YouTube app on your phone? Here I show you how I create a new queue or playlist for YouTube step by step for beginners. AND I show you how to add a video to a playlist even if the save button is grayed out and it doesn't let you add to playlist.
THIS IS THE TRANSCRIPT - CLICK PLAY ON THE VIDEO ABOVE!
Hello! How do you create a playlist on YouTube?
To make a playlist on a mobile device with the YouTube app, get any video that you want to add to a playlist. Under the video, you can scroll these buttons with your finger to get to "save," and we'll click on that. At the bottom, it saves it to your last playlist. To change this, we're going to click on "change," and it brings up your list of playlists. Here, we can click on "create new playlist" on the top right-hand corner and give our playlist any title we like, up to 150 characters. And we can set the playlist to private, where only we can see this, public where anyone can see it, or unlisted where anyone who has the playlist link can see it.
But what if the save button doesn't appear? This happens for videos which YouTube thinks are made for kids, like this video here, "Wheels on the Bus." But if I scroll across, there's no save on the button! The button's there, but we can't click on it. Look, there's a warning at the bottom here. “This is turned off for content made for kids”. But we can go to the search bar at the top of the app here and search for the title of the video to bring it up in a search list. So we'll type in "Wheels on the Bus Cece version," and it brings up this search list. We can click on these three dots next to the video title. That brings up this menu where, right here, it says "save to playlist." Click on that, and it brings up our list of playlists, where we can tick to add it to a playlist or click up here on "create new playlist."
Thank you for being awesome and hitting the thumbs up or the Subscribe button. It really helps people to find this video, and it means the absolute world to me, so thank you. And right here are even more tips and hacks that will help you right here on YouTube.
How do you delete a YouTube SHORTS video? That's a YouTube Short that you have uploaded to YouTube using your Android phone, iPhone or iPad? In this step by step tutorial, I show you how to remove YouTube Shorts videos! You can remove your video from YouTube using just the regular YouTube app...
0:36 How to remove shorts: delete YouTube short video
TRANSCRIPT: (CLICK PLAY ON THE VIDEO ABOVE)
THIS IS THE TRANSCRIPT - CLICK PLAY ON THE VIDEO ABOVE!
Hello, how do you delete YouTube shorts from your channel and off the internet?
That's a video which you have uploaded and you now want to remove permanently.
You probably know this already, but you can hide, unlist, or edit YouTube shorts videos, if you don't want to delete it.
The links for how to do that are down in the description.
If you're watching this in the future, these buttons and menus will change, and the latest advice is on the YouTube help article that's in the description.
But here's how to delete a YouTube short using just the regular YouTube app:
In the YouTube app:
I'm going to click on the button with my face on it in the bottom right-hand corner.
And then, on this page, scroll down to "your videos".
These are all the videos that have been uploaded, even the ones which are private.
And I'll click on the three dots next to the YouTube short that I want to delete.
That brings up this menu; scroll down, guess which button we need to press?
That's right - delete!
And now it's gone!
If this video is helping, thank you for hitting the thumbs up or the Subscribe button; it really helps me out, so thank you.
And right here are all my other amazing YouTube creator tips and tricks.
Can you please help my dad get to 1 million subscribers?
Just click on his face. Thanks, bye! Can we have dinner now?
How do you get more storage on a Macbook Pro or Macbook Air?
In this video, I share the best external hard drive storage for my Macbook Pro: the Samsung T7 SSD (though... mine is currently a T5!) If you're looking to upgrade your Macbook storage or get more memory for your laptop (and for me, it's for editing), this could be the best external SSD hard drive for your needs.
THIS IS THE TRANSCRIPT - CLICK PLAY ON THE VIDEO ABOVE!
Hello, I'm Neil, and welcome back to the channel.
This is a short video about my MacBook Pro Storage solution.
I went for the 512GB MacBook Pro M1 14inch, but you might have this problem if, like me, you're not made of money.
This storage solution, this one here, could work really well for you.
I make lots and lots of YouTube videos, as you know because you're watching this, but I edit all of those videos on my MacBook Pro, and any video that I'm making can take up to 100GB while I'm editing them.
I didn't want to run out of space.
Also, it's a laptop, and it turns out the MacBook is not a very rugged device.
Look, here's me introducing my MacBook Pro to a pint of apple juice all over my keyboard.
[Music]
If I keep all of my current videos and editing files on the actual MacBook hard drive, I could lose absolutely everything if anything happened to my MacBook.
Having a separate hard drive with all my current video edits, it’s... it’s just that extra layer of safety.
When I had to shut this down to dry it off for 3 Days, look here, uh, here's some footage of it upside down on two towels on our dining room table.
I was able to take this hard drive and literally just plug it into my very old MacBook, and I just carried on from where I left off.
There isn't that much to show.
I'll just give you some b-roll.
So, this is the Samsung T5.
There's a more up-to-date version.
This has lasted me for over 2 years, and it's lasted so well that the model...
I don't think you can get these now.
It's now called the T7.
It comes in all different colours and different storage sizes as well. My one is only 500GB, and I think you can get about 1 or 2TB for the same price now.
It has lasted so well for me, and I only needed 500GB.
It's an SSD, which I believe stands for solid-state drive, which means it works more like a chip rather than the mechanical disc that spins around in other hard drives, uh, like this Lacie.
Apparently, it can fail after a certain amount of data has been transferred.
I transfer a lot while I'm editing, so I should probably look out for that.
Let me know down in the comments if you know more about this.
But honestly, I've used this daily for two for more than two years, and it has never let me down, touch hard drive!
I don't think I've even formatted it or wiped it in that time. I mean, you know, wiped it as in erased it rather than giving it a clean. You just plug it in, and it just goes. It just works. It appears as a new drive with its own window and drive letter, so there's no need for me to install anything.
There is a downside I can show you here.
It was really difficult to find the right cable, and this is the best I could find.
Let me show it to you.
This is the best I could find.
It's called a Satechi cable. There are lots of short USB-C cables on Amazon.
I think I've got some examples on screen of some cables.
They looked good. They looked like they should work, but they did not work. I think they're just not good enough for the high data transfer speeds that we need or even any data transfer.
This Satechi cable, I don't know if you pronounce it that way, let me know in the comments, but this Satechi... Satechi cable is just the right length and it has never given me any trouble.
But I know what you're thinking.
You can see the massive problem with this because the Jacks stick out from the drive and the MacBook. If I were to drop the MacBook like this, I won't do it now, uh, but you can guess what would happen if I if I were to drop it or if it were to land, uh, then this plug could absolutely destroy my USB-C Jack and it could possibly destroy my whole computer.
I did actually do that on my old MacBook Pro.
I don't know if you can see the big dent there, there's a bulge where it's landed square on the USB Jack.
Luckily, when that happened, the cable was destroyed, but the MacBook USB port survived, even though you can still see the impact damage to this day.
And I sort of like how it's attached to the MacBook Pro.
You might not like this.
You might hate this, but I've got it on with some 3M dual lock tape, which I use on all my peripherals.
Look, here's a multi-function adapter by Ugreen, and I've got a patches on both sides.
It's like velcro but it's much much stronger.
It's more like sticklebricks if you remember those, the teeth, the plastic teeth really lock into each other, and it means I can mix and match my MacBook attachments, and the tape is stuck onto my rugged MacBook case, not the actual laptop itself.
I'll put a link to the cases that I use.
I'm not sure that they're the best, but they have really helped when the MacBook has fallen.
These things are so fragile.
There are also links to the Dual lock tape, the multi-function adapter, the USB-C cable, and of course the Samsung T7 portable SSD, which supersedes this T5.
And if this video is helping, thank you for hitting the thumbs up or the Subscribe button.
It really helps me out. I try out experiments here on YouTube so you can try them on your channel, and right here is what YouTube knows you're going to love watching next.
Can you please help my dad get to 1 million subscribers? Just click on his face. Thanks, bye!
How do you download Google Photos to Gallery on your phone? I walk you through how to save photos and videos to your phone Gallery app step-by-step. It means a transfer of Google Photos to phone. I also show how to download multiple photos all at once.
THIS IS THE TRANSCRIPT - CLICK PLAY ON THE VIDEO ABOVE!
Hello, I'm Neil. Welcome back to the Happy Hut.
How do you download photos and videos from Google Photos to Gallery on your phone?
Maybe you've hit your storage limit in Google Photos, or maybe you need to download them to share and edit using other apps like WhatsApp, Facebook, or Instagram.
Let's do this in real time so you can follow along step by step.
I'll put my phone on the screen here, and this is my Google Photos.
Let's pick a photo in here taken long before I had this phone.
This is my nanny and Granddad.
She was blind since she was 20.
This picture is on Google Photos, but there isn't an actual copy on this phone.
I can tell because if I click on the three dots in the top right-hand corner, on the menu items here, it says download.
If this picture is on my phone, like this photo here, this button would say “delete from device” because it's on the phone.
Going back to the grandparents' picture, this photo doesn't appear in my phone's Gallery.
So let's download it now.
I'll click on the download button.
It says downloading, download complete, and we can now go into Gallery to see that it is now the latest picture.
But what if we want to download many pictures to our phone at once?
If I click on these pictures and select the cakes and the mug, there's no option down here on the bottom to download.
The only way I've found to do this is by using a Google app called Files by Google.
When we select the pictures we want to download by pressing on one photo long enough for a tick to appear, I can now tick on as many different pictures as I like.
Then I'm going to click on this share button down here in the bottom left-hand corner.
And along here, if I scroll across, there's a button in the corner marked “more”.
There are more apps here, but it's not the one that we want.
So I'll scroll across and click on more again.
These are all the other apps on my phone that can share, and right here is my Files by Google app.
So let's click on this.
It takes a few moments, and now those photos and videos are downloaded onto my phone.
When I go into the Gallery app, there we have all our downloaded pictures and videos in Gallery on my phone.
If this video is helping, thank you for hitting the thumbs up or the Subscribe button.
It really helps me keep this channel going, so thank you.
And right here are all my other Google Photos tips and tricks.
Can you please help my dad get to 1 million subscribers?
Just click on his face. Thanks, bye. Can we have dinner now?
How to trim your video AFTER UPLOADING: with YouTube Studio Editor
Can you trim a YouTube video after uploading it? Yes!
I show you how we can edit our YouTube videos after they have been uploaded, with the in-built YouTube Studio Editor tab. It's really simple: just go into YouTube Studio and select Editor to cut and trim your video. Then follow these steps!
THIS IS THE TRANSCRIPT - CLICK PLAY ON THE VIDEO ABOVE!
Hello, I'm Neil. Welcome back to the Happy Hut.
How do you trim or edit a video after it is already published?
I am cutting out a clip from this YouTube video which has already been published. So I'm going to shorten it and delete the ending, and I'm going to do that step by step in real-time so you can follow along.
So the way that we do this is firstly go to YouTube Studio, which is Studio.youtube.com, and then obviously we need to find the right video.
It is this video down here, “how to fix Google photos”, and I'll click on edit, which is the pen icon, and then to go into the YouTube Studio editor.
Obviously, there's a nice big tab on the left-hand side here, “Editor”, so we'll click this and it takes us into the YouTube editor.
This is the video laid out down the bottom here as a timeline, and we can zoom in and out of this timeline with this plus and minus zoom in tool here.
And I'll just play you the clip that I want to cut out.
I want to cut the ending out because I love this video, but I have a little joke at the end where I say something that's a bit oafish.
It's just not a nice way of ending the video.
I'll see if I can play it to you and you can see the clip that I'm going to edit.
[VIDEO AUDIO:] if you wanted that's in the description below. In your face Google!
Right, so I'm going to edit out the “in your face Google” because I love Google. Google provides so much money for me, uh, through this YouTube channel.
I just thought this was a jokey way to end the video, but it... it... it... just doesn't work very well.
So I'm going to click on trim and cut, that's this tool here.
We'll click the plus button, and helpfully it has put these blue handles on the timeline of the video, so there's one at the beginning, one at the... the end.
So if I drag it in, it would end the video here at 5 minutes 33.
I... I don't want that!
I just want to trim the ending.
So I'm going to zoom in, and then I'm going to play the ending, and then I'll pause it at the point where I want the trim to happen.
[VIDEO AUDIO:] The step-by-step instructions are right there or in the link that's in the description below in...
Right there, and this is just the rough point.
I can get it down to the exact frame by using the comma or the full stop key, or the... the period key. I think you call it periods in uh in the United States.
Uh, we call them full stops, but I'm going to use the comma to go backwards one frame at a time there, and then I can use the period key or the full stop to go forward a frame.
So I want the... the cut to happen here.
Now the time code it tells me up here it's 6 minutes 22 and 10 frames.
So I'm going to drag this blue handle back to 6:22:10, and you can see the time code is going down as I drag it back.
6:22... 10... 11... 10... And if I let go, that is the portion of the video that we're going to keep. So this is the trim tool. It's a really handy way of taking things off the beginning of your YouTube videos or material from the end of your YouTube videos.
And who knows, maybe now the video is shorter, maybe the average watch time or the average percentage viewed will increase.
We'll see. I'll put it down in the description if it improves any metrics, but we haven't finished yet. I have to click on the save button on the top right-hand corner.
Save.
It brings up this dialogue box.
It might take a few hours for your changes to apply.
So, yeah, this is warning us that it does take some time to process this video.
So, if you're trimming a video because there's something contentious or something you really do not want to be on YouTube: once we've done this, you can set the video to unlisted or private and waits for the changes to go through and be processed.
And it also says the original version of my video will be stored, so this isn't permanent.
And then, I'll click save there.
Now, it says video is being processed. Please check back later. And just to show you how this looks online in real life, if I play through the end:
[VIDEO AUDIO:] “...the link that's in the description below.”
The video now ends before that section that I wanted to edit out.
I hope this helps you to trim your videos which have been published on YouTube.
Thank you for being awesome and hitting the thumbs up or the Subscribe button.
It really helps me out, so thank you.
And right here are all my other tips and tricks for YouTube creators.
How do you save photos and videos in Google Photos to the LOCKED FOLDER. Maybe you want to hide photos in your Google Photos phone app, or not see them while scrolling. This video shows you how to move to lock folder and see hidden folder in Google Photos.
0:00 How to hide photos in Locked Folder in Google Photos
1:00 How to hide or save photos and videos to hidden Locked Folder in Google Photos on android phone, iphone or mobile app
2:43 How to move multiple pictures and videos to Locked Folder in Google Photos
3:30 Where to find Locked Folder in Google Photos: How to see hidden folder in Google Photos
4:25 Google Photos: How to move photos and videos to Locked Folder on a desktop, laptop or Macbook
5:10 How to find hidden photos and videos moved to Locked Folder in Google Photos
TRANSCRIPT: (CLICK PLAY ON THE VIDEO ABOVE)
THIS IS THE TRANSCRIPT - CLICK PLAY ON THE VIDEO ABOVE!
Hello, I'm Neil, welcome back. How do you hide photos or videos in Google photos?
Maybe you have pictures with sensitive information on them?
Or you've gone snapping some gifts that you don't want people seeing over your shoulder when you're scrolling your phone?
Or maybe you're just fed up with some photos and videos, maybe they're about your past life and you don't really need to see them again.
There's an option in Google photos called locked folder.
You can hide sensitive photos and videos to a folder protected by your device screen lock in the Google photos app.
Pictures in locked folder won't appear in the photos grid, memories, search, or albums, and they won't be available to other apps on your device.
I've not done this before, so let's hide some photos and videos in Google photos.
I have my phone on screen now so you can follow along. This is the Google photos app and here are my photos. But let's say we want to hide this picture of the pink Smiley.
I think it's really simple.
All we do is hold the picture down with our finger and you can see that it becomes selected.
And then if I swipe along the bottom here, I can choose this option here: “Move to locked folder”.
The other way to do this is if you go into the photo itself and then click on the three dots at the top of the picture of the frame there and we'll scroll along to... there it is... “Move to locked folder”. So I'll click on that.
Now, I'm doing this for the first time, so it's showing me these prompts to set up the Locked Folder but we're just going to hit the button here.
Now it's using my device screen lock to verify that it's me.
You might need to unlock your phone on this page.
Locked folder backup is off.
It's giving me this warning that because I haven't got backup turned on in the Google photos app, you can lose these locked folder photos.
They'll only exist on my phone and they'll go if I factory reset my device, if I clear app data, if I lose my device or if I delete the Google photos app.
So we'll accept that warning.
And it wants me to confirm move to locked folder.
These photos and videos will be hidden, so I'll click move.
And now my phone wants to know if I want to allow the Google photos app to do this so I'll click on “allow”.
And it says moving to Locked Folder and that's it!
So if I come back you can see that the pink smiley face has gone.
Now say if I want to remove more than one photo at one time.
So I've got these charts from how well I'm doing on YouTube at the moment.
I've long pressed on one of those photos and that allows me to tick all the pictures that I want to move to the locked folder.
So I'll choose those ones, and then along the bottom here I can scroll over to “move to locked” and it again wants this confirmation message to be acknowledged so I'll hit “move”.
And again, my phone wants me to confirm this so I'll click “allow”.
Moving to Locked Folder!
In the background there you can see them moving. And here we go all of my Smiley and my YouTube Studio screengrabs have now gone.
Let me show you where to find the hidden photos and videos in the locked folder.
It's quite simple once you know where to look.
Along the bottom here can you see this button here?
“Library”
We'll click on that and one of the buttons at the top is marked “utilities” so we'll click on that.
And down here right at the bottom, this option here: “locked folder”, so we'll click on this and it says “open locked folder”.
Now it will ask your phone or your mobile device to unlock the locked folder and there it is!
Those are all the photos that we have locked.
Also, this is really important if you have Partner Sharing set up on Google photos:
If you move a photo to the locked folder on your account, it won't hide the photo on the shared account.
To hide photos and videos in Google photos using a desktop or laptop, go to the Google photos page which is photos.google.com
And then we can select the photos we want to hide.
So I'll just highlight these three pictures.
And then on the top right-hand corner we can click on the three dots and choose this option here: “move to locked folder”.
Now if we're doing this for the first time on a laptop it will give us this prompt to set up the locked folder, and all we need to do with this window is click on “done”.
And now it's asking me “do I want to move these to a locked folder?”
So I'll click on “move” and there, they've gone!
To find the photos you have moved to a locked folder, it's very simple.
There's a tab on the left-hand side of the main Google photos page, so I'll click on that and now it wants me to enter my Google password...
And here they are! The three amazing photos that I've hidden away in the locked folder.
If this video is helping thank you for hitting the thumbs up or the Subscribe button.
It really helps me to run this channel, so thank you.
And right here are even more Google photos tips and tricks!
Can you please help my dad get to 1 million subscribers.
Just click on his face, thanks bye! Can we have dinner now?
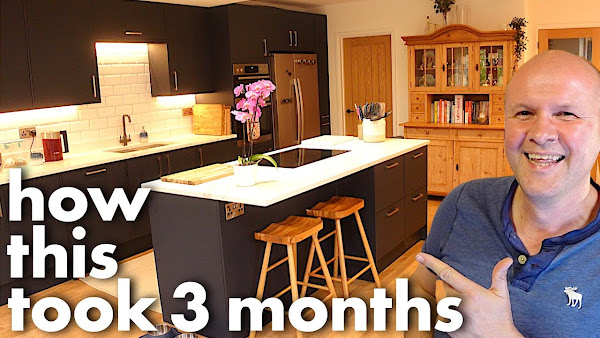
This is a kitchen tour of our remodel before and after, in case this gives any design ideas to renovate a small kitchen. We found it hard to find inspiration for kitchen design and watched lots of videos, kitchen photos and plans like these! If you're planning to remodel your kitchen: hope you find some inspo and how to here.
We made this playlist for the full beginning to end kitchen remodel tour here: 👇👇👇👇
THIS IS THE TRANSCRIPT - CLICK PLAY ON THE VIDEO ABOVE!
Hello, welcome back to the channel.
I have wanted to make this video for 2 years now.
I want to show you how we changed this kitchen, which we appreciated but which was broken and out of date and not at all energy efficient.
It was cold, dirty in a way that could never be cleaned properly, and someone else's kitchen design.
We wanted to remove the wall that runs down the middle, splitting up the space into two dark, small rooms that don't work because the width is not big enough for either room.
And we wanted to renovate it into something that looks more like this!
An open plan modern kitchen that follows the hot trends in kitchen design, a spacious living area that regains the space taken up by the supporting wall.
It allows energy and light to flow.
With stylish radiators in the right places that actually work.
With two double patio doors which are double glazed, two light wells: skylights in the ceiling that allow natural light to flood into the room.
New windows and doors down the side of the house.
I thought, how can I show you this project that took months to build?
How can I tell a story this big?
Well, every day this month I will release a video that shows the progress each day so you can follow our trendy kitchen design renovation construction in real-time.
All of the videos each day appear in the playlist that's in the description below so you can jump forward at whatever speed you want to get to the end.
So, let's take a look at how things look right at the very start.
And this isn't my voice by the way!
So the idea is: a shower room accessible from the hallway door which covers about half of that wall there.
And then the rest of it is a utility (room). This, yeah, fireplace is being knocked out.
Kitchen units will begin about halfway along the fireplace.
All the way pretty much to the end where this table is will be an island.
And we're still uncertain where we're going to put dining and where we're going to put, hopefully, some kind of chair seating sofa area.
This wall, just a small thing to mention, is completely coming out, including pillars.
So there'll be no wall, so all of those cabinets will go.
Basically, the kitchen is being relocated to the other side of the room.
What were you going to say?
Well, it's just really funny seeing it now!
So, this was how the kitchen looked and we're going to give you a tour.
I think this was 2 days before the builders arrived and, yeah, we're going to see a lot of this.
Just to give you a full tour, let's go into the nooks and crannies.
I mean, we had no storage space, did we?
No, not much, as you can see.
But I don't think I tidied it up for the filming either.
Yeah, well, I think this is actually probably better than it looked.
And look there's the... not only did this not work, we had a little heater there next to the cooker
because only two of the rings worked,
Yeah, two--
And this was the sink area and this, this is the best bit.
Look, this is actually a huge chasm that had opened up.
We filled it with filler so many times and gave up because we knew the kitchen was going to happen.
And it's called the sink because your heart sinks when you stand next to this.
And look, we got some healthy fruits here among the profanity of junk.
Obviously some baking, and obviously you've got the scales out,
yeah, yeah. And we've got a nice toaster
- a working kitchen. - Yeah, and look at that, we got this really nice... toaster in the middle of this just kind of bomb site of awfulness from the 1990s.
But I like that we dual used it, you know, for clothes hanging.
Some of that colour is coming back.
I don't think it will last, but it's just making a very brief comeback right now.
Great, so now we've ripped it out.
We've ripped it out, it's gone.
It's now coming back in again.
But we didn't do it for trendiness, it wasn't to be a hot trendy kitchen, was it?
Look, talk about the dual-purposing.
You can see the, um, what the dungarees--
dungarees, but there's like a lesson for the kids behind the dungarees,
yeah,
and I think you talk about the bread maker later.
But you can see on the left-hand side that the water is actually coming through the walls.
You can see the paintwork is bubbling up.
There was mould on the ceiling as well.
I don't if there's any sound, there's no sound.
Our son points out what's on the ceiling in a minute.
Um, but we're just giving you a full 360-degree “before” and hopefully you'll understand why the “after” was such a big transformation.
So that's the wall we're going to knock out, isn't it?
Yeah, and how did we get the idea to knock the wall out?
I don't know, I can't remember.
Well, we did have some plans drawn up, didn't we?
Yeah, to start with.
Um, some grand plans, yeah, which we scaled back a bit.
Yeah, and we did say we wanted, you know, the dream open plan dining kitchen area.
And originally we were only going to knock the wall out partway, weren't we?
We were going to keep some of the wall in to keep it, yeah, to make it, um, cheaper.
We actually spent money on an architect, and that's why there were holes in the ceiling there because a structural engineer came around just to see what was there underneath just at the top of the picture.
I think just skipped it there.
And this is my favourite part of the whole kitchen, it's the place we're sitting right now.
Where I love that window, I love sitting next to that window.
So, we wanted to turn that into a seating area, didn't we?
Yeah, that seemed to work best for dining, even though our table is a bit too wide for it.
We could do with a slimmer 80 cm slim table.
But yeah, it's fine, it was the best spot for it.
And this is the lounge area, this is where we'd watch all of our TV in this really dark corner of the house.
It's the darkest area of the house, yeah.
I heard that you should turn the darkest area into a utility and that was the lightbulb moment on what to do, how to lay it out.
That's a really good tip, the darkest area, think of a utility room.
So this is a walk-through again, and this really demonstrates the Berlin wall that we had, uh, on the left-hand side:
The kitchen from Circa early 1990s and it had been built up over the years so it was like two extensions that’d been badly done next to each other.
Hmm.
And then on the other side, you’ve got this room where we couldn't ever do anything.
So we tried having the TV here and it never worked, did it?
No, there was always a No Man's Land bit wasn't there that wasn't really good for anything.
And you can see Casper was a puppy then so the floor just got worse and worse, didn't it?
Yeah, and it, we could never get anything in here, could we?
It was just never wide enough for any furniture to go in without it feeling like a corridor, yeah, and then over here.
So we got a lovely big picture window and then we got this frosted window and we knew we could do something with that.
And we, we had so many different combinations, didn't we? We were going to put the kitchen there.
Um, it would have been cheaper to keep the kitchen in the place it currently was, so it was more expensive to move it over... but it definitely made sense having it along this side and then being able to look out and keep the windows where they were.
Now we've got French doors here.
These doors didn't work, they were so warped that they wouldn't close properly, and this is what the back of the house looks like.
I don't think we worried that much about how the back of the house looks, it was how it looked from the inside.
But it gives you an idea that we thought we could put two double doors in there rather than the bi-fold doors, and that's probably going to come up over the days where we're commentating.
But are you happy we went for French doors?
Yeah.
Well also, it was sort of a budget decision, um, obviously it's cheaper to do French doors than a whole bi-fold all the way across but also we were running out of wall space and places we could put a radiator so another budget decision was not having underfloor heating, um, so we needed some wall space for radiators, um, so that meant we could have the radiator in the middle and then I just like the um, you know how the French doors were kind of in symmetry, yeah.
So this window is going to get replaced by a pair of French doors and then the bricks between them will stay... um as this kind of central pillar that we can put the radiator on but I just had we just had a close-up there of the all the pipes and the tap there that's just where all the utilities are for the kitchen at the moment, so we're going to move the kitchen over to the left hand side of the... of the room you'll see that as the days progress but the first job is to knock out all of this and see what's left standing.
And the architect plans originally that's... that was the idea for the roof lights wasn't it and where we positioned the roof lights as well,
Yeah we actually uh paid for an architect and didn't follow the plan because we're going to knock out the whole wall but uh...
We've kept some of the elements of his design so it was it was money well spent wasn't it in the end I think, ‘cause it kick-started everything.
It did Kickstart everything but then it was years before we finally landed on a plan of where we were going to put yeah everything
yeah we were talking about it for years so yeah this is probably four years after we moved in and I think three and 3/4 of that was spent discussing the different options. We just couldn't work out how to... where to put the kitchen
Because... because we weren't um building an extension on the side it was a very long room wasn't it - Long and narrow...
Two long narrow rooms and it just wasn't quite wide enough um it just looked too long.
But when we... when we sort of bisected the room with the um wall for the utility...
yeah when we... when we did that then suddenly the... the room becomes more of a nice rectangular shape rather than long... too long and too - yeah - not so wide. Knocking out that middle wall that I'm pointing to is... it really freed up some space didn't it?
I mean it's like 3/4 of a metre-squared running the full length so that actually gave us more floor space.
It did but it also meant we lost all of that... all of those cupboards and all of that cupboard space
yeah so this is some footage of…
Cleaning!
Casper--
Attempt at cleaning
This was earlier in the year just to show you what it was like as if you couldn't picture it anyway!
This is what it was this was what life was like in this kitchen.
I think you’re probably cleaning up some Casper something.
Casper wee.
Oh, now you took so many photos.
This is a photo of your scrapbook, so I've only found four of these, but you had like dozens of pictures for inspiration, kitchen inspiration, kitchen inspo.
And this is-- it was funny that the four that I put into this video are this one, this one showed the skylights and showed the effects of the skylights and hanging lamps which is good. But we didn't know what to do with the kitchen island, did we?
No, well, we needed to just play around with it, didn't we, and see where it would fit, yeah, and how big it was going to be.
So that kitchen island didn't seem right. And then, but having a table in the middle looked good but it felt like we needed to use the middle of the room for space.
We needed the island to be cupboards that would keep stuff in because we lost a whole wall of cupboards by knocking the wall down so we had to have the island to put everything in.
Otherwise we wouldn't have had enough storage. So it would have been nice to have like a big Cook’s table and just you know, yeah that would have been lovely but then we probably would have had to have considered having cabinets down this side as well.
And it was nice to Zone it wasn't it and just have cabinets on the one side and that is the kitchen area and then this side is the dining area and then there's a little sit down area as well.
It was so hard because it was a blank canvas it was completely an empty shape and it was really hard talking to the designers about what we wanted because we could have had the kitchen on any wall and in any corner so it took a while to land the kitchen in where we've got it now... which is down... down this side.
This picture here illustrates my problem with kitchen islands.
I... I... to me that just looks ugly because it's a thin... right!
Because it's a thin top um there's just something sharp and angular about it that it just it depresses me - it doesn't spark Joy
It's just a bit cold isn't it?
Yeah both the colour and the shape and the stools!
I don't like those stools as well
The idea of this breakfast bar - is the thing that you see.
So you spend all that money on the kitchen but all you see is this really ugly lip and backs of ugly chairs after you spent - you know - five figures?
Doesn't seem right.
Yeah we needed it to look more homely didn't we
yeah but... and it was really difficult working out how that Island would... would work.
I can't remember how we decided on... I know you... I know it was you who were... you were quite insistent you didn't want you know four stools all the way along
So I think that was your idea wasn't it to put um to put the cabinets in one end and just have a couple of stools
yeah you'll see on... on the later videos
You'll see what we went for with the island and how we actually got there because we actually filmed ourselves trying to work out how to do the island.
So this is after the building work started and we're still working out where exactly the island is!
And... and what it was as well, so it's uh pretty much like when we moved in.
But this is what the room looks like on our last night before the builders come.
So this is a “before”
We can get into the corner now the telly’s gone
[MUSIC]
[MUSIC]
And this is what the kitchen looks like.
Well, this will be the area where hopefully we'll get some kind of seats and a table.
And over here this is what the kitchen looks like currently
[Music]
Let's put some light on - get that shot again
I'm going to go right into the corner there we go.
[Music]
[Music]
[Music]
I am calling this a dad delivers success!
The first day of the build is in this playlist here or you can jump to any day you want to see the progress.
I've put more details of the gadgets down in the description.
Say hi in the comments, it would be lovely to hear from you and your questions.
Thank you for hitting the thumbs up or the Subscribe button it really helps me out and right here is the complete new kitchen design renovation.
How do you make a new Google Account? I show you step-by-step how to create Google account using a desktop or laptop, or only with your phone and a web browser, for Android or iPhone or iPad. This tutorial helps you with the fastest ways to open and activate Google Account however you want.
How do you delete a YouTube video? That's a video that you have uploaded to YouTube, either by desktop or using your Android phone, iPhone or iPad? In this step by step tutorial, I show you how to remove a video and this also works to delete YouTube Shorts videos! You can remove your video from YouTube using just the regular YouTube app!
THIS IS THE TRANSCRIPT - CLICK PLAY ON THE VIDEO ABOVE!
Hello, how do you delete a video on YouTube?
That's a video which you have uploaded and you now want to remove permanently.
You probably know this already, but you can hide, unlist, or edit videos that you have put up on YouTube.
The links for how to do those are down in the description.
The easiest way to delete a YouTube video is to use the YouTube Studio app or go to studio.youtube.com on any browser.
But maybe you don’t have that app. OR you’ve only got your phone to do this.
Let's do this both on desktop and phone.
To delete a YouTube video using a desktop or laptop:
Open the video you want to delete.
Make sure you're signed in on the correct YouTube account, and this button should appear: "Edit video."
Click on that, and it takes you to the studio page for the video.
Click on the three dots on the top right-hand corner, and there's the option to delete.
You get this warning message; check the box and delete forever!
With Android phone, iPhone, or iPad, we can delete a video on YouTube using the regular YouTube app:
Click on your avatar, that's the picture of your face, in the bottom right-hand corner.
And then, scroll down to your videos.
These are all the videos that have been uploaded, even the ones which are private.
And I’ll click on the three dots next to the video that I want to delete.
That brings up this menu; scroll down, and there it is: "Delete." We did it!
If this video is helping, thank you for hitting the thumbs up or the Subscribe button; it really helps me out, so thank you. And right here are all my other amazing YouTube Creator tips and tricks. Can you please help my dad get to 1 million subscribers? Just click on his face. Thanks, bye. Can we have dinner now?
How do you turn off the Apple Macbook startup sound? In this video, I'm sharing how to stop the Macbook opening sound for a Macbook Pro, Macbook Air, M1, M2 or who knows... M3! It's all in the Macbook system settings, under the "Sound" tab to turn off the start up chime.
This is our BEST dehumidifier from Amazon from all the reviews: the MeacoDry Arete One 18L dehumidifier and Air Purifier. This is a full review of the low energy Meaco dehumidifier. It is also very similar to the 15L, 20L and 25L dehumidifiers, but this model seems exclusive to Costco. I show you where we place this dehumidifier in the room or bedroom; how much it reduces humidity and mould in our house and for drying clothes; unboxing and first impressions reviews; and how to use the Meaco dehumidifier control panel. It was easy to follow the instructions which I share step-by-step in this video, with review of the Meaco Arete One at the end.
THIS IS THE TRANSCRIPT - CLICK PLAY ON THE VIDEO ABOVE!
We have had this Meaco Arete One dehumidifier and air purifier for over a month now, and we absolutely love it. I'd even go so far as saying this is the best dehumidifier that we can find right now. I'm going to show you everything about the Meaco Arete One: how it comes out of the box, how the control panel works, plus where we've been using this dehumidifier around our house. I'll give you a full review at the end of the video because the new thing I'm trying to make your family happy is this Meaco Arete One 18L dehumidifier and air purifier. For us, we're not rich, and this seems like an insane amount of money to spend on anything, let alone something that just sucks water out of the air. But we've got a really big problem with mold around the house. Here's some footage of our greatest mouldy hits. We've got it everywhere. Here it is in the hallway behind the coats. I put up these boards to make the walls warmer, and now they just get covered in mould. I even found some behind the brand new benches I was building in the kitchen. There's a whole video about this down in the description. I'm using Milton sterilizing fluid around the house to kill the mould spores and clean up all the mess that it leaves.
As you know, if you're looking up this video, the mould just finds the coldest parts of the house, wherever they are. The water vapour in the air condenses, and mould grows in those cold places. The worst patch that I found in the house is right here on the ceiling of my daughter's bedroom, and that's when I made my last dehumidifier video. It's a small budget one for under $80 or £80; there's a link in the description, and it works really well directly collecting about a litre a day in the bedroom.
But I know that we need something much bigger, a more major solution to bring down the humidity in the house.
I bought this relative humidity meter on Amazon and put it up in her room.
It has gone up to 83%, and the advice from the health executive is that it should be around 30 to 60%.
So, because of that and the mould, we know that we absolutely had to buy this: the Meaco Arete One 18L dehumidifier and air purifier.
We saw it purely by chance in our nearest Costco; the dehumidifiers were all sold out last year on Amazon and John Lewis here in the UK.
We saw it on the shelves, and money is really tight, but I don't think we could face another year of cleaning mould off our coats and walls.
What else could we do?
Well, I... I did not think we'd pick up a humidifier today, a dehumidifier.
We came in for some lemons!
So we bought it!
I can say it is without doubt the best thing we have bought this year.
I'll give you a full step-by-step review at the end of the video, but this is how much water we are removing every half a day.
Look at all of that every 12 hours; that container fills up, that's about 5L.
The house feels drier and warmer within about a day of plugging it in, and it removes a lot of water from the air in the first week.
We think it might be drying out the whole house: the walls, carpets, gaps underneath the house, and between the walls.
The place just smells better, and it might be in our heads, but our home definitely feels less damp.
Let's open up this bad boy.
This is the Meaco, the MeacoDry Arete One!
And Meaco have called their brand "Meaco Dry," which I've not heard of before, but I love this "Excellence in all things."
They've even given themselves a Japanese-style overblown sentence of a mission statement because this is actually made in the UK.
Well, no, it's not made; it's designed in the UK. It's made somewhere else.
But we've got a nice Union Jack there. Let me give you a quick spin around the box so you can see exactly how the Arete One 18L dehumidifier arrives.
The box is quite stylish, isn't it?
It feels quite heavy, quite substantial.
I'll put the weight of this particular unit on the screen now.
Here we go.
We're in the UK, so obviously it comes with a UK plug.
And there is a pack of, oh, look, there's a filter that comes with it. We'll have a look at that.
It says it's a free HEPA filter.
And then there's a bag of instructions.
It's quite nicely presented, but oh Meaco, come on, how big is that text?
That must be only 10-point text.
It wouldn't kill you to make the instructions bigger, would it?
The sides are taped up so that they don't fall off, so we'll pull these bits of tape off for our first impressions unboxing.
And then, at the top, there's a sign here:
"The handle is below this label. Please lift the handle by pulling upwards with one hand at each end,"
Which means... I can demonstrate it one-handed because I'm holding the camera.
You kind of lift each one at the same time, and that's your carry handle there.
That's quite sleek, isn't it?
Oh, I'm not sure I want to lift it, though.
So that's a nice touch.
And then we have the control panel, which is flush and all wipe-clean.
If I use the handle to tilt it up slightly, you can see the roller castors underneath.
I don't want to lay it down because I don't want to scratch it, but there are four castors, so it should glide across most floors.
Let's turn it around.
This looks like a really well-built, substantial unit.
I really like how it comes out of the box.
It looks good.
Here's the, I guess, this is the bin, is it, for catching the liquid, and helpfully, there's a circuit diagram in there.
That's very... That’s very thorough, isn't it?
I won't be consulting that.
The power cable, the cord.
Let's get that out. See how long that is.
It looks like it's about 2 metres. Yeah, I'd say it's about 2 metres long.
Very generous.
And there's this cord storage thing that you can wrap the cable around when you are storing the dehumidifier.
At the back, oh, this slides out.
Oh, look at that.
So, I guess this is the element.
I've opened up the HEPA filter, and I'm going to put this into, I guess this is the filter holder.
I haven't read the instructions yet, but I'll put on screen if this is wrong, and then you slide this in.
I guess there's only one right way to do this, and that clicks.
So the filter is held in place.
There's a user-friendly display, one-touch ease of use, contemporary controls.
It's sleek and unobtrusive.
The side air intake allows the dehumidifier to sit discreetly against the wall.
It looks like Eva from WALL:E to me!
You can easily clean the filter from the side without moving the unit. There's a cable tidy to keep wires out of the way and tangle-free. A hidden handle for sleek lines along the top.
There's a large window which lets you see the water level really clearly.
Water can be emptied from both the left and right-hand sides.
Oversized ergonomic handles make it easy to remove the water bucket, and castors underneath are hidden behind feet that help the dehumidifier blend into any room.
Let me show you how the control panel works.
If you're thinking of getting the Meaco dehumidifier, it will give you an idea of the different things you can do with this.
It looks complicated, but it's simple once you've used it a couple of times.
This is how the control panel looks for the Meaco dehumidifier.
To turn it on, obviously there's a power button here, and it says 52.
That means that the relative humidity at the moment in the room is being sampled at 50, now 56...
The numbers are jumping around because the dehumidifier is sampling the air.
I think it does this for about 10 minutes, so the reading on the display here will jump around for a bit while we get the dehumidifier started.
The most important button on the... on the whole unit is this button here with the icon showing a drip.
This is called the smart humidity mode button.
By the way you can probably hear it in the background: I hope that's not too distracting.
This button is crucial because this is the reading of the humidity in the room at the moment.
If I press the smart humidity mode button once, that enters smart humidity mode.
And in this mode, the dehumidifier will default to a target humidity of 55% relative humidity and a low fan speed.
So if I press it again, that shows you that the target humidity is 55%.
Once the target of 55% has been reached, the dehumidifier will stop, and every 30 minutes the fan will kick in to check the humidity level and the dehumidifying indicator will turn off.
I think that's this light here.
Night mode can be set while the dehumidifier is in smart humidity mode by pressing guess what: this moon icon here.
This is the night mode button. If I press that, I'll just show you what it looks like and I will explain it properly in a minute, but the light comes on, all the lights go off so that you can get some sleep and you haven't got blue lights in your room at night.
The fan speed - you probably can't hear it - I tend to not notice it - but in night mode, the fan speed will be reduced to low.
The buttons won't bleep when you touch them, so if I press this one, you can see it’s... or hear that it's silent, and all the lights on the display will turn off.
Let's take it off night mode by pressing the night mode button.
If I press it again, you can see the light flips over to the smart humidity mode.
We can set the dehumidifier to reach a target that isn't 55%.
All I need to do is to keep pressing the smart humidity mode button, and you can see that it cycles through these different relative humidity percentages: it goes 40 all the way up to 70.
If I press it again, it goes to CO.
CO stands for continuous, so it won't have a target humidity to reach; it will just keep running come what may.
If I press it again, let's set it to something like the default 55%.
Once you've set the desired target humidity, it shows on the display for 5 seconds, and then it changes to the current humidity level that it's reading in the room.
The great thing with this mode is that once it's reached the target humidity level, the dehumidifier will stop.
If I go back to the smart humidity button and hold it down for 2 seconds, AP shows on the display. That stands for air purification mode.
Now air purification mode means that the dehumidifier has turned off (so that light has gone off and the air purifier light has come on).
The unit is now just purifying the air, and I can feel that it's a nice jet of cool air coming out.
It's not dehumidifying, so this might be useful in the summer months when we don't tend to need to dehumidify the room.
To take it off this mode, we just hold down the smart humidity button for 2 seconds, and it goes back to dehumidifying the room.
By the way, if this is helping you, thank you for hitting the thumbs up button! Let's see some more.
The thing with the air purifier is that it's always air purifying.
It's always purifying the air, either with the dehumidifier or without the dehumidifier.
The other big button is this button here with the T-shirt icon on.
Should we press it? Let's press it.
You can see 35% appears.
This is Smart Laundry Mode.
When it goes into Smart Laundry Mode, the dehumidifier defaults to a target humidity of 35% and a high fan speed.
I can definitely feel that with my hand right now.
Smart Laundry Mode runs for 6 hours. So, if I press the T-shirt button again, the Smart Laundry button, this shows SL, that it's in Smart Laundry Mode.
If I press the T-shirt button twice, this shows the number of hours left for the Smart Laundry Mode, so this “06”, that six there means there's 6 hours remaining.
And obviously, it'll count down all the way down to zero
If the dehumidifier reaches a humidity level of about 32% before the 6 hours is up, the compressor turns off to stop the air from becoming too dry, but the fan does continue to run.
We can put the dehumidifier into Night Mode even though it's in Smart Laundry Mode.
Naturally, we'll just press the Night Mode button, and the fan speed is now reduced to low. The buttons won't bleep, and all the lights on the display will turn off.
So, now we're back into the regular dehumidifying the room mode.
Child Lock is the Night Mode button here.
You can see there's a little picture of a lock beneath the moon icon.
If we hold down the Child Lock button for 2 seconds, and it just means that you can't interfere with it by pressing any of the buttons.
To turn off Child Lock, just hold down the button for another two seconds.
Once the dehumidifier is full, it stops.
It does have a hose attachment so you can just have it empty itself as it goes along. You can use the water for plants which are not edible, and you can't drink the water. It stores about 4.8 litres.
It has this really helpful carry handle – I mean, it's crucial because this unit is 18 kg.
And, here's some footage of me niftily lugging it up and down the stairs to the upstairs and downstairs landings.
And of course, there are the caster wheels underneath which are hidden so it can slide and glide across the floor on hard floors and carpets.
There's a HEPA filter; it is an air purifier. It purifies the air as it dehumidifies.
We'll have the review now, and thank you, by the way, for hitting the thumbs up or subscribe button if this video is helping you.
Here is the full review.
I am calling this a dad delivers success!
It's magnificent. The air feels drier.
My unstoppable wife says that she's not walking around hunched; you know when it's cold and damp, you put your shoulders up around your ears?
The dry air, I've been told, is easier and quicker to heat, and cheaper as well because humid air carrying water needs more energy to heat it up, apparently.
So, it feels like the house heats up quicker with the dehumidifier on, but we don't know if that's in our heads. Either way, it definitely feels better.
I really like how the air comes out of the top of the dehumidifier.
It's not a heater, but the airflow that comes out does feel nice and warm, which helps.
I know you're going to ask me about the noise; it's like a low whooshing sound.
I'll just pause for a moment...
[FAN NOISE]
My microphone probably filters it out or boosts it, so the sound on this video probably isn't that useful, but it is like a low white noise.
We've had this in our daughter's bedroom, and she slept right through it, though she does sleep through absolutely anything.
I don't think I can sleep in the same room with this overnight, but you can have it running in another room or corridor or hallway if you're lucky enough to have one.
For me, it's been quiet enough for that. For what it's worth, I don't notice any noise difference in night mode, even though the fan speed is meant to be lower.
And I know you want to know how much power this thing uses.
Meaco says its power consumption is 250 watts, so that's 6 kilowatt-hours per day or 6 units of electricity if you leave it running all day.
We've left this running for the first couple of weeks to dry out the house; that's in October, so I'd hope the summer had kind of dried it out anyway.
I've looked at our electric meter readings, and I think it is using about six units per day, so that might affect how long you want to leave your dehumidifier running.
I cannot recommend the Meaco Arete One dehumidifier more highly; it is fantastic.
And if you want to see it on Amazon, there are links in the description.
I first download and export all my photos and videos to a backup drive.
I fix the Google Account Storage is Full problem by using the "Clean up space" options to clear my Google Drive storage using my desktop, but if you use the links below you can clear Google Photos storage in phone. Then I use a "Recover Storage" option to reduce ALL the photos and videos in my Google Photos to Storage Saver Size. There is no option to see what photos & videos are in my Drive at Original Size, so the only way is to compress all the photos and videos to free up some storage.
Finally, I show a way to create a Google Account for storage JUST for Google photos... and set up my phone to upload and sync photos and videos with this new Google Account. We can then use Partner Sharing to share those Google Photos and Videos with my personal Google Account.
THIS IS THE TRANSCRIPT - CLICK PLAY ON THE VIDEO ABOVE!
You know this day has been coming, and like me, you've put it off and put it off. Your Google Photos is full, nothing's being backed up, and you're getting these warning messages. They're going to stop Gmail, or they've already blocked all your Google products and Google Drive. You don't want to delete anything because all your precious family photos and videos are on here. But now this phone is getting filled up. Where do you even start?
This is a long video where I walk you through step by step how to fix your phone storage with Google Photos. This is my Unstoppable amazing wife's phone. But as a dad, the hospital didn't tell me this when you have a child, that suddenly I become the IT manager for the family. I'm no good at IT, but I have done this a few times now. It's a Samsung Android phone, but some of these tips are for all phones, and the time code for every step is down in the description if you want to jump forward or replay any clips.
The first step is to back up our phone.
We need to save a copy of all the photos and videos on here in case something goes wrong with this. We'll at least have them stored somewhere else.
You can save them to a laptop, a desktop PC, or a memory card or a big, rugged, colourful hard drive like this one. I'll put the links to these down in the description.
But I'm backing up my wife's photos and pictures to here via my PC. So this is my PC desktop. I've plugged the phone into the PC with a USB cable, and you can see internal storage is maxed out, as well as the Google Photos. The actual storage on the phone is maxed out. But we're going to try and find all the photos. So I'm going to look in internal storage, then DCIM, and then I'll look in Camera to see if there's anything there. There's nothing there, which is great because it means that all the photos have actually been stored on the SD card. So if I go back to the SD card folder, I'll go into DCIM, and there's Camera. Here are all the photos.
Now, I've tried doing this on my MacBook, but it just doesn’t work very well for me.
There's an actual tool called Android File Transfer. I just can't get mine to work at the moment. So I'm using a PC. You can also get storage cards to plug directly into the phone to back them up directly to a card. There's a link down in the description to one of those.
This folder is still loading up because you can see in the corner here there are 1,300 items so far and counting.
1400 now, it’s still going up.
I'm going to click on View, and I'm going to choose Details. It just makes it easier because it presents everything as a list. And this is everything.
At the top here, there are some files called “.trashed”
I'm going to ignore those. In fact, I'm going to delete those to try and clear some space on the phone. So I highlight them and I'll click Delete, and I'll delete those.
Those files have now gone, so I'm going to select everything in this folder.
Now bear in mind this isn't actually everything because, as well as the camera photos and videos, there are screen captures and phone recordings. You might want to back those up as well. I'm just looking out for the photos and videos.
I'm scrolling all the way to the bottom, and this is the last one here.
That is 1,647 items.
I'm now going to drag them into this folder that I've made for the backup file. So the PC is now copying all the files from the phone to my drive in my folder that I've got here on my PC.
It says it will take an hour and 10 minutes, but I know I have a safe version now of everything on the phone.
The next step is to shrink the size of files in Google Photos.
To get our Google account working again, we need to bring the photos and videos storage to under 15 GB.
I'm doing this without deleting any files or videos yet and without signing up to the Google Drive storage subscription because we do not know how much Google will charge for OneDrive in the future.
And I've seen it in the comments from you on my videos that we just fill up the storage allowance they give us, and then we face exactly the same storage problem again!
So let's now follow these steps from my other video.
So the first thing we're going to do is to change the Google photos upload size from original quality to “storage saver” quality.
You might have done this already but just let's make sure that that setting is set to storage saver because sometimes when the Google photos app updates it switches it back to “Original”.
So we're going to click on the avatar on the top right hand corner of your Google photos.
Don't click on “free up device storage” because that is just going to remove photos from your phone.
We don't want to do that. We don't need to do that.
What we are going to do though is go down to photos settings.
We click on that and then we'll click on backup and sync, which is the first menu item here.
If we scroll down we can see “upload size” and there are two ways that you can backup photos to Google photos: that is either “original size” which is the full fat big size of your photos and video...
Or this option here: “storage saver”.
Tip number two is that we're going to turn off Google photos backup.
And to do that we're going to click on the Avatar in the top right hand corner again.
We're going to scroll down to “photos settings” and then we're going to click on backup and sync.
There’s a little toggle switch here: we're going to turn that off and the reason we're doing this is that once we've cleared some space from Google photos we don't want to be filling up Google photos with the pictures that are in our phone again.
And later on I'm going to show you how you can set up a Google account just for your photos and videos.
The third tip is to remove any obviously unwanted Google photos and videos.
Click on the Avatar in the top right hand corner, and down underneath the “account storage full" you can see this button with three dots.
I'll just click on it and that takes us to the “out of storage” window.
There's a section down here called "review and delete” and this is where it offers to show you screenshots, blurry photos, large photos and videos, and other apps.
Now I don't particularly want to delete these, but there might be some big ones here that you can delete.
You can see from the sizes here aren't huge and I don't think they'll bring me back underneath the storage limit, which brings us to tip number four, and this... this is the killer tip.
This is how you and me are going to beat Google, and it's to reduce the size of all the photo and video files in Google photos just in one go.
Now you can't do this on the Google photos app, which I think is pretty disgusting, so what we need to do is to open a browser on your phone.
If you have an Android phone that's probably Chrome, and if you have an iPhone or an iPad that's Safari, and we'll type in photos.google.com
Next on the top left hand side, you see the three lines there?
We click on that to open the menu just to make sure that we are logged into the correct Google account.
You can click on the Avatar face there if you want to change the account.
Next we'll scroll down, and down here where it says storage we're going to click on the word “storage" and this is like manage storage on the app...
But if you scroll down, the app doesn't have this option: “recover storage”.
And by the way if any of these tips are helping, please say hi in the comments or hit the thumbs up button. It really helps other people to find this video so thank you.
On the “recover storage” option here, we're going to click on “learn more" and it opens up this scary warning.
Now we don't know which photos and videos in Google photos are at the big original size or the smaller storage saver size. By clicking on this option, it will reduce all of the photos and video file sizes down to the storage saver size, which will free up loads of space.
I'm going to click this warning disclaimer here: I understand that it cannot be undone...
and then I'm going to hit the blue "compress existing photos and videos”
Now it looks like nothing has happened... look our storage is still at 16.3GB
If I scroll back down it says compressing.
It does take a couple of hours, let's see how this fixes my Google storage!
It's now 8:30... 7 hours later. Let's open Google photos app.
We were on 16 gigabytes. If I click on my avatar, whoa! Look at that!
Account storage 7.8 gigabytes!
We did it! Woah, we did it! So for me this tip reclaimed about eight gigabytes of storage, but more importantly it's got my whole Google account working again!
I followed those steps and now I have a storage total of 14 GB, AND more importantly, I've got my wife's Google account working again.
That's a win, surely!
It's got to be something that counteracts the tiny downsides of living with me!
Our next step is to create a Google account that's just for the new photos and videos.
And we'll send set this up in a way that doesn't max out our storage ever again.
I know it's a bold claim, but it works if we use something called “partner sharing”.
Take a look at this.
At the moment, if you share your photos and videos with another account using partner sharing, so you've got Google account number one and you create Google account number two... you can share your photos and videos from this account with this account - so that the photos and videos from this account can also be seen and searched and saved in this account.
Those photos and videos do not take up any storage space in that shared account,
Which means you can delete them off the original account where they were taken, still have them saved in the shared account, and those saved photos and videos do not take up any of your free 15GB of Google storage allowance.
So let me show you how to set up partner sharing step by step.
I'm going to do this in real-time, and you can try it out for yourself and follow along.
I'm going to do it on this phone.
You can do it on the desktop, I'm going to try this on a phone.
If I go into the Google Photos app, I have created this brand new Google account just for my photos and videos.
It's really easy, so let's make a Google account right here, right now, step by step.
You can follow along with me.
I have my phone on screen here.
Step One is open the Chrome browser if you have an Android phone, and then we'll open a new incognito tab.
Just click on the three dots on the top right-hand corner and choose “new incognito tab”.
If you have an iPhone, just open Safari and choose “new private tab”.
The reason we're doing this is to avoid being signed into Google already so that we can create a new clean account, and now we can go to google.com.
I'll just scroll down and accept the terms and conditions.
Next, we'll click on this button on the top right-hand corner, "Sign in," and obviously, we haven't created an account yet, so at the bottom of the page here, it says "Create account."
I'll click on that.
This page now asks us if we want the Google account for personal use, for my child, or for work or my business.
I'm actually going to go for "work or my business."
Now we can enter our name, and now we can enter our birthday and gender.
Google now offers us a couple of options for a Gmail name, or we can choose to create a new name for our Google account.
And now we can accept the terms and conditions, and it looks like it's a success, "Your Google account is ready."
Now I've signed my Google Photos app on my phone into that new account, and to check that you've done that, you just click on the top right-hand corner.
At the bottom of the app, at the bottom of the screen, there's a tab here called "Sharing," and if I click on that, here is a prompt to share your photos.
It's right here where it says "Share with partner."
If partner sharing isn't here, try going into a desktop on a computer and go to photos.google.com. Click on settings, which is the cog at the top here, and partner sharing should be on the list there. If it isn't, you might need to verify your account first.
Back to the Google Photos phone app, I'll click on "Share with partner."
Get my glasses on.
It gives you some options here, so it explains that setting up automatic sharing means that you can share your memories. So we can choose the starting date. I'm going to go with "all time."
I want all photos to be shared with the other account, and you can choose which photos to share. I'm going to share all photos.
Then I guess we'll click on "Select partner," and here we can type in the email address that we want to share the account to, and now we'll click "Confirm."
So it's told me that it's shared this request, this invitation with the other account.
Now we can go to that other account to accept the invitation.
So I'll click on the avatar in the top right-hand corner, and I'll log in the Google Photos app to my other Google account.
And here it is right now on screen, and I've got a notification saying, "Neil wants to share with you." So it's instantly told me that the sharing request has been made.
If it's not showing, make sure you've clicked on the sharing tab at the bottom of the screen here.
I can now click on 'View Invitation'. “Neil wants to start partner sharing with you.”
You'll be able to view photos shared by Neil. So hit 'Accept'.
And now, it offers to share back to the other account.
The questions look exactly the same as before. Choose starting date. We'll have all time. And choose photos to share. Let's hit 'All Photos'.
And then, I'll click 'Confirm'.
Now, it's given us an extra option, and this is the important bit to make this work, to make this unlimited. "Auto-save pictures from Neil.”
So it's offering to show those photos and videos from the other account and save them in this account. And it won't take up any of my storage.
So I'm going to hit 'Get Started', turn on auto-save so you never miss a photo from myself.
This is the crucial bit here.
Can you see where it says “the photos that you save won't count towards your storage as long as your partner continues to share them with you”. So what I will do, I will choose 'Save All Photos'.
And then I'll hit 'Confirm', “saving automatically all photos”.
But all of those photos are now going to be saved in my original Google account.
I've now logged into the other account, the new Google account that I created just to take photos and videos.
And you can see here that partner sharing seems to be working.
But if I click on “Neil's photos partner sharing”, I've got the same message here to auto-save. So I'm probably going to do this in both directions just for safety.
It takes up no storage, so I might as well do this. “Auto save pictures from Neil”.
I'm going to click 'Get Started', turn on auto-save. So I'm going to choose 'Save All Photos', confirm, and that is now saving all my photos from the other account to this account. It doesn't take up any of my storage.
Hello, me again. I followed those steps, so now I have a new Google account just for photos.
What I need to do now is delete from my phone all the photos that have been backed up to Google, because I don't want those old pictures filling up my storage allowance again on my new empty Google account. Remember, I've got them backed up to a drive and backed up on Google photos.
It takes way too long to do this one by one in the gallery. So, I'm plugging the phone into my computer again and just highlighting the pictures to delete, and then hitting delete on all those old photos and videos. They are now removed from my phone.
While you're doing this, why not hit the thumbs up on this video to let me know this might be helping? I really appreciate it.
This deleting will also free up space in the phone. Everyone just seems to fill up their phones until they crash!
Well, I know I do, and I think some people just buy another phone and leave them on there.
Doing this will give the phone a bit more life and protect your photos and videos.
Step five is to set the phone to backup from the Google Photos app to our new Google account that we created just for our photos.
It's really easy.
Go into your Google Photos app on your phone, click on your avatar on the top right-hand corner, scroll down to photos settings, click on that, then click on backup, then click on the Gmail address and change it to your new Google Photos account.
Scroll down, make sure the backup quality is storage saver because I keep a copy of the original files, and this will stop it from filling up again too quickly.
The beauty of this system is, at the moment, the brand new photos Google account will share all the photos and videos to my original old personal account.
And when I delete them from the photos account, they stay saved in the personal account. They're even saved at original quality.
I've been doing this for about a year now, and it's just so much easier having a Google account that's just for my photos and videos so they don't fill up my personal account.
Thank you for hitting the thumbs up button.
I've got other videos that might help if you click the subscribe button, and if you do either of those, it really helps me out. So, thank you.
And right here are all my Google Photos storage videos to keep you under that limit.