THIS IS THE TRANSCRIPT - CLICK PLAY ON THE VIDEO ABOVE!
Hello! Welcome back to the Happy Hut. I'm Neil and it is cold tonight.
This is the coldest night of the year so we'll get through this as quickly as possible.
How do you change your name on YouTube?
We are going to change our YouTube channel name, but we actually have two names on YouTube... look at my channel here.
Firstly we have the channel name, so this channel you're watching right now is called “Neil Mossey”.
You can choose anything you like up to 50 characters and it has to be within YouTube Community guidelines so no rude words!
But there's a second name down here which starts with an @ symbol and YouTube calls this a handle.
It's a name that's completely unique to you so no one else on YouTube has this, and it kind of works like the @ names on TikTok and Instagram.
I've got the YouTube guidelines on screen now, so this can be anything from 3 to 30 characters long and YouTube might have just made up and given you your handle that you have right... right now.
And it usually puts numbers on the end so you probably want to remove those numbers from your YouTube name.
If you want to do this using your desktop computer, I'll leave a link down in the description and YouTube will change this over time.
I'll leave a link right down in the description for the very latest guidance and advice for how to do this.
So the first thing we're going to do is open the YouTube app, and then I'm going to click on the avatar on the top right hand corner of the screen.
And we'll make sure that we are logged into the channel where we want to change our name, so on here you can see I'm called “My super first channel” and my handle is my superfirstchannel5798.
I don't want those numbers, so we're going to click on the next menu option down: “your channel” and we click on “your channel” whether or not you have videos up on your channel.
And on this page, just underneath our name and details you can see some options here.
We're going to click on the pen icon which... which is the edit icon.
This opens up all the details for our presence on YouTube.
At the top here we can change the picture for our Avatar, so if I click on this camera icon here I am... I can even take a picture and change my avatar.
And the first option down, if I click on the pen icon here, I can change the name of my YouTube channel.
Now this name doesn't have to be unique, so there might be lots of channels called “my super first channel”. It doesn't matter, so long as it's 50 characters or less.
The second option down is where we can change our handle.
Let me show you what happens if you can't get the handle you want.
So I want to change this to “mysuperfirstchannel” and lose those numbers.
But unfortunately the handle has been taken by another Channel with this handle.
What I can do is call this something completely different, so let's try “MySuperSecondChannel” and YouTube is telling me that this handle - this unique handle - is available!
So I'll click on the “save” button on the bottom here, so if I wanted to change my channel name... I can click on the pen icon here and I could change this to whatever I like.
And because of this it means that we have a completely unique URL!
So we have a unique web page for our YouTube channel or our YouTube name and this URL is youtube.com/@mysupersecondchannel
So if we go to our YouTube channel, this is how it looks now.
I think it's beautiful!
If this video is helping thanks for saying hi in the comments below it'd be great to hear from you and right here are all my videos to help you get started on YouTube.
How do you free up space in Google Photos on mobile? Here's how to recover Google storage space when it's full! This is my step-by-step guide to solving the google photos storage full problem with 5 things you can do right now on your mobile phone. If your back up is full or out of storage, there might be something here which will help you bring your space back down to under 15GB.
I'll try changing the back up from original size to storage saver, easily search and remove any unwanted photos and reducing all the photos and videos in my Google Photos app to storage saver size.
THIS IS THE TRANSCRIPT - CLICK PLAY ON THE VIDEO ABOVE!
Hello I'm Neil, welcome back to the Happy Hut: this is so frustrating...
Is your Google photos suddenly full?
You are getting warnings and error messages like these, telling us that it stopped backing up photos and videos... Even worse than that, it's shut down our Gmail!
This is happening to me right now, so I'm going to show you quick things you can do right now on your phone to bring your Google photo storage back under the 15 gigabyte limit.
I'll also show you how you can keep it under that limit without deleting all your photos and videos, or more importantly without giving Google any money whatsoever.
You know Google? The most profitable company on planet Earth? Yeah that Google, that really wants us to buy some storage.
You and I both know that buying storage from Google isn't a good idea because it will mean a monthly fee for the rest of our lives!
And Google can increase that fee anytime they want to while they still hold on to our data and sell that to advertisers.
We do not need to be giving Google a monthly subscription, so let's dive in with tip number one.
So the first thing we're going to do is to change the Google photos upload size from original quality to “storage saver” quality.
You might have done this already but just let's make sure that that setting is set to storage saver because sometimes when the Google photos app updates it switches it back to “Original”.
So we're going to click on the avatar on the top right hand corner of your Google photos.
Don't click on “free up device storage” because that is just going to remove photos from your phone.
We don't want to do that. We don't need to do that.
What we are going to do though is go down to photos settings.
We click on that and then we'll click on backup and sync, which is the first menu item here.
If we scroll down we can see “upload size” and there are two ways that you can backup photos to Google photos: that is either “original size” which is the full fat big size of your photos and video...
Or this option here: “storage saver”.
Honestly I've been using storage saver for years now. I haven't noticed any difference and if you do want to keep the original resolution of your photos and videos, you can be backing them up to your computer.
It really does make a difference with the file sizes as we'll find out on one of my tips in a moment! So I'm going to choose “storage saver”.
Tip number two is that we're going to turn off Google photos backup.
And to do that we're going to click on the Avatar in the top right hand corner again.
We're going to scroll down to “photos settings” and then we're going to click on backup and sync.
There’s a little toggle switch here: we're going to turn that off and the reason we're doing this is that once we've cleared some space from Google photos we don't want to be filling up Google photos with the pictures that are in our phone again.
And later on I'm going to show you how you can set up a Google account just for your photos and videos.
The third tip is to remove any obviously unwanted Google photos and videos.
Click on the Avatar in the top right hand corner, and down underneath the “account storage full" you can see this button with three dots.
I'll just click on it and that takes us to the “out of storage” window.
There's a section down here called "review and delete” and this is where it offers to show you screenshots, blurry photos, large photos and videos, and other apps.
Now I don't particularly want to delete these, but there might be some big ones here that you can delete.
You can see from the sizes here aren't huge and I don't think they'll bring me back underneath the storage limit, which brings us to tip number four, and this this is the killer tip.
This is how you and me are going to beat Google, and it's to reduce the size of all the photo and video files in Google photos just in one go.
Now you can't do this on the Google photos app, which I think is pretty disgusting, so what we need to do is to open a browser on your phone.
If you have an Android phone that's probably Chrome, and if you have an iPhone or an iPad that's Safari, and we'll type in photos.google.com
Next on the top left hand side, you see the three lines there?
We click on that to open the menu just to make sure that we are logged into the correct Google account.
You can click on the Avatar face there if you want to change the accounts.
Next we'll scroll down, and down here where it says storage we're going to click on the word “storage" and this is like manage storage on the app...
But if you scroll down, the app doesn't have this option: “recover storage”.
And by the way if any of these tips are helping, please say hi in the comments or hit the thumbs up button. It really helps other people to find this video so thank you.
On the “recover storage” option here, we're going to click on “learn more" and it opens up this scary warning.
Now we don't know which photos and videos in Google photos are at the big original size or the smaller storage saver size. By clicking on this option, it will reduce all of the photos and video file sizes down to the storage saver size, which will free up loads of space.
I'm going to click this warning disclaimer here: I understand that it cannot be undone...
and then I'm going to hit the blue "compress existing photos and videos”
Now it looks like nothing has happened... look our storage is still at 16.3GB
If I scroll back down it says compressing.
It does take a couple of hours, let's see how this fixes my Google storage!
It's now 8:30... 7 hours later. Let's open Google photos app.
We were on 16 gigabytes. If I click on my avatar, whoa! Look at that!
Account storage 7.8 gigabytes!
We did it! Woah, we did it! So for me this tip reclaimed about eight gigabytes of storage, but more importantly it's got my whole Google account working again!
But that's not all, because we can now keep it off.
Because tip 5 is to create a Google account just for your photos and videos.
I've got a video all about that, it's right here. You'll never run out of free Google storage again and you can create a new Google account for every year. You could create one for every month if you wanted. The step-by-step instructions are right there or in the link that's in the description below. In your face Google!
How do you start a YouTube channel? If you want to create a new YouTube channel from scratch, this video might help. I've launched many YouTube channels, and 2 have become monetized... I've done it the wrong way many times, so here I'll help with step-by-step instructions for you to start your very own channel on YouTube!
THIS IS THE TRANSCRIPT - CLICK PLAY ON THE VIDEO ABOVE!
Hello welcome back to the Happy Hut!
It's not a very nice day today you can see Casper at the window there...
Hello I'm Neil Mossey, and YOU want to make a brand new YouTube channel!
What are you thinking!
This is it! This is gonna be the time we're gonna get through this.
But it looks difficult enough even knowing where to start.
But trust me, it is really easy and you can follow along step by step.
I'm going to make one right now, we're going to do this together.
I've created a lot of YouTube channels: two of them have become monetized, so I'm in the YouTube Partner program. And it is absolutely lovely getting money... getting paid by YouTube every month, but I have hit some problems along the way.
So I'm gonna do this to avoid any of those mistakes and problems further down the line.
The first thing we'll need is one of these, a Google account!
And you can skip ahead if you have one of these already, but it is much better for me to create a brand new Google account for the YouTube Channel.
I do this just in case something goes wrong, either with my Google account that wrecks my YouTube channel... or something goes wrong with my YouTube channel and then I lose my Google photos and Gmail... so I just keep the two separate.
There are some terrible things happening out there.
At least this way I play it safe and one won't affect the other.
I've signed out of Google to start a new account and up here in the top right hand corner we've got “Sign in” so we'll click on that and then down here on the sign in page there's an option “Create account”
So we'll click on this. It gives you three options: “for my personal use”, “child” or “work or business”.
I'm going to choose “for work or my business”: it just keeps it clean and separate and “not me”.
What do you want to call your channel? Leave a comment down below. I'm gonna call this “my super first channel”.
Next we'll verify this account and agree to the terms and conditions, and now it confirms that the Google account is ready.
And that takes us back to the Google home page with the avatar in the corner showing that we're now logged in with this new account!
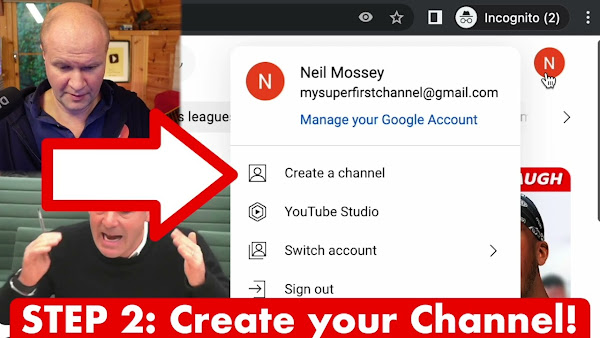
Now it's the exciting bit! We'll go to youtube.com and you can see it's already automatically signed me in. There's my avatar at the top.
If I click on it we can see that I'm logged in as “my super first channel” and the very first option on this pull down menu is “create a channel”.
Let's click on it... now this is where it gets slightly confusing.
Even though we created a Google account that is “for work and business” it still wants the YouTube channel to launch with your name.
And your handle is your unique name on YouTube, so what I'm going to do is I'm going to change the name of the channel to “my super first channel” and it lets me have that as the... the handle.
There’s a little green tick, so I'm going to click “create channel”.
It's looking a bit bare... well it's looking very bare, there's nothing here at all so the first thing we need to do is to upload a video.
Very generously they've given us a button here to “upload video” but I'm going to use the proper button to show you where it is for all the other videos.
Up here on the top right hand corner, can you see there's this kind of camera icon with a plus there?
And if I hover over it, it says create... and you have two options.
You can either upload a video or go live. Obviously we're going to hit “upload video” and then it brings up the “upload videos” dialog window.
“Select files” and then we're going to find the video file that we want to upload and click “open”.
This opens up another window where you answer some questions about the video. You can change these later on, so you don't have to do this now, but we can give it a title.
So I could just... I don't know... call that “welcome video” and then down here we have the description box, and that's where we can type a description for the viewer.
You can change all of this later on. This is where you can put in a thumbnail... you can add it to a playlist... and there are even more details...
We can fill those later on. I'll click on “next”.
Oh it's reminding me that I have to say whether or not it's “made for kids”.
It's not made for kids.
Don't be confused there. It might be acceptable for kids, but it's whether or not your video is specifically geared towards children... so if it's like a cartoon or a nursery rhyme that's the only time you'd hit “yes” - even though my videos are safe for kids to watch.
And it's explaining that the video is going through some checks, and then we have a choice. We can either make the video go live right now by selecting “public” or I can just save it so that anyone with the link can see it. That's “unlisted”.
I'm going to choose “private” for now and then I'll make it public when I've got everything ready. So we'll go down to this box down here. Save, and this is the first video on my channel content page!
But this video is now ready to go live. I'm going to show you how to go into the video to change anything you want to do.
I'm first going to click on the pen icon to open up “details”.
This video is now ready to go live so we're going to go to “visibility”, but if we pull down this box we get those options that we saw earlier... so the video can be hidden so it's “private”. We can make it “unlisted” and down here is “public”, so I'm just going to make it go “public” and live.
I'll hit “Done”.
Now it won't go live until I hit “Save” on the top right hand corner here, so let's hit “save” and this video is now live on YouTube!
Out on the internet for anyone to see it. It's a... it's the greatest buzz.
You've got to do this! You've got to do this. If you've managed to get a video up onto a brand new channel, I'd love to hear from you down below in the comments below.
It'd be great to see your channel and your first video... and right here I've put all my YouTube hacks, so everything that I need for making a YouTube channel.
It'd be awesome to bring you on the journey with me, if you want to hit the Subscribe button. I know you can do this! You've got to do this. We need your videos on YouTube. You've got this!
I'm cheating on our regular supermarket, Lidl. An Aldi has opened up today 20m closer to our house so let's brazenly walk in and take in the delights of a new supermarket smell. Just don't tell the Lidl.
And I also use the stuff from Aldi to make my daily egg frittata or omelette, with the chorizo and button cup mushrooms. But is THIS the start of VLOGMAS?!
THIS IS THE TRANSCRIPT - CLICK PLAY ON THE VIDEO ABOVE!
Hello welcome back to the channel I don't know if I'm going to release this video because today I'm... I'm going to cheat on my Supermarket
So around the corner from us we've got a supermarket called Lidl it's uh... it's one of the lower end supermarkets in here in the UK
They're all over Europe I think they're over the United States as well
I mean we use it because it's cheap but also because it's the nearest and it served us really well over the years but... I've made some videos about it on this channel
But over the years the staff are brilliant but the supermarket itself is... is now getting a bit tired... a bit run down like me!
And lately I don't know if you... you you're experiencing this with your Supermarket but the shelves are just bare empty and most other supermarkets they sort of make an effort to spread the stuff out to cover up the supply issues... the supply chain issues that we're facing here in the UK at the moment for obvious reasons
But they haven't even got the stuff to spread out on the shelves because that's partly what I'm doing... why I'm thinking of cheating on them
The second reason is that their main competitor - that their arch rival - their Nemesis - has opened up a branch and it's about 20 metres nearer to us... so not only do we get a brand new supermarket and the excitement of another chain
And it's the head-to-head rival...
But it's... it's... it's brand new and more importantly it's less far to walk
I'm gonna buy the three products that are usually buy in Lidl... I'm gonna buy them in Aldi and I'll see if I save any money
We're here! It’s all new - look benches!
You can sit down and... look at the car park!
New baskets - look - the hand sanitizer stand doesn’t fall over when you touch it!
The doors don’t... The doors don’t fall off when you touch them! I know, this is the first product that I wanted to buy: mushrooms for my omelettes, £1.25 so we’ll see how that compares
Now the next thing I need to find is chorizo slices.
The thing with the German supermarkets is that they... they know to do their meat...
I can’t find the chorizo
[Music]
Okay, I’ve found it - and it looks like it’s the same price! 89p
[Music]
It’s so clean! Now the last thing I need is erm some Gouda slices - or is it Gouda slices? Leave me a comment below, how do you pronounce it?
I'm gonna try and not be distracted by the stuff in the middle
the Aisle of Aldi... is that what we call it?
now the gouda slices usually cost about three pounds 20 so let's see how much they cost here
[Music]
It's £3.19, which I think is exactly the same as Lidle.
it's literally penny for Penny identical to Lidl... except without the bare empty shelves and the wobbly cleaning station
I've got completely distracted by the dog harness
I think I'm gonna get this for Casper - apparently it lights up - charger - and the neon dog coat
I think he's gonna like this - we were actually looking for one - which is the trouble with the middle of the aisle things - they are things that are sort of in the back of your head
Okay I spent way too much than I should have done
Let's uh let's go to the checkouts now and see the damage
[Music]
What I actually went for
oh yeah okay thanks
Thanks
oh cool I like the attention
Well that went really well!
I went in to spend about four pounds and came out spending 32 pounds something but oh there's nothing like a brand new Supermarket to lift the spirits is there?
look Casper I got stuff! I got stuff for you! quick find the shoe well done! all right should we go and put the stuff on you'll have a little doggy fashion show while I make an omelette with my Aldi stuff
come on then Casper come here Casper come! good boy! look what Daddy's got! oh what is it what is it? ready? yeah I can't do this with one hand
oh yeah very good you're helping aren't you? right you ready? sit!
you look like a member of the emergency services!
oh Casper you look... you look ready to have your pay cut by the government! oh Casper! oh it's beautiful oh yeah give us a wag! very good boy! oh I think that's a hit because we bought a coat before and the trouble was there was so much coat that it was basically all around his bits and pieces
although - this is fairly close to his bits and pieces so when he goes for a tiddle it just goes all over the coat
That's how dog coats work isn't it? let me know if I'm doing this wrong but I think he's just gonna wee all over the underside of that
I was kind of hoping it'll all be lit like um some kind of neon stripe?
[Music]
I think that's a hit! we'll adjust it - Casper that looks amazing! oh it looks amazing Look at that - make it twinkle?
[Music]
[Music]
let me share some closing Thoughts with you while I make the omelette with the Aldi stuff
[Music]
So there’s this thing on YouTube called Vlogmas, I’m sure you’ve heard of it - It’s where vloggers try to make a video every day through December
I've never done it before and I'm thinking of giving it a try
what do you think? oh these chorizo slices look smaller
thing is, I don't know if it's a... if it's a good idea
I think it is a good idea because it just means I get to share more junk like this but this is a LIDL chorizo slice - chorizo - this is an Aldi chorizo - chorizo slice
I have to put one on top of the other yeah it's definitely smaller look at that!
the Lidl chorizo slice is much more generous than the Aldi one
that's Lidl and ALDI
it's exactly the same weight but there are 22 slices and this has 24 slices
it's exactly the same product for exactly the same price but shaped differently
we need two eggs - so I don't know I'm just thinking of making a video every day just to see what would happen but I don't even know if I can keep up one video every day
so I take the two eggs
anyway put the two eggs in
I know what my first vlogmas videos would be
I could fix the leak over there, I'd clean out my Phillishave - you know it's really exciting stuff! uh what else? oh and I’d share, I’d share how I got the scaffolding Tower up on the... the side of the... the building here last week and survived!
so I cut the chorizo pieces into, well, into pieces
I cut the slices into bits
I'll bring the camera around - I'll get two mushrooms - I'll get three because they're little
I'll just cut these up and I should wash them but I like living dangerously
and then I get a knob of butter [Music] and then I fry the mushrooms or saute them or just make them warm and buttery
I put the chorizo in at the same time so I'm doing this with one hand not very proficiently
the gouda slices or gouda slices are for a roll later... I didn't get any rolls! didn't get any bread! future Neil, quick! go back and get some bread!
I'm gonna whisk the egg and I'll just sling this into the pot
[Music] I like to not disturb it so that all the bits are evenly distributed but I always mess that up so let's just Stir It
[Music]
I wanted to share this with you for a long time and the trick is to get it solid without it burning
right it's the moment of truth
can I get this flipped over without it falling? right I usually have a success rate of about one in ten so it's gonna be really unlucky If This falls apart on me, on camera
but I am doing it one-handed
Shall I go for it? oh almost yeah yeah! I'm calling that a Dad delivers success!
I did it! I did it! it flipped!
it sort of stayed in one piece and that's it - that's my beautiful egg frittata slash omelette slash first time at Aldi and YouTube can put up a window of one of the other videos
there'll probably be a how-to that you're not interested in so let's see what it offers can you please help my daddy get 10000 subscribers just click in his face thanks bye all right this is gonna be the proper one right?
How do you block a user on YouTube? Walking through step by step how to remove a nasty comment and block YouTube channels and users.
I also go thorough how I deal with bad comments on YouTube. It's difficult. Every comment increases data for the YouTube algorithm... and I genuinely want to thank every comment, especially if it's letting me know that this video is not for them. But spending any more time than that is a complete waste of time. As creators, and human beings, it's difficult to acknowledge that sometimes.
THIS IS THE TRANSCRIPT - CLICK PLAY ON THE VIDEO ABOVE!
hello I'm Neil welcome back to the Happy Hut and I'm sorry to say you have just got a horrible comment on your channel
I know exactly how you feel: I get hundreds of really positive messages on my channel... They're really uplifting, kind, helpful... sometimes they ask questions. It's Community Building. But about once a month or six weeks I get one single message that is really off key or just not nice.
This week I got one and it was just out and out nasty!
I wish I could show it to you right now to demonstrate this video but I... I... I made the big mistake of replying to it and guess what? It got even nastier!
But it's okay because it was the biggest lesson to myself for the thing that I already knew which is that it's never a good idea to reply to bad comments.
Mostly because it's a complete waste of time.
It's time that you're spending on someone that doesn't deserve it when you could be spending that time on replying to the nice comments.
Removing them completely from our channel is absolutely the best thing that you and I can do.
Someone explained it really brilliantly to me like this: If a visitor comes to your house and takes a dump in your living room... you clean it up and you do not let them come back ever again.
It's exactly the same with your beautiful YouTube channel.
Now I'm gonna do this on the desktop first and then I'll show you how to do it on a mobile but you can do this on a mobile. If you go into your browser and put in studio.youtube.com
Here is my lovely video that I spent ages on and look oh no someone's left... left an off-key comment! A comment that I don't really like.
It was me so don't, don't worry, I did this to myself.
On a desktop it is really easy: you hover your cursor over the three dots on the right hand side of the comments and that brings up this mini menu - pin, remove, report or hide user from Channel.
I'll just show you how the first one works. You can just hit “remove”.
There's a problem with this though which is once you've removed it, you've now lost who that person is or who that YouTube channel is, so it's a bit more difficult to block them now that you've removed it.
But look here's... here's another comment from them so let's just explore the other options.
You can report a comment and these are the reasons that you might want to remove a comment from your channel: it's spam or it's just harassment or bullying.
The problem with this is I think the AI looks at it itself so if you're giving it a reason that isn't actually the reason you don't like the comment, it’s probably best not to do it that way. The much easier way is to just “hide user from channel”
Should I do it? Should I hide myself?
Let's click on it.
The second way we can do this is in studio.youtube.com it's your YouTube Studio dashboard.
If you click on the three lines and go down to the tab comments that opens up all the comments that you've had for your channel... and here are the lovely comments waiting for me here. Again if you go to the three dots on the right hand side of the comments you get a few more options with this but you can remove it or hide user from Channel.
There's a third way and this is where you can see all your hidden users on your channel.
If you click on the avatar for the commenter, it opens up their YouTube page.
Guess what! They've been horrible about our stuff without actually making anything themselves! Well that's a huge surprise.
If you click on the URL and just take this URL up here and copy it, we can go back into YouTube Studio - go all the way to the bottom to settings - go down to the community tab here - and that opens up this window.
There are three Windows here: moderators, approved users and hidden users.
If I paste the URL into here it's now a hidden user and I'll hit save and if I go back in I can show you that that worked - Community - There You Go! Hidden users: “Damaged YouTube commenter” is one of your hidden users!
Let's move on to the mobile now and let me know what you think about how YouTube handles comments on YouTube.
Obviously you go into the video and you click on “comments”
For mine I have to click “newest” to see the newest comments and oh look there's some lovely messages here!
This is slightly different on the mobile. First we'll click on the three dots and that brings up “pin”, “remove”, or “report” so you can report the comment here and you can remove it.
To block the user you've got to do something slightly different.
We're going to click on the Avatar - so this little D here for damaged YouTube commenter - and that brings up this window and we're going to go to the bottom here and click “View Channel”
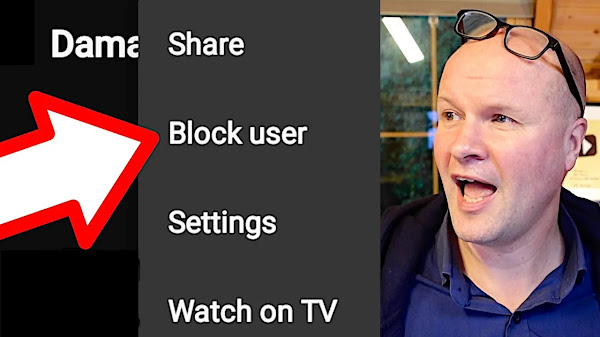
And then on the top of that user's Channel there are three dots.
If we click on that you can see the second option down is “block user” that's what we're going to do, so I'm just going to hit block user.
“Blocking this user will prevent them from commenting on videos that you've uploaded” so if I hit “block”... “user has been blocked”
And then hopefully if I reload the comments, I'll go back into newest comments, it’s gone!
All the comments have gone and to make us feel even more positive I'm going to quote an author now one of my favourite authors: Seth Godin.
“He's a jerk. He deserves everything you throw at him: you're cutting remarks, your sarcasm, your enmity.
You are totally justified in spending a lot of time and energy in evening the score.
The thing is, it's not clear that we benefit from carrying around all that vitriol.
All the time we spend hating is time that we've given away to someone who hasn't earned our time.
It's time we're being controlled by someone we don't like or respect very much.
Teaching someone a lesson is often overrated. Doing the lesson teaching in your head helps no one.
What happens if we walk away and make something magical instead?
You deserve it.
Can you please help my daddy get 10000 subscribers, just click on his face.
Thanks bye! Alright this is going to be the proper one right?
Does your fridge FREEZE your food? That's what happened to us, and couldn't work out why the fridge was frozen all the time. We defrosted it, we turned it off and back on... and then I tried this...
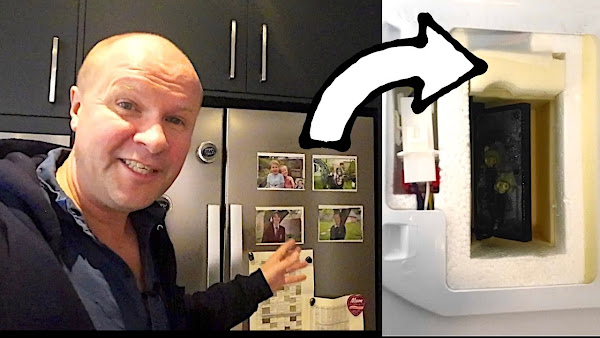
Removing the quick can cooler on our Daewoo/John Lewis refrigerator reveals this secret door...
It's called a Damper, and this is way too much time on video devoted to our Damper.
THIS IS THE TRANSCRIPT - CLICK PLAY ON THE VIDEO ABOVE!
okay so this is uh quite an experiment let's see if we can see the damper closing so I'll put the camera here... [FRIDGE BLEEPS]
hello welcome back to the dad delivers Vlog where I try new things every day to make your family happy and today I'm making the family happy with... with this and making the family ecstatic
this is going to be really short dull very specific video
does your fridge freezer or rather your fridge freeze all your Food?
that's what was happening to us and this is what's left from the... well it's quite a healthy load of stuff but it's mainly jars because we're having to throw out all of our stuff because the fridge was freezing all of our food
I'll talk you through quickly everything that I've tried
this solution might help you fix your fridge
the second thing to rule out is... is your thermostat Frozen?
maybe your bits inside your fridge are frozen and need defrosting so turn your fridge off for a day and see if that fixes the problem
I just realized that I'm suggesting “turn it off and on again” over an extended period
that didn't work so then I tried adjusting the doors which... which is... is a challenge it has to be said
there's a nut in there and up here so I used that with a spanner to... to lift the door to make sure that the door seal was right
I thought it was that, but no the fridge froze everything again and I thought this was the one that was causing it
you can see where the door meets the fridge here and I thought that it didn't look like a good fit and I thought that's where the cold air was escaping and it was kind of constantly keeping the fridge on
so we tried... tried fixing that
tried cleaning the door seal as well that didn't work so I... we were just on our final phone call to Daewoo and we couldn't even get through and I was just looking through the internet and I found... found out by chance about this little door this Secret Door that's caused all the problems
oh it's open okay that's exciting!
let me adjust the camera, maybe I'll get some light in there as well
let's go in there properly look at this!
there's a door
it's like Narnia
this little door is what has caused all the problems but you won't see this little door and I'll show you why in a moment
but I think it's a... it's a little portal to the... to the freezer and when it wants to cool the fridge down this little door has got a motor on the side and it closes and opens to keep the... or to regulate the temperature in the fridge
should I leave... should I leave the camera in?
I'll show you how it works
it's really... I found it quite exciting to discover this and I'll show you... I'll show you in a minute how I got to the... the Magic Door
okay so I'm Gonna Leave the camera running but also run the microphone cable into the fridge so this might not go very well so hopefully you can still hear me even though the camera is... is in the fridge
so I'm now going to adjust the temperature of the fridge and put it up to eight degrees and I'm hoping that that will trigger the thermostat and you should see the motor closing this little secret door
let's open the fridge
yeah it's closed! so you saw it closing before your very eyes
I think... I think it's the first time I've put my camera into... into the fridge so that is what the problem is
that little door there - what you need to do is check that that door... that door was open
let's go through it again - that little door it's called a damper - was stuck open and it... it had ice on it
I had to kind of scrape it with my hand
you can open the door, open and close the door yourself
I used a screwdriver to open it but it was jammed open
anyway so I pushed it closed and all this ice fell off in my hands so that's the problem
the problem is there's a an ice build-up on the hinge and it stops that door opening and closing
let me show you again so I'm going to set the fridge to five degrees and put the camera in again
I need the light again - oh there it's going let's go!
behold that now lets the cold air in to bring the temperature down to five degrees
so the final pain point to get to that - and the pain point that I'm in right now, why I'm Vlogging this, is that... that door isn't exposed
they hide it with this nice bit of Kit called the quick can cooler
it's the name for a group isn't it? “quick can cooler” and it was quite difficult to get out so I'm going to try and get it in on camera and that will be our dad delivers success for today if... if it happens. Please let it happen.
the problem with it is that when you push things back in you feel like you're going to destroy your really expensive Appliance - and this is why I'm sharing it on the internet in case you need to take this off and put it back on again
I think the trick is, it doesn't help that the doors open - as well the little damper door
let's give it a try - I've gotta - I've got to put this back - I love that little beeps on our Daeoo fridge that to me is like the... the radio 2 theme
[FRIDGE BLEEP]
[Music - RADIO 2 JINGLE]
so what I'm doing is I'm lining up these sides and I'm gonna force it up but it won't because the latches need to go in so I'm gonna... oh don’t want to snap it - I really do not want to snap this - right I'm forcing it back that's the way
oh my goodness all right I tried this for an hour last night so what you do is you line it up so it's level with the ceiling the roof of the fridge and just push it back with force
and then in here there are two screws so I'm going to screw back those
[Music]
[SINGS] radio two! That was handy, my camera's holding the lid up and obviously to get to the damper door you need to do the reverse of this okay [SINGS] radio two now...
our fridge has been freezing things for three months so I am calling this an unqualified dad delivers success!
and if you have searched for “how can I stop my fridge from freezing” I hope this video helps and right here is what YouTube thinks you should be watching next!
can you please help my daddy get 10000 subscribers just click on his face thanks bye all right this is gonna be the proper one right?
THIS IS THE TRANSCRIPT - CLICK PLAY ON THE VIDEO ABOVE!
I'll give the uh the windshield a fluffy hairdo!
There we go! whoa there we go
hello welcome back to the Happy Hut - it's a very sad day today because today's the day that I'm going to take off this Ulanzi wide angle lens!
it's coming off today
it's been really useful but I don't like it
and I'm going to explain why it's been good for me and the zv1 or zv-1 camera - I think that's gonna be the last time that I say zv1 - the Sony zv-1 camera
and the reason I'm taking it off is this!
It's the Neewer wide angled lens for the Sony zv1 camera
I'll be unboxing that in just a moment and I'll be comparing the two lenses
I'll be comparing this Ulanzi against the Neewer against how the Sony zv1 looks straight out of the box with no wide-angle lens on the front
if you're interested in getting a Sony ZV-1 camera or you already have one you'll already know the frustration with the lens
so let's just recap the problem the Sony ZV 1 or zv-1 is a wonderful camera
it's beautiful I love mine, I use it all the time
I'm up to about 2000 videos that I've shot on it - you know 2000 individual video files but the zv1 is absolutely terrible as a vlogging camera
it's terrible for vlogging
it's been sold to us by Sony in its advertising as... as the perfect vloggers camera and it's not: because for me vlogging is being able to hold the camera at arm's length and for it to take a good shot at arm's length
I'm standing a little back from the... the camera now, if I move forward and hold the camera with my hand so this would be holding the camera at arm's length... this is what the shot should look like
it should... it should have me in and enough of the background for it to feel like a good piece of vlogging because I'm talking about the place where I'm at
but if I take the lens off... and this is the Ulanzi wide-angle lens this is the shot that you get
if I hold the camera like a vlogger would. like Fun for Louis, or Emma Chamberlain or any of your favourite vloggers - this is too close!
my head is too big in frame
this is not very comfortable - if I really stretch out this is the kind of shot you get
let me take it off the tripod
this is the shot that Sony thinks is... is the shot for vloggers
I... I hate to disagree with you Sony, you give us so many wonderful products but my big face on my videos isn't one of them
it should be further back and I'm really, really stretching my arm out now
so if you're out on the streets - out in public - and you're really craning your arm out like this while you're goose stepping down the sidewalk, uh trying to talk to the camera at the same time as... as holding the thing it's not good
it's not good enough
this shot is too tight and the reason it's too tight is because the... the lens isn't wide enough, so the wonderful people at Ulanzi
I think they were the first out of the gate to make this
it's a wide-angled lens that you put onto the end of the camera like this
it just screws on so this is what the shot looks like
sorry, I've got some rain spots because it is starting to rain we're going to get through this quickly
this is the shot with the wide angled lens on
there's an added complication with the Sony zv1 as well which is that there's inbuilt stabilization so if I take the lens off
I have now taken the built-in stabilization off
it's called active stabilization
I have no stabilization now and if I walk around you might notice that maybe it's not quite as steady as it could be
so I'm going to walk to the end of the garden - this is with no wide angle lens on
this is how I would hold the camera so this looks like a better shot because my face isn't quite as big
but the movement is really jerky
the zv1 has some inbuilt stabilisation which smoothes that out
but to do that it zooms into the picture a bit so let me turn on the stabilization
this is the camera the zv1 camera with active stabilization on so it should feel a bit smoother and a bit less jerky
but look at the size of my face! I can't even look at the screen
this is way too close for you to be near me
I... I'll try and put the camera down - we'll do a straightforward side by side comparison now
this is what the shot looks like normally with active stabilization with no lens stuck on the front and this is how the shot looks on the Sony zv1 with the Ulanzi wide angle lens so this is with the wide-angle lens on and this is with the wide-angled lens off so just pure natural camera lens
you can see the shot is tighter
this is how the shot looks with the wide angle lens back on the camera
I've got two other features that I can show you if you are interested in this lens
there's a link in the description uh down below
if I go behind the camera you can zoom in - so the zoom seems to work completely normally and now going into digital Zoom
and I'm going to zoom out
so the zoom seems to work completely well with the wide-angle lens on
let's go in further
I'll pan up
it's the same - stabilization seems to work and the zoom seems to work completely fine with the wide-angle lens on the camera this wide angle lens seems to have served me really well
especially when I've been shooting in the bathroom for some of my DIY videos
there's no way I could have done that on my zv-1 because the field of view would just be too tight so at least I can get most of the room in with this lens on
but there are a few cons I think with this particular lens
the biggest one is it's ugly!
it looks stupid!
I don't like my beautiful ZV-1 looking like this
it's got this Big Blob on the end of that really elegant pop out Zoom and the worst thing is this, thing is held on by sticky tape!
I've got some footage of... of unboxing the Ulanzi wide-angle lens
this is what comes in... in the box but you need to stick a plate onto the end of your camera lens and this wide-angle lens then screws onto that plate
now my plate looks slightly different because I've used the JJC stick-on plate
I kind of like how the... the centre is cut out like a box but I'd already stuck mine on to the camera and it fit the Ulanzi lens so that was handy
but it's a $700 camera and I'm sticking a lens on with double-sided sticky tape!
Sony what are you doing to us!
for me it's been useful: this has been stuck on here for two years and I've even been able to use the stick-on ring to put an autocue on the end of the camera
I've got a link to that video for the autocue - portaprompt - that I use
that's in the description but the ring has been on the whole time and I just hate my camera looking like this
it looks like it's squished its nose or something but I have used this lens a lot so here are the pros
the biggest one is that it's $50 at the moment so it's much cheaper than the Neewer wide angle lens that we're about to see in a moment
the sticky tape that I've used has lasted two years so the system works
I'm not looking forward to taking it off though
I'm not sure how easy that's going to be
there is also a macro lens on this thing
so there are actually two lenses
if I unscrew the outer one - it's a bit fiddly - but it leaves a second lens on the camera which is a macro lens
which is a lens that you can hold very close up to close objects without it falling out of focus
so I've got a really nice mushroom growing out of the table next to the Happy Hut.
my demonstration table
if I push close you can see how much detail it picks up so this is with active stabilization on and look how close I can go
or I'm gonna get the mushroom touching my camera
you see how close that is
I'm going to grab my fake coffee in my YouTube logo mug
I'll leave a link in the description but this is a really sad and exciting time for me
can you be excited sad? because we've got the Neewer - it's just about raining so this is very well timed
I've got the Neewer wide angle lens waiting for me, so I'm going to take off the lens
perhaps for the very last time so sad
okay let's get the lens cap on thank you for your service
now moment of truth - I'm going to take this ring off
like I said it is JJC but it's exactly the same as the... the ring that comes with the Ulanzi
I think I'm going to borrow my daughter's hair dryer to warm up the glue gently
I probably... probably don't need the diffuser do I
I'll give the uh the windshield a fluffy hairdo! there we go whoa! there we go
and oh can it be true? oh let's take... it's brilliant the tape has stuck to the ring not my beautiful lens
oh hello lens there you are!
I've missed you!
you now look like how cameras look
now we get to fit the Neewer wide angle lens so the first thing we need to do is to fit the tube onto the camera
in the instructions it says that the Neewer logo should be up
I guess they want it to be seen but also there is some kind of strange cut out here so if you put it this way up I guess it... it can do that but if you if you put it on the way they suggest then the centre cut out means that it's kind of flush with the bottom of the camera
so I'll get the precious Allen key and as you've probably guessed it grips the outside of the lens on the zv1
I kind of like the look of this! I might leave it on
so now this is on, you then line up the tube the extension tube - Red Dot to Red Dot and press the button on the side here and now when you turn the camera on... because it pushes it out slightly so I'm going to turn it off
There we go - it disappears inside
now we can put the lens on
now one question I... I did have when I was buying this was can you put the Ulanzi lens - where is it?
can you put the Ulanzi lens on this extension tube? and you can't, because they're two completely different sizes
yeah that doesn't fit at all
and then we'll just screw it on here - take the lens cap off - I prefer the look of this
I feel like I can hold the camera with it
it has a like a rubberized grip so this section here this ring here is rubberized which feels it feels really good to hold
the rest is plastic for weight and this is metal and glass
this is bolted on and it... it feels great so you press the button to release the tube and the lens like that and put it back
oh this is good - this already feels good
I'll turn the zv1 on
it pushes out slightly - there's some people online saying it looks really loose and dangly
I guess if you really give it some Force the spring inside does give a little
you do really have to boing it up and down to do that if you're just holding it... it doesn't feel too bad
let's turn the camera on and we are now recording on the zv1
I'm actually holding the camera by the Neewer extension tube this is how the Neewer wide angle lens looks on the Sony zv1
I'm holding the camera like vloggers do
what I can do, I can just pop the button to take the lens off and we can compare it with how the zv1 looks with no wide angle lens so... whoa this... oh sorry I'm shaking a bit
this is how the zv1 looks with no wide angle lens on - straight out the camera
this is what it looks like at arm's length with active stabilization
this is how the wide angled lens looks the Neewer wide-angle lens for the Sony zv1 this is how it looks!
this is how the Ulanzi wide-angle lens looks with active stabilization and with me holding the camera at arm's length
we'll do a side-by-side comparison so this is the Neewer action lens at arm's length on the Sony zv1 camera - active stabilization
and I've got this playlist!
my zv1 playlist: my Sony zv1 videos all of them - accessories, tips and tricks, everything that I've gathered while using my camera for two years I put into that playlist there
can you please help my daddy get 10000 subscribers just click on his face, thanks bye!
How can you recover Google storage on your phone? Are you getting warning messages that your Google Storage is full? Here's how to clear your Google storage without deleting all your photos, videos and files PLUS how to increase your Google Photos storage for free!
I fix the Google Account Storage is Full problem by using the "Clean up space" options to clear my Google Drive storage using my desktop, but if you use the links below you can clear Google Photos storage in phone. Then I use a "Recover Storage" option to reduce ALL the photos and videos in my Google Photos to Storage Saver Size. There is no option to see what photos & videos are in my Drive at Original Size, so the only way is to compress all the photos and videos to free up some storage.
Finally, I show a way to create a Google Account for storage JUST for Google photos... and set up my phone to upload and sync photos and videos with this new Google Account. We can then use Partner Sharing to share those Google Photos and Videos with my personal Google Account.
THIS IS THE TRANSCRIPT - CLICK PLAY ON THE VIDEO ABOVE!
Hello welcome back to the Happy Hut, I'm Neil and your Google drive storage is full
I know exactly how you feel because you're getting error messages like this in your Google Drive and Google photos, saying “out of storage”
Even better we're getting emails saying that Google photos has stopped backing up and even an email on Gmail to say that Gmail doesn't work!
Worse than this though is that in every single message from Google, Google is just trying to get us to do one thing and that's this - to buy storage
It's not buying storage, it's a subscription. It's a monthly fee that you and I would have to pay for the rest of our lives.
But don't worry, you and I are going to fix this right now, and we're going to clear storage in real time step by step without deleting everything and definitely without giving Google any money.
Plus when the storage works again, I'm going to show you this system that I use to avoid it happening ever again and to get free Google storage for Life!
Yes I know it's a bold promise but I think I can get you Google storage for life so stick with the video.
The first thing we're going to do is to go to Google one, which is one.google.com and this is where our storage is managed.
I'm doing this on a desktop just so it's easier to see on the screen but if you're doing this on a mobile I've put some links in the description so you can just click those and follow along.
In Google One, you can see right at the top “your storage is full” - upgrade - we're not going to do that... it's going to ask us at every point to try and buy storage but if you go down to the first box here “storage” we can click on the three dots.
That brings up this little mini menu “view storage details”
Let's click on that and we can see that on my account all 15 gigs has been used in Google photos.
Now I know yours might look differently, you might have bigger files in Gmail mail or drive but this is a place to find out where most of the storage is being used up
Let's go back and there's another box here which is “clean up space” so if I click on “view” that brings up some options of some things that we can delete...
Like this first one here: “emails in trash”. If we click on “review and clean up” these are all the emails in our deleted folder.
We could go up to the button here in the top right hand corner “delete all”
Let's scroll down to the next section: “large photos and videos”
You can select them individually by clicking on the little tick boxes one by one, or you can check this box to select all items but I've got a way to do this without deleting your photos and videos.
And it's here! I've put a link down in the description it's photos.google.com/quotamanagement which opens this page where we can manage storage in Google photos.
We can scroll down and review and delete things like large photos or blurry photos and that might help but the big option for us is down here: recover storage.
“Convert existing photos and videos to storage saver”
You might know this already but there are two ways to upload and sync your photos on your phone with Google photos... and that's to upload them as original size or storage saver size.
And it's really easy to check: firstly go into Google photos and then click on your avatar in the top right hand corner and there's an option down here at the bottom “photos settings”
The top option... this is so this is so buried! The top option is “backup and sync” and if you click on that, and you can scroll down to these three options at the bottom.
The first one is “upload size” so if we click on that it gives you the two options to choose “original quality” or “storage saver quality”
I would choose storage saver quality. I've been using this for years and honestly I can't really tell the difference and the original files if you want them they're on your phone.
Let's go back to “manage storage” in Google photos and we're going to click on “learn more” which brings up this window: “recover storage”
“Recover some storage by switching existing photos and videos to storage saver quality”
If we tick this box it's going to take all of the photos and all of the videos and make them all “storage saver size” so it kind of crushes everything in your photos down to this smaller size.
“I understand that compressing cannot be undone” and then we're going to click down here “compress existing photos and videos”
Now don't forget your original photo files are on your phone this is just for the photos and videos in Google photos.
Now don't panic, I made a mistake here. I thought I've done all of that and it's not done anything!
It looks like we are still out of storage - that's what I thought but look let's scroll back down to “recover storage” and it says “Compressing... this may take several hours” so Google is now compressing and making all those video and photo files smaller.
It's going to take some time but while it's doing that I'm going to show you my system to stop this happening ever again.
We are going to create a Google account just for our photos and videos.
I've opened up a window in Incognito or you could open a private window so that you're not logged into Google at all
Go up to the top right hand corner and click sign in and then on that sign in page down on the left hand side there's “create account”
You've got some options here, I'm going to go for “work or my business” and on this page we're going to make up a username for our photos account.
I'm calling it my lovely photos 2025.
Obviously you can call it anything you want and you can make a new one of these every year... and then I'm going click “next”
Now we can fill in these other details to help us recover this account, so now we have a Google account that we can use just for our photos and videos!
We are now going to go to Google photos on the phone and in the top right hand corner we're going to click on the Avatar, and we're going to click on the little pull down menu next to your account name, which brings up this menu
We're going to go to “add another account”
Now you have the sign in page so we'll put in our brand new photo account “my lovely photos 2025” and then we'll put in our password... and now we have Google photos on our phone, but with this new photo account.
It can see the photos on my phone.
We need to click the avatar on the top right hand corner again and choose “my lovely photos 2025” and it gives us this option: “do not back up” or “turn on backup”
I'm going to “turn on backup” and now if I click on the Avatar you can see it says “backup is on - getting ready to back up”
Basically it's now going to back up your phone to this whole new Google account that's just for your photos.
So that way you can keep it completely separate from Gmail and Google Drive and also you can create a new one of these every year of your life or every month!
While it's doing this, do not forget go to photo settings, “backup and sync”, “upload size”
They're already here by default this is how they get us!
“Upload size original quality” we don't want that!
I'm going to click on storage saver and then when we click back it's now going to upload photos and videos at that slightly smaller size so it's going to take longer to fill up the 15GB again. There's one more thing that we can do to make life much more easy for us and that's to share photos from this account with our personal Google account... or I'll still be able to see these photos without them taking up storage on my personal Google account.
If you click on the Avatar again in the top right hand corner and we'll go to “photos settings” - if you scroll down here all the way to the bottom can you see it says “partner sharing”.
“Automatically share photos with a partner”
Well I'm going to share them with MYSELF, so if I click on that option: “A better way to share with your partner” so get started!
All we'll do is type in our personal Gmail address here and then all the photos and videos will be shared with me but the photos are being stored on their separate account or any other separate accounts and I can partner share all of those accounts with my personal account.
I've been running this system for about a year now and it's working!
I'll put in the description if I hit any problems I'll put it in the description but I think this is a way to avoid maxing out your storage.
Let's go back now to Google photos, manage storage, because I know you're dying to see if this works, and yes! We did it! We absolutely did it! About one year of storage left. The 15 gigs maxed out storage - we have now cleared storage in our Google drive because we've cleared out some space in Google photos
If this video is helping thank you so much for hitting the thumbs up and the Subscribe button it means so much to me and right here are some other tips and tricks that Google thinks you'd like to see next! Can you please help my daddy get 1000 subscribers, just click on his face, thanks bye! How was that?
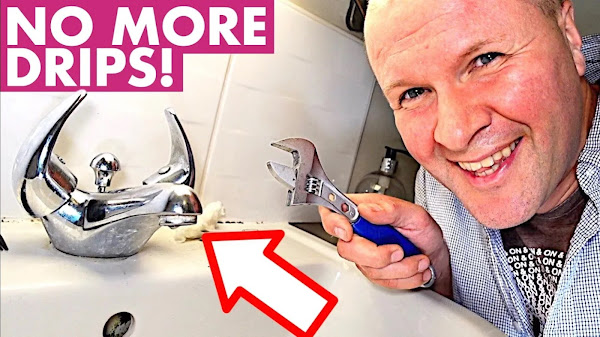
How to fix a dripping bathroom tap or faucet? Our bathroom taps were dripping, constantly leaking so I knew I had to do something like replacing the washers or O ring, but I've not done this for a very long time... So this video shows me repairing our dripping tap by replacing the whole mixer tap cartridge.
THIS IS THE TRANSCRIPT - CLICK PLAY ON THE VIDEO ABOVE!
hello I'm Neil welcome back to the dad delivers Vlog where I try something new every day to make your family happy and today we're making your family happy here!
we're back in the bathroom so we've already done the toilet seat and the toilet roll holder
that's been a big success
It’s look... it's wobbling just a little bit don't tell anyone
the seat is holding out - the Ikea toilet seat is holding out but it is kind of cracking here
so it's not wearing too well there and I don't know what we're doing to uh to cause that but fingers crossed that can hold out for another year
and today we're now working our way around the bathroom because this video is all about this!
yes it's the classic... the dripping tap
I don't know how we've managed to avoid this for so long
I knew when I started this Channel and I just wanted to record the little jobs that I do around the house - almost as proof that I do something now and again
but this... I hope this day would not come and... and it's here... it's here now the tap is dripping
obviously if I get this wrong we can expect a trip - an expensive trip - from Mr Plumber which I really really want to avoid
and that's even if you can find a plumber
we can't even find a plumber at the moment and I wouldn't bring a plumber into this situation but if I make a wrong turn or disable the tap like you know it could like drip quite more violently than it is at the moment
it means that we're wasting water which is terrible for our water bills I mean the environment
and most importantly at night the sound of this is really really annoying
but here's the thing I've not done this in a long long time like I mean like decades
so I don't know if I've even got the right tools I...
I definitely haven't got the right washer the right o-ring that we'll need inside that tap
the kids are home from school you can probably hear them in the background I've got it... [DOG BARKING] oh and that's Casper I don't think...
I don't think Casper is very happy with the kids
he... he tells them off more than we do!
he's a great dog
I think the first thing I need to do is to shut off each pipe to each tap to work out which of the Taps are leaking
maybe both of them are leaking!
and to do that I'll need to get a screwdriver - a flat headed screwdriver - come with me down to the toolbox let's try in here
that one looks like a good one the...
Casper's been chewing the end of it but I think that might be the one
back up the stairs and we're lucky because we've got... we've actually got these shutoffs
you might not have them
this is the pipe for the hot tap so I'm going to turn this so that it shuts off the water
I think if you just turn it like that... yes brilliant so that water's off
and it's still dripping fantastic!
this is really good news because it means that it's the cold tap that's dripping not the hot tap so I'll probably turn this back on and then I'll go around the other side
just get the lights
and over to the cold tap pipe and I'll turn this sideways... and as if by Magic the leak has stopped
so it's definitely coming from the cold tap which is on this side so the next thing that I need to do is to take off this thing
I don't know what do you call it? it's like an indicator
your tap obviously will be different but pop this off
I know I'm going to get qualified plumbers in the comments telling me how I'm doing it wrong which is good!
please leave me a comment and tell me how you would tackle this
well maybe I need a small... oh there it goes yeah it's just... Levering it up and this comes off like this
yeah fantastic and what's in there?
that looks like a bit of an allen key job
back downstairs to get the Allen key and good job I didn't tidy up the toolbox - Allen keys
so put the Allen key into the hole
hey it’s too big - okay so this is classic dad delivers Vlog - the actual Allen key that I need is the one that is missing
that's too big and this one's too small
gotta get back to the Allen key collection
oh you know I... I'm this close to throwing away all my Allen keys because I've got a really good Allen key set
but it's a good job that I keep lots of old ones so let's try these ones now oh man
these jobs would only take like two minutes if I did them properly
okay that's way too big
this is smaller this might be the one
my options are getting Slimmer by the minute
right now I'm going to turn... oh no it's not good
oh yeah right so this is a tip I saw once
close... put the plug in because if you drop something into the sink then that's bad news
so I've... I've hit a wall before I've even started
I've Got to Now not only get a washer and an O-ring but I've got to get an Allen key that's like this - but one will actually work
there's only one place for this
this is a place that we have in the UK called poundland
you've probably got something similar in your country if you're not in the UK where everything in the store is one pound
this is me wandering through the aisles trying to find an allen key set
and I found the DIY section and oh my goodness
this is what the one pound Allen key set is worth now
oh my God £2.50?
I don't know if things are like this wherever you're watching but the prices have definitely gone up
but anyway I've got the... the Allen key so now back home to take it apart
I was kind of hoping they would have O-rings or washers as well but they didn't
there we go, brilliant - it's going
okay this is why it's definitely definitely worth putting the plug in so you don't drop any vital bits but this is what's come out
Is that in Focus? oh it won't come off oh no... oh wait oh... oh there he's done
right so now we're into this I guess the... the washer is inside here maybe
I'm gonna try and undo this and see if there's something inside that needs replacing
this might be the most difficult part of the job because the WD-40 is in here somewhere
okay I've got this it's not quite as good because the wd40's got this really nice straw on the end of it so you can put it on really accurately and this?
this just kind of sprays everywhere
Let's give this a go
I guess it's cleaning the tap
yeah I don't even know which way to turn the bolt around
it's probably been here... I think it's been here since 1990 so it's about 30 years old
okay I really do not want this to go snap!
brilliant I'll send you a picture
all right then see in a minute bye bye
so my my Unstoppable wife is at a DIY Superstore now - she just happens to be passing - but I can't... I can't tell her what rings to get
I don't know what washers because I just can't get it open
I'm going to send her a picture of what I've got so far and we'll see how that goes
my brilliant wife did give me a tip off though that the WD-40
I don't know how she knows these things
but she said have a look in the cupboard in here
oh there it is!
how does she know these things? how do you do... how do you do that?
I'm gonna watch this with her - this video - I'm gonna ask how... how did you... how did you know this was in here?!
it's only one thing for it - I'm gonna give it one really really hard turn
I don't want it to fly off and hit me either
I did it!
I did it! look at this Dad delivers success no, no not finished yet
come closer look at it turn
magnificent - whoa there we go - I'll be able to call my wife now oh
is it in there? oh where is it? where's the washer? so it's stuck in there [PHONE RINGS]
I've got it! I've got... I've done it so now I've kind of shredded the washer that's inside, I can't get the washer out
I've got some O-rings of different sizes
oh brilliant oh tweezers! do you know a tweezer, there have been some blue tweezers hanging around yeah?
yeah I was gonna do my eyebrows, I left them in the bathroom - on the glass thing - oh yeah of course yeah I moved them all right thanks okay alright bye!
okay bye
I can't get this washer out and it's coming out in bits
there we go
oh whoa look at that! that's what we needed!
let me try to explain what happens next
my wonderful wife came home with a load of washers
none of them fit - it's just an O-ring! I just need an O-ring for this cartridge!
the next day I went to the big DIY Superstore myself
I didn't mind - it's a... it's a day out isn't it
here I am pulling up after the 20 minute journey and it's quite exciting so I go to the plumbing section to see, well I had to find the plumbing section first to see the amazing array of products that might be able to help
I don't know where to start
what my wife did get me - which was absolutely crucial - was this!
it's like a... it's like a guide so you can hold your cartridge up because obviously there are hundreds of these
you hold your cartridge onto the card and you can measure some really specific things - it's now getting really complicated!
I just want... I just wanted the O-ring
I could not see any o-ring here
I mean feel free to pause the footage - I would
I don’t know where to begin!
which means that the only thing I can do is to buy one of these!
these cartridges and I don't know which one
I mean I've done my measurements but there was only a small selection of a few on the shelf and they are 15 quid for literally... for an O-ring!
I'm gonna have to replace the whole thing
this stuck in my throat ever so slightly and I wasn't convinced that it was the right one
the extra confusion is that this is blue because it's on the blue... the blue tap because it's for the cold tap so it opens anti-clockwise and closes... no
so they only sell them in pairs and I only need one!
it just felt like I'd be buying in a panic if I just grabbed this cartridge here and... and I don't need two of them as well - I just need one for the cold tap so I got a refund for the washers, came home and I found this page here
a pair of them for... for half price so I ordered them and here they are!
They’ve just arrived - I'm very excited
now we can go into the bathroom and try this out
this is getting to be a catchphrase on the channel isn't it
what do we say
it's never easy!
I really want this done now as much as you do because look we've got pork chops!
I've gotta... I've got to do this before the chops are ready
so I've managed to tidy up and close this again... I managed to tidy up after Friday
it's now Sunday
we've been without a bathroom sink for two days
this should be as easy as just screwing this into that hole
and sorry my kids are playing electronic Monopoly at the moment so you might hear some shouting and some swears in the background sorry
I'm going to try and get some of this water out here
actually oh it's probably not a good idea using tissue oh no
oh this is trapped in here for all time
That’s clean now
let's try this
so I'm hoping this will just screw in
well it fits - I've got the right size one... oh this is looking too straightforward
then I'll get my spanner oh this is looking very promising
the next big test is to see if the tap handle fits onto this, so this has to be the right number of teeth is this gonna... this could still go very wrong
it's like Cinderella's slipper! it fits
just make sure it's straight
that's not straight oh man, now I can screw this on
fingers crossed let me take you closer
we'll get the crucial piece here and then I'll put this in right side up and I need to screw it tightly enough for the handle not to wobble
and finally I'll put the little top on for Elegance
I'll just push that on - oh
Kids?! where are you? oh there you go
kids please come see this
come see what your old man's done
how long did that take you
two days and 10 pounds
well it yeah it took a lot longer than I thought but you know, given I haven't done this before
the final thing is - maybe you could do this - can you just turn that - yeah okay quarter turn... quarter turn?
yeah which way
oh okay you ready
okay let's do... you do the cold tap, I do the hot tap oh go on, go on you do both
oh and is it dripping
I'm calling this a dad delivers success!
I win! I win!
No you don’t - I do!
you and me are on such a voyage of Discovery thank you for making it to this point and if you're hitting the thumbs up or subscribe button thank you for being awesome and right here is what YouTube knows that you're gonna love next!
we did it
Can you please help my daddy get 10000 subscribers just click on his face thanks bye! alright this is gonna be the proper one right?
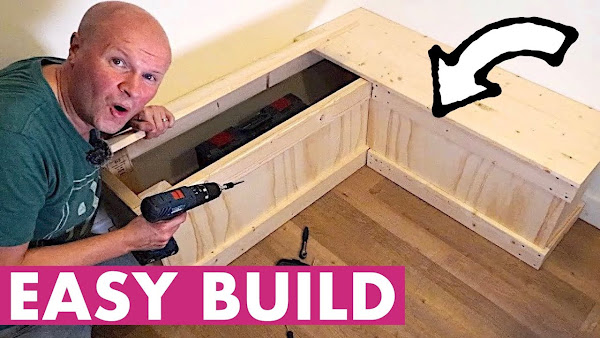
I FINALLY get the sides onto my homemade L-shaped corner bench. It's an L shape seat for the kitchen, but I only built the frame. In this video I show you how to put wooden sides onto the corner seating for a dining table.
I say it's finished, but I still need to varnish it and make a padded seat cover...
THIS IS THE TRANSCRIPT - CLICK PLAY ON THE VIDEO ABOVE!
Hello, are you looking to fill some dead space like the corner of this room in our kitchen?
Maybe get some seats or a bench in there like this!
And, even better, turn that bench into some useful storage?
Plus do it extremely budget friendly?
Well welcome back to part two of my L-shaped bench project.
This is sort of how it's looking now but in the last video I showed how I built this L-shaped bench using wooden stud work to fill the corner of our kitchen.
There's a link down in the description if you're interested in that, but it's now part two on the Dad delivers vlog where I try something new every day to make my family happy.
You know how hard that is but I think I’m making everyone happy with this corner bench.
This is more like one of my DIY vlogs but I’ve kind of left that video unfinished because as you can see I’ve got the sides not covered up.
So if we were to use it for storage everything would sort of fall out the edges.
So today this morning I went to my favourite place on earth - not really - somewhere that I seem to be going a lot.
It's another DIY superstore.
This one happens to be B&Q and I wanted to find some plywood.
I thought if I got some thick plywood I could use that to put the sides on.
It's one of these and I think I found my perfect piece of wood but as you can see it is absolutely massive!
I couldn't get that into the car even if I tried.
And I decided to use their cutting service so I planned it all out I’ve got all my dimensions on my bit of paper but first I had to get the right piece of wood!
And I saw lots of reviews online saying this wood falls apart and it's warped but actually I thought it looked great.
I just knew that the top two sheets were warped.
They looked really bent so I had to get a sheet from underneath.
I think on the footage here you can see me getting the sheet that's three sheets down - that looks fairly new.
But the only way I could get it out was by doing that magic trick you know where they pull the tablecloth off the table and leave everything standing?
Well I thought if I whipped out this giant sheet of plywood fast enough I’d be able to get it out.
But I think the footage shows quite clearly that that wasn't the best plan.
But still I tried I kept pulling tugging.
Finally after a lot of jimmying and walking around this... this truck that was left in front of it... I gave it one last push.
Managed to get it out so now I can get it over to the cutting service area.
Okay I’ve got the wood - time to get it cut now just over here!
And this is the cutting area. I don't like filming people when they're at work. It's bad enough when I do it on myself, let alone dragging other people into it, but I just wanted to show you sort of how it works.
So got it cut. Looks perfect look at it! Just what I wanted, all those. Just go to the checkout now.
I took my dad along we went shopping as well so we loaded it all up into the back of the car. Got the plywood back to the house. Now I won't need all of these bits because some of these bits are destined for the other corner of the room.
I’m going to do some shelves for the TV area that's going to be on... on the next video.
Just check with the spirit level?
Spot on!
But first I need to use these ones. These planks here that they very kindly cut up.
I hope I’ve got the measurements right. I’ve not checked it yet, I thought I’d do it on camera and share... share the joy with you.
Let me show you the basic idea.
I’m gonna hopefully - if I’ve got the measurements right - it should slot into there so all I need to do is cut the right lengths.
But let's... let's just slide it in, just to see.
Please work, please work.
Oh looks really tight... oh that's really snug, is it gonna work?
Oh yeah! Does it go in? It does look at that! Great! So all I need to do now is to cut these to length and then figure out a way to secure them... screw them in somehow from behind.
The... the wall isn't true so that's not a true L shape unfortunately.
I think I’m going to have some gaps.
That gap there isn't my dodgy measurements, that is literally how the wall meets.
It kind of comes out a bit. I managed to get four pieces cut from the board. I can only use one side because it's got this printing on it, and that one's a bit scratched.
I think I did that in the car.
This one has a load of filler in it.
This one looks okay and this one looks okay. Whoa!
I’m gonna use these two for the big parts - the long parts on the bench.
It's the first of August, it's the middle of summer and it has just started raining, so I’m going to try and get this done as quickly as possible.
One of them: I don't have to cut at all. I’m just going to run that the whole length, so if I can choose that one I think I’m going to... that's a hard choice. I think I’m going to keep this one so get that out of the rain.
Which means I need to make this one 79.2 cm long.
I really do not want to mark these pieces of wood so I’m laying out the dog blanket on our IKEA Seglaro table, just to keep it scratch free!
I know I should probably varnish it and protect it.
I’ll probably do that later on, but let's just cut it to length now.
I’m using my jigsaw and I’m trying to guide it as straight as possible.
Which is a bit tricky in the drizzle but I’m sure I can get it through there.
Casper's got his friend over!
And now I’m going to cut this piece into smaller pieces.
These will go onto the sides - onto the ends of the L-shaped bench to stop all my stuff falling out.
I’m on a bit of a wing and a prayer with these measurements because I’ve got to keep the jigsaw straight!
Hoping the chair would catch that!
Let's go and get these onto the bench.
So I’ve put one loose on already.
I want this to go on the end here.
Yes! Oh that is really satisfying.
I think that looks really good and then I’ll push this one up a bit, so that it's flush.
There like that. Completely flush. I just need to work out a way now to fix these to the bench so they don't fall off.
To permanently fix the sides onto the frames of the benches, I’m using these L-shaped metal brackets and I can't help feeling like this isn't the best or the prettiest way of fixing them on.
It is really difficult finding places to... to screw.
I can't get my screwdriver into these tiny places so I’ve got to find the right brackets and the right screwdrivers to try and get in here. So I’ve got a bit of a gap here, but it's a bit unavoidable. I think that's the closest I can get and when the lids are on... let's put the lids on... there! Finally, I got the sides on and... and oh I could do this.
Put it away and never see it again!
I’m calling this a Dad Delivers success! High five! Thank you so much for the thumbs up and the subscribes, I really appreciate it... it really helps me to keep these videos going. Videos like this that YouTube knows you're gonna love next!
Can you please help my daddy get 10000 subscribers. Just click on his face! Thanks bye! Alright this is going to be the proper one, right?