Showing posts with label Loves. Show all posts

Friday, 28 February 2025

How FAKE Lego track for my SECRET train layout helps in my Garden Office...


This is the big one! Buying FAKE Lego track to complete my secret hidden Lego City train layout around my Garden Office. Is it any good? Is it worth it? PLUS, the very first run of my Lego City Cargo train around the finished Lego City railroad track loop. I can finally build the Lego City railway from here!

How FAKE Lego track for my SECRET train layout helps in my Garden Office...


TRANSCRIPT: (CLICK PLAY ON THE VIDEO ABOVE)

THIS IS THE TRANSCRIPT - CLICK PLAY ON THE VIDEO ABOVE!

"Hello, welcome back to the Happy Hut. This is my garden office, if you've not been to the channel before. And, uh, this is a Lego City train track video because I'm in the middle of building a top secret Lego City train Railroad Railway layout. Uh, it's not so secret, 'cause you can see it on the front door, but the rest of it will be kind of hidden under the benches, behind the armchair, under there. I'm thinking of having two tiers and having two decks of tracks, but that's slightly a step ahead of where I'm at. What I'm going to look at today is, is fake Lego City train track any good? You know, the bootleg, knockoff Lego train tracks. Lego City track is perhaps one of the most expensive substances on the planet, it seems. Uh, it feels like it's going to cost the same as, uh, building HS2 here in the UK for me. But very exciting development because I looked on Amazon and discovered this. Should I open it? A little sneak peek. So I've got some fake Lego City track, but is it any good? Is it going to wreck my trains? Is it even going to stay in place? I don't know, but I'm going to open it on camera with you so we can, uh, we can compare the two tracks. Obviously, I'd really like to build the whole layout in the original official Lego Track. The cost difference is, it's so massive. Let me just see if I can compare the two now. You know the deal, if we're buying on Amazon, the official Lego City Railroad Track, the train track, it, it costs $20. It's reduced to $16, but for $20 you get eight pieces of straight track. Here's four pieces, just to give you an idea of the, the length. I put some of the flexible track on here. Uh, you get eight of these flexible pieces and four curves. Now, I don't, I don't need any curves because I've got a huge bag of Curves over there up on the wall, ready to curve me around the garden office here. But I saw this, it on Etarnfly: 60 pieces for $30, or in the UK it's £25. You get 60 pieces and they're all straight apart from the flexible tracks. This is really crude, but for double the money you get three times the track. That's just in, in terms of numbers of pieces. But what was really helpful for me is that it's just straights, and I really need straight pieces of track. And here it is. So, should we unbox this and see if it can connect to the the official track? And we'll also see what kind of quality we're, we're dealing with here. So the brand of this is called Etarnfly... Etarnfly. It's actually listed in the UK in its listing, but, uh, on the US site the word Etarnfly is kind of buried in the description. If I hold it up to the camera, this is the flex piece and it, it looks, I mean, it doesn't look far off. It's kind of got like a Dusty quality to it, which is the the same with all um pretend clutch brick play toys, where they they try and describe it without using the word Lego. Just on first holding, the the quality actually seems quite good. It clicks together really nicely. I thought that would be difficult. So I really can't see that much of a difference. So I'll hold it up so you can compare side by side. Underneath it kind of, it looks similar, whereas, uh, Lego has a shiny quality to it. The bootleg Lego has a kind of a Dusty Sheen to it, like it's, I don't know, just not, not polished. The the Lego bricks seem to just of their by their own accord, they line up where they've gripped together. So the sleepers or the ties are in alignment on the not, not Lego. I don't call it bootleg, that sounds like I'm knocking it and it's not, but on the pretend Lego it's kind of a bit wonky, which is probably where either the piece is bent or, uh, the clutch isn't quite as, uh, clutchy as it could be. And also the clutch should have a a hole in it, and some of the holes aren't punched out. So let's get going on the straights, which is the whole reason that I had to buy these, because I've got a long distance that I want to travel around the heart. So Lego on the left, uh, not Lego on the right. There's a a sprew cut from from on that stud there, but in other respects that looks normal. Sorry I'm not a Lego expert, so you'll have to help me out with the terminology. I'm sure you will in the comments. Does the official Lego Track connect nicely to the not Lego Track? So I'll put the camera up here not Lego let see if they snap together"
"Yeah, I mean, they clip together so easily. I, I can't see the difference. Let me give you a really close pan. I might have to go macro on this, but now we're not Lego territory. Hold me. I know you just, you just know, though, don't you, when you got the official stuff. This is going to be good for the big layout that I'm doing, and I have no idea if this idea to get a ring of track going around the garden office is going to last for more than two videos. I've got, uh, the previous video where we did the inaugural run of the cargo train over there, scared poor Casper the dog, but I've got that linked down in the description. Just holding it, seeing it, and clipping it together for the first time though, it seems pretty on the money. It's, it I'm, I'm glad that I bought it. I don't regret it at all, and it's great to have so much track as well. I think I'm going to tackle this side of the room first, mainly because over there I've got all my spaghetti from my PC, um, workstation, my battlestation. I think that would be quite easy. I'll just put a piece of wood up and have all the cables on top of it. So I'll make like a almost like a little tunnel over there, but I can't face doing that yet. I'll try and Tackle this. This is more of a clean with me video now, because I've got Casper's bed. I'll just pull that out. I've got a bung that I put up in the the chimney. This was a barbecue heart. I'm hoping that I can make it around the heart, so at least I'll have some kind of closure to this video. I can't leave you hanging on I've just bought some fake track, you want to see it working, don't you? So here we have my life I've never show on either of my two YouTube channels. I did half think of running you could run trains into here and have some kind of Depot under there. This is a stealth Lego City Railway. And if I fill this with track, I'm I'm going to really miss that storage space, so I think I'll just have one Loop just to start with and see if I can make it around the heart. So I'll pull this out. This is a laptop stand. It's actually quite cathartic finally cleaning this part of the heart that I haven't touched in years. And the idea with the two tiers was to maybe have a second layer here, but that would really block being able to see any, uh, train tracks underneath smooth this so I need to clean this up and we can start laying track and put the fake the not official Lego track down and see how far I can go into this corner and see if I can get it round to the back of the Ikea armchair here. I have not cleaned down here in over 5 years, if ever, and, uh, it's quite difficult removing there's quite a lot of spider home here that we're clearing. We absolutely plowing through the slum District in spider town. I am a little bit worried that once I put the Lego train tracks down that will be it and it'll be difficult to clean, but it'll add a bit of character to the hidden model railroad layout. Now I've, uh, just been down the end of the garden. I've built this really shanky, uh, there's a word for this isn't there? It's like a a tunnel that they use for stopping snow getting onto the tracks. It's just to cover the the tracks from all the leads down here, so if I install this tunnel, hopefully I can keep all the printer leads and cables just above the track level. I've now overdone it a bit and completely wrecked the heart. I know I can put it all back together again. This little tunnel has given me an idea that I could actually build a few more behind the armchair and that means I can run all my cables above the track and, uh, it's all unseen anyway, so the tunnel will help. But oh my goodness, the the spiders have kind of taken over and I I like the spiders in the heart because nothing that comes into the heart survives they manage to eat it all up, so it's really bug free in here generally. But oh, they make such a mess when they spawn. I don't if you can see that, those black marks would have had had the spider babies. So I'm going to try and clean all of this up and see if I can build a little tunnel system here. I see if I can turn this into a straight tunnel that will just be full of spiders at all times. It is now really late, so we've had dinner and I've got my son here to help me, which is it's just going to transform things. So the the happy h's not looking very happy at the moment, but I've got the box tunnel behind the armchair. So what I'm going to do now is ask my son to put together the straight bits of track and I'll add them to the official curves, the official Lego City curve track, and I'll try and clear the way ahead. I've got a try and clear a path behind the desk and sort out the cables there. I've got a fairly clear run under that bench there, and hopefully it will connect with the track that I built on the last video. At the end of this time Jump, we should have a loop of track and we'll run a train. So here we go. Go for a time Jump. Uhoh, it looks like we've lost Casper. Casper does not want any part of this. He knows this"
"Trouble. Okay, okay, so my son's gone to bed now because it's very late and he's managed to lay track all the way under. Uh, We've not gone all the way around the Hut yet, but come on, you want to see this, don't you? So, uh, let's find the Rope control. I've got it paired up, so I just take it back and this is for running it through the the tunnel. Oh, my son shot this, so he he built the track and he shot this footage of the train making it through the tunnel. He had to take the Pantagraph off the the top. I've adjusted the tunnel. I think the tunnel slipped when I pushed the armchair back. So, uh, I've adjust it now, hopefully it won't hit the ceiling. Let's see if it makes it through the armchair. Go on way you"
"Go. Yeah, now there's a, oh, I've run out of track. There is a problem here that illustrates the problem with the fake Lego Track though. Let me put some light down here. Locomotive actually derailed before it hit the end and it derailed on that curve there, on the flexible tracks. So all four wheels are properly on the track. I'm going to take it back. See if you can see on the flexi track, doesn't quite like the flexi track there. It kind of Skips over and derails. It's done that every time I've run it over those flexi tracks. I've got a couple of options here. First is I could put some kind of cushioning underneath and the second thing is I can nail the track down. I've got a feeling it's just something about the track that the train doesn't like on that curve. So I hit a problem behind the armchair here. I think the the Train's Pantagraph hit the the one of the roof boxes slipped. So I think what I've got to do is, uh, make sure I've got enough clearance. What I probably should do is to actually build something out of Lego, so that that would solve the problem, but for now I think I'm going to change the clearance so that I make sure that these wooden temporary box things don't slip and I put up a a stick of wood so that when the armchair is pushed back it doesn't disturb the height and I can see that the Pantagraph is going to clear at this level, but we'll see. I'd really like to get those Orient Express Blue carriages. They look huge. Let's go backwards full"
"Speed. Okay, I think the Tunnel of Love is a success. I don't know why I'm calling it The Tunnel of Love. I love it that's"
"Why. Ow. Frost. Okay, it's late so I'm filming this on my phone and I've got the track nearly round to where I need it to. So down here I have no idea, but I've managed to create an avalanche Gallery little tunnel here just that all my PC and this is like everything I use for my YouTube channels are protected from the track or the track is protected from the cable and this is literally all the track I've got left. I have three straight pieces and I've got a feeling I haven't got enough. I think I might be like one one track short. Oh my goodness look, so the end of the track is there coming out of the Avalanche gallery and I've got about a meter to cover. I put the the switch track the points there, so it goes all the way around the the heart completely hidden and I've just got this final section and would you believe it this this is all the track I have left. So I can put some flexi track there. I think I need to put in a lot of flexi track. I'm about four straights out. So I think the only way I can do this for now, uh, before I buy another box of fake track or maybe I'll buy the original I Don't Know But I've got all this flexy track left, so I'm just going to for now I think all of this has to be flex flexible track. Let's do a time Jump and hopefully the next shot you will see no scrub that I just wanted to show you this. I'm just about to complete the loop. You will not believe how close I am to completing the loop. So the track comes out of tunnel there and I've put some flexies in there and then put some flexi track here and look it's I am one flexible track piece over. So I've used absolutely abely every last piece of track bar this one this fake track has really helped me out of the hole there great we've done it that's the loop remote control here see if we can make history. We'll see if we can make the train go around. I'll put it on four and hopefully it won't hit a cable or something. Oh no ah I can move these cables and I'll pin them as well right so it's into the tunnel it's through the tunnel it's going under the bench it's so hidden I can't push the camera under we're across the front door that was the first phase and now it's going to go under this bench and it's going to go into the armchair tunnel will it make it out the other side yes we did it we did it I've done it"
"I wish it were lit better. I'll get you a let's get a light going hang got a nice light there. I've done it. I cannot believe after all these years of thinking about this that I finally managed to get the Lego City train tracks hidden a hidden layout all the way around the happy Hearts. It it looks really small, but it it's taken hours to try and pass this layout all the way around all the cables and boxing it in. I I just can't believe this train is doing top speed over so much fake Lego Track. The fake Lego Track the off-brand track works and it's magnificent and it has really got me out of a hole because this would have cost me a fortune to have done this with official Lego Track and even better the train runs really well over the flexi track over the flexible tracks the fake flexible tracks that's the section that has meant that I can link one end to the other and the train just Glides over it without hitch. I know what I need to do now. I need to get some kind of cork underlay I think just to help I don't mind the noise, but it would help it run more smoothly I think and I also need to now put in some some points. I can put in some station platforms and have some pass through Loops where I could put other trains. I can start buying trains now and I've got my eye on the Lego street car which I need to motorize. I am calling this a dad delivers success. Thank you for hitting the thumbs up or the Subscribe butt and it really helps me to keep this thing going and do you know what I think there might be one or two Lego train videos coming up in the future now this is running I can't believe it's still going"

Previous post...
London Tube station build for my LEGO CITY train layout! REAL TIME!


All about me, and getting these by email.

Monday, 11 November 2024

How to cook delicious CRISPY DUCK in AIR FRYER! Ninja Foodi Max Dual Zone Airfryer...


How can you cook the PERFECT AROMATIC CRISPY DUCK in an Air Fryer? 
I share how easy and quick it is to make this delicious Asian duck dish: with the correct cooking time and temperature using a Ninja Foodi Max DualZone Air Fryer for half a duck.
PLUS how we also prepare our pancakes!

How to cook delicious CRISPY DUCK in AIR FRYER! Ninja Foodi Max Dual Zone Airfryer...


TRANSCRIPT: (CLICK PLAY ON THE VIDEO ABOVE)

THIS IS THE TRANSCRIPT - CLICK PLAY ON THE VIDEO ABOVE!
Look, can you see Casper over here? Here you are—the definition of hopeful there. You could not look more pleading. Oh, Casper! Hello, welcome back to the channel! Can you cook Peking crispy duck—so it's crispy aromatic duck—in an air fryer? That's what I'm trying, and you're seeing video footage from the future. I do not know how this is going to work out. I've just edited these pictures in, and I'm doing this for the first time, and I have no idea whether this is going to work in this Ninja Foodi Max Dual Zone air fryer. The details of the air fryer are down in the description, and I've got this from the supermarket here in the UK.

Let's open it up. Obviously, wherever you're watching this around the world, it's probably different for you, but in this country—the UK—we can buy crispy aromatic duck. This is half a duck. Doesn't look like half a duck, does it? This is a half duck, and it's come prepackaged. It's not frozen; it's just chilled, and I think it's got some sauce and seasoning on it. But in the box, you get some pancakes and some hoisin sauce as well, which is lovely. But it's the duck that we need to work out how to cook.

I've said this a few times on my air fryer videos that Ninja say you do not need to preheat the air fryer before cooking. But I think with the duck, I do want the... I do want the duck to hit the heat—hit it as soon as it goes in. By the way, this is a regular feature on the channel called "Bung it in the Air Fryer," and I have a whole playlist of food that we have bunged in the air fryer. But to preheat, obviously, I don't need to bung anything in the air fryer, so I'm going to choose... let's choose roast, and, uh, I’ll put it on the highest temperature I can. Hit start.

This is just to warm up the chambers. I’d better check they're clean... Yeah, clean... Oh no, someone's had a sneaky croissant in here! Okay, we're going to have to stop that and preheat the other zone. So I'll hit on to roast, temperature, and we'll just... we'll just give it 5 minutes.

While that is warming up, it's time to prepare the veg. We could do this while the duck's cooking, but there's no time like the present. So this is my beautiful, hardworking, unstoppable wife cutting up the cucumber. She's feeling a bit self-conscious about her cutting, but it's way better than my vegetable cutting. We're just going to cut these into strips and arrange them in a nice Asian bowl, and we've managed to find a few spring onions from the bottom, right... right at the back of the vegetable rack in our fridge. We thought we had four spring onions here, but one of them doesn't quite make the grade, so in the bin that goes.

And you can't hear this with the air fryer and the music in the background, but the chomping in the background is Casper. He's having his dinner. It's good that he has this now, so he's not begging us when the duck comes out of the air fryer. Sorry, Casper, this isn't for you. And just as self-consciously as the cucumber, because we're not chefs—we're just sharing our cooking times, and you can, uh, judge our techniques as much as you like. We don't care; we're the ones that get to eat this, and hopefully this walkthrough is helpful for you if you're planning on some crispy aromatic half duck in the air fryer.

I think the basket is nice and hot now, and I have washed my hands. And on the instructions, they do say for a regular oven you need to place it skin side up. So I'll try and do that—that's the skin side up—and hopefully it fits. Oh, can you hear the sizzle? Amazing! It's exactly why I wanted to preheat it. And I'm going to put that in here... let's clear—you want to clear all of this.

You're watching this in the future, so I will put on screen now the actual time that worked out for us. But for this experiment, I'm going to put it on roast, and I'm going to dial up 400°F, which is 200°C, and I'm going to try just to start with... I’m going to try 25 minutes, but I'll put on screen now the actual time that you'll need to put it on for.

It is time to "Bung it in the air fryer!" 
All we need to do now is to hit the big start/stop button, and fingers crossed, we'll see how this comes out. Just something else that we can get ready—and that's the sachet of hoisin sauce, the plum sauce. Oh, I need the bowl. It’s going to have 25 minutes to get this ready and very elegantly prepare that for the table. More plastic bags... So now we have the sauce, and the cucumber and onions ready to put into our pancakes.

It's the final countdown now... 3, 2, 1. Let's see how it's looking! Oh my goodness, that is looking absolutely sizzling. Hoping it's coming across on camera, that is looking absolutely perfect. Now, I... I think that's ready to go, but I don't have a... a meat thermometer, so I'm going to put it in for a few minutes extra just to be sure. But I think... I think that that is looking crispy and done to me. Let's just put it in for another 5 minutes, just to make it super crispy.

It is now 5 minutes later, and let's see how it's looking. Oh boy, so putting it on for the extra 5 minutes hasn't completely wrecked it. Let's elegantly put it into the shredding bowl that I've got ready here. I have to do it one-handed 'cause I'm holding the camera. I was always told it’s good to let the duck rest for, uh, 5 minutes before shredding, so I've given it a few minutes.

It's shredding time! I've got my two forks—let me put the camera up here—and then I'll just use the forks to open it up, and wow, that... looking at absolutely... perfect.

Look, you see Casper over here? You are the definition of hopeful there. You could not look more pleading.
Oh Casper... 
Let's get this delicious duck into a pancake. I... I've waited far too long for this, so I've microwaved the pancakes, and I'm just putting on some hoisin sauce, ready for the cucumber and the spring onion. 
I know I'm just doing this in a rush. 
Uh, on goes the duck, and food preparation when I'm actually dying to just get it in my mouth is not my forte.
Okay, not... not the most elegant pancake in the world, but it's just for a quick test... 
oh my goodness.
I am calling this a Dad Delivers success! 
I hope this helps you cook duck in the air fryer. 
I need to clear my mouth. 
I am calling this a Dad Delivers success! 
I hope this helps you to make crispy aromatic duck—Peking duck, half duck—in a Ninja air fryer. And thank you for hitting the thumbs up or the subscribe button—it really helps us to keep this channel going. And right here is what YouTube knows you are going to love watching next. I want to eat this. 


Previous post...
LG Instaview American Fridge Freezer GSVV80PYLL | How we found our perfect fridge!


All about me, and getting these by email.

Monday, 26 February 2024

PERFECT Air Fryer STEAK with easy Chimichurri sauce: Ninja Foodi Max airfryer recipe!


How can you cook the PERFECT steak in an Air Fryer? 
I share how easy and quick it is to sizzle a medium rare fillet steak using only a Ninja Foodi Max DualZone Air Fryer. Plus I turn it into the ultimate Steak Sandwich by also cooking a ciabatta part-baked loaf in the air fryer and make a delicious easy Chimichurri sauce recipe to drizzle on the steaks. I was worried about the airfryer drying out the steak, but with these recipe tips you'll have juicy steaks in no time!
If you're looking for steak recipes or ideas for air fryer snacks, this could be the video for you!

BUY a NINJA FOODI MAX DUAL ZONE 9.5L 10 quart Air Fryer HERE! (Commissions Earned) 
BOSCH MAXOMIX HAND BLENDER here:
🧂Buy OXO GOOD GRIPS salt and pepper pots here:   ðŸ‘‡ðŸ‘‡ðŸ‘‡ðŸ‘‡
🥄 Buy MEASURING SPOONS here: 👇👇👇👇
Buy SILICONE TONGS here:   ðŸ‘‡ðŸ‘‡ðŸ‘‡ðŸ‘‡

PERFECT Air Fryer STEAK with easy Chimichurri sauce: Ninja Foodi Max airfryer recipe!


TRANSCRIPT: (CLICK PLAY ON THE VIDEO ABOVE)

THIS IS THE TRANSCRIPT - CLICK PLAY ON THE VIDEO ABOVE!

I know what you're thinking. How do you cook a steak in an air fryer? I don't know because this is the very first time I am cooking this fillet steak in this Ninja Foodi Max Dual Zone air fryer. 
I'm hoping that this footage that you're seeing is obviously from future me, and I'm... I really hope that it shows the steak as delicious and medium rare. 
I need it to be juicy because I'm serving it on a wholesome ciabatta bread which was part-baked, but I've also cooked this in the Ninja air fryer. And on top of that, I'm drizzling this homemade chimichurri sauce. It's an Argentinian, uh, what would you call it, a marinade? It's just a... a gorgeous green sauce that goes well with the steak. 
This is the most expensive meat I can cook in the air fryer. I need it to come out tender and to be cooked through, and this is the fillet steak. It's left over from my birthday. I don't usually eat like this, but it means that it's a really super special snack that we can bung it in the air fryer! 
Now usually, I would dry fry this in a pan. Thanks, got my son on camera today which will really help, but if you have no access to a pan or barbecue, this is going to be a great experiment for the air fryer. Over here, my biggest worry is the steak drying out, so I'm going to try these things to take advantage of the Ninja air fryer: the small compartments and rapid heat to make this the best air fryer steak. 
This steak is super expensive. It's the best fillet steak, 170g or 6oz. It's not even a half pounder. And I know if you're watching this in the States, you think this steak is tiny. I get it. I get it. But that's how we roll here in the UK.
So, you don't have to do these things, but the... the first thing I'm... I've done is to take it out of the fridge and I've let it rest for a few hours at room temperature. 
It means that it's a few degrees that the air fryer doesn't have to cook. This and it will mean that it cooks more evenly. Now, I need to get some oil, so the second thing... oh, I've... I've lost count of the numbers. Where's the oil? Oh, here it is. The next thing is to season the steak. So, I'm just going to put on a bit of oil, and we need the salt and pepper. So here we've got the Oxo Good Grips salt and pepper grinder. 
If you like the look of these, I'll put a link to them down in the description. 
So putting the oil on helps the seasoning to stick to the steak, and it also, hopefully, will help it to char a little bit so we get, uh, some nice charring.
The next thing, it's not essential, but I think it will help, and Ninja say if you've got a Ninja air fryer, they... you'll know that they say in the instructions that you don't need to preheat the air fryer. 
But this is steak, and I really want it to sizzle, and I don't want the steak to warm up and get dry warming up. So, I want it to hit the air fryer at the right temperature. 
I'm going to dial up air fry and 450° Fahrenheit or 240° Centigrade, and I'm going to do this for 5 minutes just to preheat the basket.
And while we're preheating the basket, I'm going to later on use a chimichurri sauce to drizzle on the steak. 
This is how I make the chimichurri sauce. Ah, we start with some cilantro. 
Uh, we call it coriander here in the UK. I'm just going to take a big super big handful. Let’s try that much. Everything else will be measured, but I'm going to just wing it with the herbs or herbs as we call them. 
Parsley - with this, we need slightly less than the cilantro or coriander so it's about 2/3 as much as the coriander or cilantro and push it down. 
I'm using a Bosch MaxxoMix blender, and I've got a review, a whole review, and details of where you can get that in the description down below. This next one I... I can't say it. I can't say the word oregano. I grew up calling it oregano, that's what we call it in the UK. 
So, I'm trying to U.S. it up for you, I promise. So here's some oregano, and we need one tablespoon of oregano. 
Wasn't he one of The Wombles? Oregano? 
So it is weird that I'm being precise with all the other measurements, but it's the only way I can get an idea of what's going in. 
I'm going to microplane two cloves of garlic, try and miss the middle bit, the spindle that's where the motor is going to go. 
Next, I need 1 1/2 teaspoons of chili flakes. Oh, these are great as well. See if I can put these in the description. They just save me because they're all labeled. Don't if you can see the embossed cuz I'm really rubbish at the whole tablespoon teaspoon thing. Next up is red wine vinegar, and we will need three tablespoons of red wine vinegar. 1, 2, 3 in they go. 
Only a couple more ingredients. I need salt, finally, olive oil. I think you're supposed to use extra virgin olive oil. You need 200ml which is 3/4 of a cup. In that goes. I'll just drizzle it around the side there. All the olive oil that's left in the house is going into this. So this has better be good. Clip on the Bosch MaxxoMix, and it's easy to get carried away by this. 
I don't want to stop, but I think it might be best to not crush it too finely so you've got some nice big chunks of leaf that will go onto your steak. 
I think I'm probably overdoing this, but I just love using this hand blender. 
Oh, look at this, whoa, that looks lovely. I think I probably would have ground it a bit less finely, but this is how it looks. 
That is going to taste gorgeous. 
Tastes so good with the steak.
The basket is preheated so it's while it's hot, if you dive down have a look. If I lay the steak down it should, oh, could you hear that? 
And I might, should we just sear both sides? 
Let's just turn it over. Oh my goodness, this is going to be really good, isn't it? 
Right, it's time to bung it in the air fryer! 
We are going to dial up air fry and can you hear the urgency in my voice? 400°Fahrenheit, 200°Celsius and just to get started for one side  I'm going to go for 4 minutes and hit start. This is going to be good. Look at that. Oh my goodness, oh. So, we're going to flip this over. I have a fork, okay, it's kind of stuck, but the oil has stopped it like really properly sticking. Flip it over. Now let's put it back in. Now, this is up to you for your air fryer if you want it medium or rare you'll have to gauge it so I'm going to go for air fry 400° Fahrenheit, 200° Celsius and I'm I'm going to go for another 4 minutes, I think. Let's see. Oh, while... well, while we're doing that we can get the... the bread ready. So obviously, you don't have to do this, but I'm going to go for some part-baked... part-baked? part-baked ciabatta and I'm going to take half the loaf, I think. So, we're going to use the second basket air fry and we'll go 400° Fahrenheit or 200° Celsius and I think I'm going to try 7 minutes and I'm just going to bung it in the air fryer. You don't want to do both, no? My son has just said, can't we do both and I think he's right. So, let's bung it in the air fryer. Two loaves of ciabatta, here we go. 
Oh my goodness, look at that, absolutely stunning. Oh, let's get it on the plate and these will be Beauty shots. There we go, you got nice Beauty shots there. 
Oh, you see the sizzle? Let's put it on the chopping board. Yeah, let's put it on the chopping board to rest. Oh, should we cut into it? 
And now we're ready for the ciabatta. Yes, I had to guess it with the times, uh, yeah, I think that's perfect. It's really hot though, I'm going to cut it open and we'll just open it up and oh, the bread looks good, the bread looks ready. So now, let's put some of this steak, well, I've got to try and get as much steak in as possible cuz my son's going to get what's left over. So, let's see how many slices can I cram onto this half a loaf. 
That is looking absolutely stunning. 
I can't wait to eat it, but I have... I have to wait, I have to wait. Let me give you some beauty shots of how this looks if you want it just like this. This is how the steak comes straight out of the air fryer. 
But we've got the Chimichurri sauce, haven't we? So here comes the Chimichurri, let's drizzle it on and ah... I wish I could convey the bite of the... of the parsley and the cilantro or coriander garlic and chilli all mixed up. 
We'll just drizzle some of this on. I've probably gone a bit too overboard with the Chimichurri sauce, but I haven't got any butter on the bread so we're using the sauce to uh, to make it really uh, nice and moist. 
This steak looks absolutely juicy by itself but with the sauce, I think this is going to be the real kicker.
Time for the taste test. This is going to be the ultimate air fryer snack. Let me show you what what I'm going to see as that heads towards my mouth, here we go. 
Oh my goodness, it's perfect, absolutely delicious. 
This is the ultimate air fryer steak sandwich. 
Look at it, it's still oh, it's so warm because the bread's warm and the steak's warm, this is absolutely heaven in a bun. 
I am calling this a dad delivers success! 
If you want to see more of our bung it in the air fryer videos they're on screen now or down in the description thank you so much for hitting the thumbs up or the subscribe button it really helps us to put more things into the air fryer so thank you and right here is what YouTube knows you are going to love watching next. Air fryer snacks!


Previous post...
Best Costco SAMSUNG American Fridge Freezer? RH68B8830S9 review tour! In Costco!


All about me, and getting these by email.

Wednesday, 15 November 2023

Best dehumidifier reviews MEACO ARETE ONE Dehumidifier and Air Purifier


Buy Meaco Arete One 18L Dehumidifier HERE! 
(I earn Amazon commissions from qualifying purchases)
Buy BUDGET SilentNight Dehumidifier HERE:
Buy HUMIDITY METER here:

This is our BEST dehumidifier from Amazon from all the reviews: the MeacoDry Arete One 18L dehumidifier and Air Purifier. This is a full review of the low energy Meaco dehumidifier. It is also very similar to the 15L, 20L and 25L dehumidifiers, but this model seems exclusive to Costco. I show you where we place this dehumidifier in the room or bedroom; how much it reduces humidity and mould in our house and for drying clothes; unboxing and first impressions reviews; and how to use the Meaco dehumidifier control panel. It was easy to follow the instructions which I share step-by-step in this video, with review of the Meaco Arete One at the end.

Best DEHUMIDIFIER on Amazon! MEACO ARETE ONE 18L dehumidifier and air purifier


TRANSCRIPT: (CLICK PLAY ON THE VIDEO ABOVE)

THIS IS THE TRANSCRIPT - CLICK PLAY ON THE VIDEO ABOVE!
We have had this Meaco Arete One dehumidifier and air purifier for over a month now, and we absolutely love it. I'd even go so far as saying this is the best dehumidifier that we can find right now. I'm going to show you everything about the Meaco Arete One: how it comes out of the box, how the control panel works, plus where we've been using this dehumidifier around our house. I'll give you a full review at the end of the video because the new thing I'm trying to make your family happy is this Meaco Arete One 18L dehumidifier and air purifier. For us, we're not rich, and this seems like an insane amount of money to spend on anything, let alone something that just sucks water out of the air. But we've got a really big problem with mold around the house. Here's some footage of our greatest mouldy hits. We've got it everywhere. Here it is in the hallway behind the coats. I put up these boards to make the walls warmer, and now they just get covered in mould. I even found some behind the brand new benches I was building in the kitchen. There's a whole video about this down in the description. I'm using Milton sterilizing fluid around the house to kill the mould spores and clean up all the mess that it leaves.
As you know, if you're looking up this video, the mould just finds the coldest parts of the house, wherever they are. The water vapour in the air condenses, and mould grows in those cold places. The worst patch that I found in the house is right here on the ceiling of my daughter's bedroom, and that's when I made my last dehumidifier video. It's a small budget one for under $80 or £80; there's a link in the description, and it works really well directly collecting about a litre a day in the bedroom. 
But I know that we need something much bigger, a more major solution to bring down the humidity in the house.
I bought this relative humidity meter on Amazon and put it up in her room. 
It has gone up to 83%, and the advice from the health executive is that it should be around 30 to 60%. 
So, because of that and the mould, we know that we absolutely had to buy this: the Meaco Arete One 18L dehumidifier and air purifier. 
We saw it purely by chance in our nearest Costco; the dehumidifiers were all sold out last year on Amazon and John Lewis here in the UK. 
We saw it on the shelves, and money is really tight, but I don't think we could face another year of cleaning mould off our coats and walls. 
What else could we do? 
Well, I... I did not think we'd pick up a humidifier today, a dehumidifier. 
We came in for some lemons! 
So we bought it! 
I can say it is without doubt the best thing we have bought this year. 
I'll give you a full step-by-step review at the end of the video, but this is how much water we are removing every half a day. 
Look at all of that every 12 hours; that container fills up, that's about 5L.
The house feels drier and warmer within about a day of plugging it in, and it removes a lot of water from the air in the first week. 
We think it might be drying out the whole house: the walls, carpets, gaps underneath the house, and between the walls. 
The place just smells better, and it might be in our heads, but our home definitely feels less damp.
Let's open up this bad boy.
This is the Meaco, the MeacoDry Arete One! 
And Meaco have called their brand "Meaco Dry," which I've not heard of before, but I love this "Excellence in all things." 
They've even given themselves a Japanese-style overblown sentence of a mission statement because this is actually made in the UK. 
Well, no, it's not made; it's designed in the UK. It's made somewhere else. 
But we've got a nice Union Jack there. Let me give you a quick spin around the box so you can see exactly how the Arete One 18L dehumidifier arrives.
The box is quite stylish, isn't it? 
It feels quite heavy, quite substantial. 
I'll put the weight of this particular unit on the screen now. 
Here we go. 
We're in the UK, so obviously it comes with a UK plug. 
And there is a pack of, oh, look, there's a filter that comes with it. We'll have a look at that. 
It says it's a free HEPA filter. 
And then there's a bag of instructions. 
It's quite nicely presented, but oh Meaco, come on, how big is that text? 
That must be only 10-point text. 
It wouldn't kill you to make the instructions bigger, would it?
The sides are taped up so that they don't fall off, so we'll pull these bits of tape off for our first impressions unboxing. 
And then, at the top, there's a sign here: 
"The handle is below this label. Please lift the handle by pulling upwards with one hand at each end," 
Which means... I can demonstrate it one-handed because I'm holding the camera. 
You kind of lift each one at the same time, and that's your carry handle there. 
That's quite sleek, isn't it? 
Oh, I'm not sure I want to lift it, though.
So that's a nice touch. 
And then we have the control panel, which is flush and all wipe-clean. 
If I use the handle to tilt it up slightly, you can see the roller castors underneath. 
I don't want to lay it down because I don't want to scratch it, but there are four castors, so it should glide across most floors. 
Let's turn it around. 
This looks like a really well-built, substantial unit. 
I really like how it comes out of the box. 
It looks good.
Here's the, I guess, this is the bin, is it, for catching the liquid, and helpfully, there's a circuit diagram in there. 
That's very... That’s very thorough, isn't it? 
I won't be consulting that. 
The power cable, the cord. 
Let's get that out. See how long that is. 
It looks like it's about 2 metres. Yeah, I'd say it's about 2 metres long. 
Very generous. 
And there's this cord storage thing that you can wrap the cable around when you are storing the dehumidifier.
At the back, oh, this slides out. 
Oh, look at that. 
So, I guess this is the element. 
I've opened up the HEPA filter, and I'm going to put this into, I guess this is the filter holder. 
I haven't read the instructions yet, but I'll put on screen if this is wrong, and then you slide this in. 
I guess there's only one right way to do this, and that clicks. 
So the filter is held in place.
There's a user-friendly display, one-touch ease of use, contemporary controls. 
It's sleek and unobtrusive. 
The side air intake allows the dehumidifier to sit discreetly against the wall. 
It looks like Eva from WALL:E to me! 
You can easily clean the filter from the side without moving the unit. There's a cable tidy to keep wires out of the way and tangle-free. A hidden handle for sleek lines along the top. 
There's a large window which lets you see the water level really clearly. 
Water can be emptied from both the left and right-hand sides. 
Oversized ergonomic handles make it easy to remove the water bucket, and castors underneath are hidden behind feet that help the dehumidifier blend into any room.
Let me show you how the control panel works. 
If you're thinking of getting the Meaco dehumidifier, it will give you an idea of the different things you can do with this. 
It looks complicated, but it's simple once you've used it a couple of times.
This is how the control panel looks for the Meaco dehumidifier. 
To turn it on, obviously there's a power button here, and it says 52. 
That means that the relative humidity at the moment in the room is being sampled at 50, now 56... 
The numbers are jumping around because the dehumidifier is sampling the air. 
I think it does this for about 10 minutes, so the reading on the display here will jump around for a bit while we get the dehumidifier started.
The most important button on the... on the whole unit is this button here with the icon showing a drip. 
This is called the smart humidity mode button. 
By the way you can probably hear it in the background: I hope that's not too distracting. 
This button is crucial because this is the reading of the humidity in the room at the moment. 
If I press the smart humidity mode button once, that enters smart humidity mode. 
And in this mode, the dehumidifier will default to a target humidity of 55% relative humidity and a low fan speed. 
So if I press it again, that shows you that the target humidity is 55%. 
Once the target of 55% has been reached, the dehumidifier will stop, and every 30 minutes the fan will kick in to check the humidity level and the dehumidifying indicator will turn off. 
I think that's this light here.
Night mode can be set while the dehumidifier is in smart humidity mode by pressing guess what: this moon icon here. 
This is the night mode button. If I press that, I'll just show you what it looks like and I will explain it properly in a minute, but the light comes on, all the lights go off so that you can get some sleep and you haven't got blue lights in your room at night.
The fan speed - you probably can't hear it - I tend to not notice it - but in night mode, the fan speed will be reduced to low. 
The buttons won't bleep when you touch them, so if I press this one, you can see it’s... or hear that it's silent, and all the lights on the display will turn off. 
Let's take it off night mode by pressing the night mode button. 
If I press it again, you can see the light flips over to the smart humidity mode.
We can set the dehumidifier to reach a target that isn't 55%. 
All I need to do is to keep pressing the smart humidity mode button, and you can see that it cycles through these different relative humidity percentages: it goes 40 all the way up to 70. 
If I press it again, it goes to CO. 
CO stands for continuous, so it won't have a target humidity to reach; it will just keep running come what may. 
If I press it again, let's set it to something like the default 55%. 
Once you've set the desired target humidity, it shows on the display for 5 seconds, and then it changes to the current humidity level that it's reading in the room.
The great thing with this mode is that once it's reached the target humidity level, the dehumidifier will stop. 
If I go back to the smart humidity button and hold it down for 2 seconds, AP shows on the display. That stands for air purification mode. 
Now air purification mode means that the dehumidifier has turned off (so that light has gone off and the air purifier light has come on). 
The unit is now just purifying the air, and I can feel that it's a nice jet of cool air coming out. 
It's not dehumidifying, so this might be useful in the summer months when we don't tend to need to dehumidify the room. 
To take it off this mode, we just hold down the smart humidity button for 2 seconds, and it goes back to dehumidifying the room.
By the way, if this is helping you, thank you for hitting the thumbs up button! Let's see some more.
The thing with the air purifier is that it's always air purifying. 
It's always purifying the air, either with the dehumidifier or without the dehumidifier. 
The other big button is this button here with the T-shirt icon on. 
Should we press it? Let's press it. 
You can see 35% appears. 
This is Smart Laundry Mode. 
When it goes into Smart Laundry Mode, the dehumidifier defaults to a target humidity of 35% and a high fan speed. 
I can definitely feel that with my hand right now. 
Smart Laundry Mode runs for 6 hours. So, if I press the T-shirt button again, the Smart Laundry button, this shows SL, that it's in Smart Laundry Mode. 
If I press the T-shirt button twice, this shows the number of hours left for the Smart Laundry Mode, so this “06”, that six there means there's 6 hours remaining. 
And obviously, it'll count down all the way down to zero
If the dehumidifier reaches a humidity level of about 32% before the 6 hours is up, the compressor turns off to stop the air from becoming too dry, but the fan does continue to run. 
We can put the dehumidifier into Night Mode even though it's in Smart Laundry Mode. 
Naturally, we'll just press the Night Mode button, and the fan speed is now reduced to low. The buttons won't bleep, and all the lights on the display will turn off. 
So, now we're back into the regular dehumidifying the room mode. 
Child Lock is the Night Mode button here. 
You can see there's a little picture of a lock beneath the moon icon. 
If we hold down the Child Lock button for 2 seconds, and it just means that you can't interfere with it by pressing any of the buttons. 
To turn off Child Lock, just hold down the button for another two seconds. 
Once the dehumidifier is full, it stops. 
It does have a hose attachment so you can just have it empty itself as it goes along. You can use the water for plants which are not edible, and you can't drink the water. It stores about 4.8 litres. 
It has this really helpful carry handle – I mean, it's crucial because this unit is 18 kg. 
And, here's some footage of me niftily lugging it up and down the stairs to the upstairs and downstairs landings. 
And of course, there are the caster wheels underneath which are hidden so it can slide and glide across the floor on hard floors and carpets. 
There's a HEPA filter; it is an air purifier. It purifies the air as it dehumidifies.
We'll have the review now, and thank you, by the way, for hitting the thumbs up or subscribe button if this video is helping you. 
Here is the full review. 
I am calling this a dad delivers success! 
It's magnificent. The air feels drier. 
My unstoppable wife says that she's not walking around hunched; you know when it's cold and damp, you put your shoulders up around your ears? 
The dry air, I've been told, is easier and quicker to heat, and cheaper as well because humid air carrying water needs more energy to heat it up, apparently. 
So, it feels like the house heats up quicker with the dehumidifier on, but we don't know if that's in our heads. Either way, it definitely feels better.
I really like how the air comes out of the top of the dehumidifier. 
It's not a heater, but the airflow that comes out does feel nice and warm, which helps. 
I know you're going to ask me about the noise; it's like a low whooshing sound. 
I'll just pause for a moment...
[FAN NOISE]
My microphone probably filters it out or boosts it, so the sound on this video probably isn't that useful, but it is like a low white noise. 
We've had this in our daughter's bedroom, and she slept right through it, though she does sleep through absolutely anything. 
I don't think I can sleep in the same room with this overnight, but you can have it running in another room or corridor or hallway if you're lucky enough to have one. 
For me, it's been quiet enough for that. For what it's worth, I don't notice any noise difference in night mode, even though the fan speed is meant to be lower.
And I know you want to know how much power this thing uses. 
Meaco says its power consumption is 250 watts, so that's 6 kilowatt-hours per day or 6 units of electricity if you leave it running all day. 
We've left this running for the first couple of weeks to dry out the house; that's in October, so I'd hope the summer had kind of dried it out anyway. 
I've looked at our electric meter readings, and I think it is using about six units per day, so that might affect how long you want to leave your dehumidifier running.
I cannot recommend the Meaco Arete One dehumidifier more highly; it is fantastic. 
And if you want to see it on Amazon, there are links in the description. 


Previous post...
How to fix Phone Storage FULL problem with Google Photos full drive


All about me, and getting these by email.

Tuesday, 7 November 2023

LOFT TOUR! Which retro gadgets are up there???


This is a weird video, I know. But a friend wanted to know if I had an old amplifier up in the loft he could borrow. What better excuse than to take you up there with me for an old fashioned YouTube Loft Tour!

Come along for this exciting trip up into the attic where my electronics go and have a rest...

LOFT TOUR! Which retro gadgets are up there???


TRANSCRIPT: (CLICK PLAY ON THE VIDEO ABOVE)

THIS IS THE TRANSCRIPT - CLICK PLAY ON THE VIDEO ABOVE!

hello Gordon uh it's lovely to hear from you so you need to find a uh Hi-Fi amplifier I think I've got something just for you um you said you'd like it to be midi size now I can't remember if midi is like the um you know like the width of those awful all in one Hi-Fi systems you know from amstrad you know that kind of width or if midi is like the standard width you know there's like the width of a video recorder so I'll just get my dog let's put in now the first hurdle I've got is I've got to go into the Loft and Casper hates me opening The Loft ladder so let's see if uh if doggy goes nuts uh when the Loft opens no no he's on standby he knows he knows what's happening but watch this so I've lost the stick to open the Loft that's problem number two so use this baseball bat here we go right what's the dog here we go

so I need two hands

I'm not being attacked it's all right

I don't know why oh and foolishly I didn't turn the light on on my camera so we're gonna go up uh hang on okay I can't use the ultra wide lens with the light so this is probably really close to me now and here we are in the the Field of Dreams uh Harvest what can we Harvest I've got a feeling it's in this one so here's all my model trains and I think I've got all my life at the BBC fit into one box over there but all my electronics was... are here what's this so

I've got a cassette deck I've got mini disc player but this is this what you're looking for um I tried to get my son interested in this and he just does not want to know he wants one of those graphic equalizers like they had in Ferris Bueller's Day Off you know with the lots of buttons and the dancing LED display I think let's get this out

so is this what you're looking for Gordon because this this is absolutely brilliant there's a little graphic equalizer here which obviously you won't need um and it's got two outputs for speakers I'll show you around the back in a minute so you push them in to engage so that's you can have two sets of speakers obviously it's on off I've not used this in 20 years as well you can balance it left and right here oh that's uh hopefully you won't get any crunch there and I'll set it to the middle and then you've got three inputs as well so I can do that oh it's a Sanyo a JA350a and you can do a direct monitor of tape Source by clicking that in

there's a high filter and loudness I think that just gives it a bit of a boost and volume control here and then these LED lights dance up and down uh with the volume and then on the back we have so a a and b speakers left and right

regular just hardwired plug and then we have these phono inputs so I've got phono for a record deck and I'm I'm wondering if that's what you might need it for tuner, aux and record and play for the tape source is this is this what you need Gordon this is what I need to know is this or maybe it's just for um maybe just doing some DJing on the beach um setting up some kind of sound system I've got a much bigger amplifier so I should show it to you shouldn't I just think just in case uh I'd have to find it though so I might pause oh yeah by the way you know because you like old stuff look this is my I did look for the the very old Apple Mac I've got a very funny feeling I might have sold it 10 years ago um between some freelance gigs I don't know but look this look at this look you'll love this so in here is a bag of every mobile phone that I've owned ever I've got the um do you remember this this was a um so you didn't want to do any work today did you um

that's that's a bag sorry I just want to show you this camera um I don't think it works anymore it's a flip camera do you remember the flick cameras um you just literally press record there and if I pull this button from memory you just stick it in it's a USB so it looks terrible because the the plastic is kind of decaying it's a bit of a shame isn't it but look at all these flow oh look at all these phones are my favorite phones um

I thought I had my phone that opens up into a keyboard um that's in another bag and then I've got a really super old orange 5.1 that I bought off eBay about 10 years ago because I knew it would be a thing

I'll show you this just for the fun remember this Oh Happy Days Sim got mild case um anyway so that's not that's not why you called cooler uh trying to remember which box this might be in here we go let's try so I'll pause the video and I'll see if I can find the other amplifier

this isn't the amplifier but I thought you might like to see it this is my old mixer that I used to do mixtapes in my room too um I don't think it's working anymore why why am I keeping all this Gordon

okay okay I've found it underneath the Christmas tree I've got this look at this CD this CD players like the one at UKC radio um I got it from that auction from the from TV Centre when TV Centre was sold off um it's not that good actually because the button's quite sticky but underneath it I don't think I think you'd prefer the Sanyo one but this is my other amplifier it's a Sony three and it's huge it's a beast and there's a Dolby Pro logic sorry about the focus um system with auto input balance and you can you can put video into it as well as audio but it's really heavy so this would not be fun to bring to uh to Brighton but if if you prefer this one hang on pause it and we'll see the other we'll see around the back and here we are around the back my goodness you must have an amplifier like this surely for your um so I'm really curious I'd love to know what you need this amplifier for but just in case this one is of use you can put videos into it LD Happy Days uh video three video two video One video monitor and then phonos and it's got these phonos in and these outputs but I'm sure your amplifier would be much better than this one so here's the question is any of this any good love your work see you soon can you please help my daddy get 10000 subscribers just click on his face thanks bye all right this is going to be the proper one right?

Previous post...
How to fix a toilet that won't stop flushing... Continuous water flow into the bowl...


All about me, and getting these by email.

Sunday, 5 November 2023

Best dehumidifier reviews MEACO ARETE ONE DEHUMIDIFIER 18L HEPA Air Purifier


Buy a MEACO ARETE ONE DEHUMIDIFIER HERE! 
(As Amazon Associate I earn from qualifying purchases)

This is my unboxing and first impressions review of the Meaco Arete One 18L Dehumidifier and Air Purifier we bought at Costco. I think it's a Costco exclusive because the other Meaco Arete One dehumidifiers are 15L, 20L and 25L. We absolutely love this dehumidifier... but the video concentrates on unboxing the unit and its advertised features, my full review covers how this works and how we're using this now (link above!)

HOW TO ENGRAVE A MACBOOK PRO


It's quiet enough to run it in your bedroom, but I find it a bit too loud so run it in the hallway. It is big enough to dry out a regular house... In the first week we had to empty the 4.8 litre collection bucket about every 6 hours, though this goes down over time.

The power rating is 250W, which is about 6 kWh or 6 units on the electricity meter if you run it all day long.

The whole house feels dryer, and it's early days but we think it's already really helping with mould in our house caused by high humidity. For us this is the best dehumidifier.
We've used it in the hallway to reduce humidity, and in a bedroom to really prevent mould, and in laundry mode for drying our clothes: this Meaco dehumidifier is working absolutely brilliantly. We have no regrets - if we do, I'll come back here and change this description.
Hope this helps in your search for best dehumidifier reviews!

TRANSCRIPT: (CLICK PLAY ON THE VIDEO ABOVE)

THIS IS THE TRANSCRIPT - CLICK PLAY ON THE VIDEO ABOVE!

Hello, I'm Neil, and the new thing we are trying is this Meaco Arete One dehumidifier. 
It is absolutely magnificent. 
We've had this for about a month now, and it has taken so much water out of the air. 
It really feels like it's drying the actual building out.
You might have this problem too. 
We have really bad patches of mould in our house. There's some footage of me cleaning up the latest batch. But since getting this Meaco dehumidifier, the air feels drier. The whole place feels warmer all the time without that damp air lingering around. 
I paid for this with my own money. I actually bought this. So this is an honest review. 
I’ve made a full review of the Meaco Arete One dehumidifier: there’s a link down in the description.
This is the unboxing, the first impressions review, so you can see what this looks like straight out of the box.
We saw it purely by chance in our nearest Costco. 
The Meaco dehumidifiers were all sold out last year. We saw it on the shelves, and money is really tight right now. But I don't think we could face another year of cleaning mould off our coats and walls. So what else could we do? 
Well, I did not think we'd pick up a humidifier today! 
A dehumidifier! 
We came in for some lemons. 
Let's open up this bad boy.
This is the Meaco, the MeacoDry Arete One, or is it Arete One, arete petite! 
And Meaco have called their brand "Meaco Dry," which I've not heard of before, but I love this "Excellence in all things." They've even given themselves a Japanese-style overblown sentence of a mission statement because this is actually made in the UK. Well, no, it's not made; it's designed in the UK. It's made somewhere else. But we've got a nice Union Jack there. Let me give you a quick spin around the box so you can see exactly how the Arete One 18L dehumidifier arrives.
Let's open up this bad boy dehumidifier and see how the Meaco Arete one comes straight out of the box. 
The box is quite stylish, isn't it? 
It feels quite heavy, quite substantial. 
I'll put the weight of this particular unit on the screen now. 
Here we go. 
So, a lot of plastic wrapping. 
Hello, future Neil. 
I know this is how we used to live. 
We're in the UK, so obviously it comes with a UK plug. 
And there is a pack of, oh, look, there's a filter that comes with it. We'll have a look at that. 
It says it's a free HEPA filter. 
And then there's a bag of instructions. 
It's quite nicely presented, but oh, come on, how big is that text? 
That must be only 10-point text. 
It wouldn't kill you to make the instructions bigger, would it?
The sides are taped up so that they don't fall off, so we'll pull these bits of tape off for our first impressions unboxing. 
And then, at the top, there's a sign here: 
"The handle is below this label. Please lift the handle by pulling upwards with one hand at each end," which means I can demonstrate it one-handed because I'm holding the camera. 
You kind of lift each one at the same time, and that's your carry handle there. 
That's quite sleek, isn't it? 
Oh, I'm not sure I want to lift it, though.
So that's a nice touch. 
And then we have the control panel, which is flush and all wipe-clean. 
If I use the handle to tilt it up slightly, you can see the roller castors underneath. 
I don't want to lay it down because I don't want to scratch it, but there are four castors, so it should glide across most floors. 
Let's turn it around. 
This looks like a really well-built, substantial unit. 
I really like how it comes out of the box. 
It looks good.
Here's the, I guess, this is the bin, is it, for catching the liquid, and helpfully, there's a circuit diagram in there. 
That's very thorough, isn't it? 
I won't be consulting that. 
The power cable, the cord. 
Let's get that out. See how long that is. 
It looks like it's about 2 metres. Yeah, I'd say it's about 2 metres long. 
Very generous. 
And there's this cord storage thing that you can wrap the cable around when you are storing the dehumidifier.
At the back, oh, this slides out. 
Oh, look at that. 
So, I guess this is the element. 
I've opened up the HEPA filter, and I'm going to put this into, I guess this is the filter holder. 
I haven't read the instructions yet, but I'll put on screen if this is wrong, and then you slide this in. 
I guess there's only one right way to do this, and that clicks. 
So the filter is held in place.
Let's read some of the features that are on the box here. 
There's a user-friendly display, one-touch ease of use, contemporary controls. 
It's sleek and unobtrusive. 
The side air intake allows the dehumidifier to sit discreetly against the wall. 
It looks like Eva from WALL:E to me! 
You can easily clean the filter from the side without moving the unit. There's a cable tidy to keep wires out of the way and tangle-free. A hidden handle for sleek lines along the top. 
There's a large window which lets you see the water level really clearly. 
Water can be emptied from both the left and right-hand sides. 
Oversized ergonomic handles make it easy to remove the water bucket, and castors underneath are hidden behind feet that help the dehumidifier blend into any room.
We have had this Meaco Arete One dehumidifier and air purifier for over a month now, and we absolutely love it. 
For us, we're not rich, and this seems like an insane amount of money to spend on anything, let alone something that sucks water out of the air. 
I can say without doubt this is the best thing we have bought this year. 
The place just smells better, and it might be in our heads, but our home definitely feels less damp. 
I'd even go so far as saying this is the best dehumidifier that we can find right now. 
I cannot recommend the Meaco Arete One dehumidifier more highly. 
It's fantastic. 
And if you want to see it on Amazon, there are links in the description. 
I am calling this a Dad delivers success!
Say hi in the comments down below. 
It'd be lovely to hear from you, and thank you for hitting the thumbs up or the subscribe button. It really helps me to keep this channel going. And right here is what YouTube knows you are going to love watching next.

Previous post...
How to cook bacon in Air Fryer! Ninja Foodi Dual zone recipe


All about me, and getting these by email.
Saturday, 4 November 2023

How to cook bacon in Air Fryer! Ninja Foodi Dual zone recipe


How do you cook BACON in an AIR FRYER?
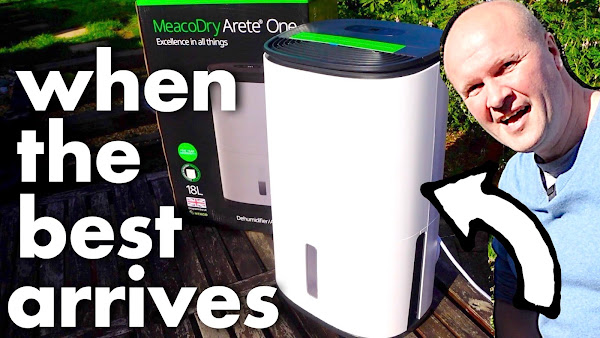
First of my new series of Bung It In The Air Fryer sees me cooking 4 rashers of bacon in a Ninja Foodi Air Fryer for my family. And our dog. I'd call it a kitchen recipe but it's more like me getting a pack of bacon and Bung It In The Airfryer. I cover temperature, air fry instructions and how long to cook the bacon.

BUY A NINJA AIRFRYER HERE! (As Amazon Associate I earn from qualifying purchases)

Perfect BACON in the AIR FRYER!


TRANSCRIPT: (CLICK PLAY ON THE VIDEO ABOVE)

THIS IS THE TRANSCRIPT - CLICK PLAY ON THE VIDEO ABOVE!
Whoa, that is looking really nice and sizzly. This delicious bacon is a gift from my future self. Hello, I'm Neil. I've not cooked bacon in an air fryer before, so that was in the future. I've edited it in. I'm doing this for the very first time, and I'm doing it on this air fryer, this Ninja Foodi Max Dual Zone air fryer. But I'm hoping that this will work with any air fryer. Let's get started. This is for a new series on the channel called "Bung It in the Air Fryer," and today, I'm getting this bacon to bung it in the air fryer. And for this, I'm taking four rashers of regular bacon. I'm laying them out in the basket and I'm overlapping them on the tray. We don't have to be too precise with this. I'm going to move it around while I'm cooking. So now, let's bung it in the air fryer.

I love the air fryer, but the trouble with an air fryer is that you need the booklet to tell you how long to cook everything, or end up going online to look up videos like this. So, I'm actually making this video for myself, so I can remember how long to cook the bacon for. Let's put it in. Ninja says you don't have to preheat to cook in their air fryers. I'm going to choose the air fry program. I'm going to dial up 220 degrees Celsius, that's 430 degrees Fahrenheit. And then, to put the time in, you press the time button and you hold it to take it down to one, and then we'll dial it up to six minutes. And then, to start the thing—I had to look this up, but I didn't even see the big start/stop sign—you just push this button in, and then we're away. Let's do a time jump. It's about halfway through, so let's see how we're doing. It's looking quite nice, isn't it? I'm just going to toss it over and shimmy them around, just so that all bits of the bacon get the benefit of the heat fans. And then, I'll put that back in, start it going again.

Now, this is smelling delicious, but I've got some smoke coming out from my smoky bacon. We had to move our air fryer out onto the counter because it just kept tripping off our smoke alarms. I'm not sure if you had that problem. Leave a comment down below if you've got smoke alarms and an air fryer that likes to entertain you. Three, two, one, we are done. This is how it looks. Let me get a light for you. Whoa, that is looking really nice and sizzly.

[Music]

Let's cut into one and see what it tastes like. Oh, we've got Casper. Casper the dog is hovering, looking very hopeful. Yeah, dream on. Look, I can see you. I can see you there we go. Four rashers of bacon. Oh, these are looking great. I don't like mine that crispy, so maybe you could put it on the Max Crisp if you like it crispy. I've not experimented with that yet. This was just on the regular air fry, but they are looking absolutely delicious. It smells amazing. Let me hold it up to the camera. This is absolute torture. I just want to sink my teeth into this right now. But this is how it looks. Like, it looks like bacon. Ah, tastes like heaven.

I am calling this Dad Delivers Success. I've got bacon on the lens there. Oh, I don't want to talk with my mouth full, but thank you for hitting the thumbs up button or the Subscribe button. And right here are all the other things that I bung in the air fryer. Can you please help my daddy get 10,000 subscribers? Just click on his face. Thanks, bye. All right, this is gonna be the proper one, right?

Previous post...
How to subscribe to AMAZON PRIME membership... FAST!


All about me, and getting these by email.
Thursday, 2 November 2023

EASY Air Fryer CROISSANTS! Ninja Foodi Dualzone airfryer recipe from frozen in minutes....


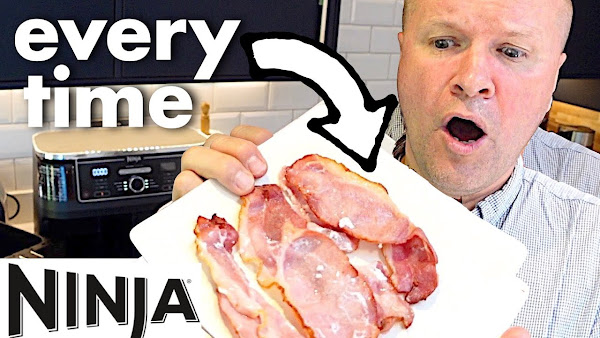
How do you cook frozen croissants in an air fryer? I bake these delicious supermarket croissants from frozen in our Ninja Foodi Air fryer in minutes, and share the temperature and airfryer cooking times. With MORE air fryer recipes and breakfast snack ideas in the playlist below!

BUY NINJA AIRFRYER HERE! (I earn from qualifying purchases)
BUY FROZEN CROISSANTS (or Crescents) here!

PERFECT Air Fryer CROISSANTS! from frozen in minutes.... Ninja Foodi Dualzone airfryer recipe


TRANSCRIPT: (CLICK PLAY ON THE VIDEO ABOVE)

THIS IS THE TRANSCRIPT - CLICK PLAY ON THE VIDEO ABOVE!
Oh, these are looking good. Let's put them on the plates really gently, delicately. Woah! For the next Air fryer breakfast snack idea. I'm going for these Frozen croissants. We've got these in the UK from Aldi, but I bet you can find some wherever you are.
Now I've got to convert the time. It says, uh, fan on 180 for 20 minutes, so I'm going to drop the temperature to 160°C. I'll put Fahrenheit on screen now. I'm going to turn on the air fryer and put it on to bake. 160 has come up, so I'm going to set the time for probably, probably for 12 minutes just to check how that goes. So, and I'm doing three croissants.
Hit start. Now the challenge with the Frozen croissants is that we've got to have the temperature high enough so that the pastry cooks through, but we don't want to make it brown and come out brown and hard. We are about halfway through now, so let's see how it's going. Oh, the camera's a bit wobbly. Wow, these are looking pretty good. They're on their way, but I'll keep them going.
It's 2 minutes to go. I think I'm going to turn these over, so let's get the tongs. Maybe I should do it by hand. And so we go. I think I'll flip them over just so they get cooked all the way around. But when I'm doing this, I think it's probably not good to interrupt the cooking, but let's see what happens if I turn them over, so we get a nice even cooking on there.
So the cooking time's over at 12 minutes. Let's see how they look. Waa, it's looking great. I'm just going to, ow, excuse fingers. I've got clean hands. I think they might be a bit soggy in the middle, so I'm just going to give them another minute. So I need to reset it to bake 160, and we'll just go for 1 minute.
Time's up. Let's see how it looks. Oh, these are looking good. Put them on the plate really gently, delicately. Woah. I still think that's going to be a bit doughy in the middle. Oh my goodness. Okay, I'm going to put them back in. I'm going to gamble it, uh, so just throw them in, and then we will, uh, go for another minute.
Woah, it's air fryer gambling, isn't it? Let's try again. 
Yeah, I'm calling it. 
Yeah, I'm calling that success. Dad delivers success. Let's cut into them now and see. So I've got my daughter on camera there. Good work. Right, let's cut into one and see how it's come out, and we'll know everything's okay. Oh, obviously it's collapsing. Yeah, I'd say that's a, a success. That's looking pretty cooked for Frozen croissants, I would say: Try 320°F or 160°C for 14 minutes. You might want to try 16 minutes, so 14 to 16 minutes depending on how big they are and how many you've got.
Can you please help my daddy get 10,000 subscribers? Just click on his face. Thanks. Bye! All right, this is going to be the proper one, right? 


Previous post...
How to Air Fryer WHOLE CHICKEN Ninja Foodi Dual zone recipe...


All about me, and getting these by email.

Wednesday, 1 November 2023

On the Thames beach... in CENTRAL LONDON! Bucket List family trip to River Thames shore


I didn't know if this is legal! I grew up in Central London and wanted to do this for decades. Took a trip with my son down to the river bed on the South Bank. I didn't know if it was legal to go down the ladders on the Embankment onto the beach at low tide... but we do it anyway! On the River Thames shore in front of Oxo Tower, ITV tower, the old This Morning studios and the City of London skyline, including St Pauls Cathedral. I think we can see 8 Bishopsgate being built, next to the walkie talkie building...

On the beach... in CENTRAL LONDON! Bucket List family trip to River Thames shore


TRANSCRIPT: (CLICK PLAY ON THE VIDEO ABOVE)

THIS IS THE TRANSCRIPT - CLICK PLAY ON THE VIDEO ABOVE!
Here we go!
So I never thought we would ever do this! Um I don't know why it's just been on my bucket list for a long time uh it's the... it's going on the beach on the River Thames in the middle of the central... "the" Central London. 
So my school - my very Posh school that I had a 
scholarship to - is over there. That's Blackfriars and you can see St Paul's Cathedral just uh over there in the distance um but I'm um I... for years like decades, I've always wanted to come down onto the beach uh on the River Thames and uh we're just doing it today my son and I uh it's very exciting. 
I had planned to you know make a big thing of this you know make a big trip but we just saw a ladder over there and thought well let's do it let's go down let's go down to the beach! 
Hello I'm Neil this is the Dad delivers Vlog where I try new things to make your family happy and the new thing I'm trying today is this - nearly tripped up - it's going somewhere we're not probably supposed to on the beach uh on the River Thames in Central London.
So um I've wanted to do this for a while just to see just to see what it's like down here um I don't know if it's illegal but so I did a little bit of research - a little bit of Uncle Google - and apparently it is illegal to dig um down here so just touching the shore other than stepping on it apparently that's a no no that's uh verboten, but walking on it there aren't any signs that say no entry and there aren't any signs that say um we're not allowed to do this but uh look there's even some sand over here have a look at this!
Here's some dull TV trivia this is where um "This Morning" used to be over there those windows there used to look out onto this Skyline if you ever seen this morning you might recognize the background but um this was actually real and now they've just got TV screens I think recreating this they just got a video oh look there uh there's some boat activity there.
Have a look over here you can see there's um we're filming this in... we're filming this in 2023: probably see a yet another building going up uh near to the walkie-talkie building.
So the studio was back then - behind it is the what I know that as the London Weekend Television Studios the LWT building became ITV Tower and then they sold it off and then they tried demolish it but they haven't quite done the job yet um I think they might have hit a problem which is which is good because I think that's a really - one of my favourite buildings in London and look at the state of it it's been like that for uh quite a while uh they've got the scaffolding ready ready to bring it down. 
I think if you look closely you can even see the faint outline of the "this morning" logo on the wall there. 
There was a giant picture I think of uh Phil and Holly there - it's long since gone let's zoom out.
Yeah it's not usually as busy as this there's loads of people in the background um usually you just have like one or two people uh maybe someone with a metal detector um which isn't allowed apparently without a licence uh yeah this is quite exciting there's a little element of Jeopardy - a little element of maybe we shouldn't be here!
So are you pleased we did this finally - 
yeah - we've been talking about this for years! 
Yeah right, let's go. Too much time. 
We have spent too much time.
If you have any uh questions put... leave a comment down below um I don't know why I'm really excited about this but I am cuz I grew up in London and I've never done this before so uh that's another thing to cross off the list!
It's really clean sand...
Well okay we're going to take this ladder 
- there are a few points where you can walk down.
There's some steps over there uh there's a ladder here this is the one we took next to the Oxo Tower let's go back.
Obviously uh thank you for hitting the thumbs up or the Subscribe 
button really appreciate it it helps me to keep going with this channel make these videos but as we go back to shore right here in the corner is uh what YouTube thinks you want to watch next.
Let's go.


Previous post...
How to turn VAILLANT heating ON or OFF with Remote Control


All about me, and getting these by email.

Friday, 13 October 2023

How To Punch A Hole In Leather Belt


How to punch a hole in a leather belt? I share how I use a leather hole punch tool to make a new hole in a leather belt, and you can use this for other materials too. I also show how to add a rivet or eyelet and snap fastener or press stud to leather or fabric cloth material

BUY a LEATHER HOLE PUNCH HERE! (Amazon paid link)

How I Punch A Hole In Leather Belt


TRANSCRIPT: (CLICK PLAY ON THE VIDEO ABOVE)

THIS IS THE TRANSCRIPT - CLICK PLAY ON THE VIDEO ABOVE!

Hello, I'm Neil. Welcome back to the channel. It's a very sad day today for both health and fashion. This is the Dad Delivers Vlog, where I try new things every day to make your family happy. And today, I'm doing this. I'm punching a hole in this belt. And I'd love to say that I'm punching the hole to make it smaller, but it's to allow a little bit more room for the Dad Delivers stomach. What can I say? I love those chocolate cookies. My ones are off-brand chocolate digestive biscuits that we have in the UK.
Oh, man. And I'm using this. There's a link to this or something like this down in the description. It's a punch pliers set. I'll show you how to fit a rivet with it as well as punch a hole in leather. You can also fit eyelets and press studs. We might give that a go today for the hell of it before we punch a new hole in this bad boy.
So this is the timeline. I fixed my sleep. I think I've got some footage now of me wearing the sleep machine that means I can keep breathing in the night. And one of the side effects of this bizarrely was that I instantly lost lots of weight, and I actually gained a notch on my belt. I had to fit a new hole in my belt just to cope with the more slender lifestyle. I didn't change anything else in my lifestyle. I think if anything, I probably ate more. It... It's just so linked to sleep. And I even had to change my watch strap. But like all of us, covid happened, and time, and now I've got to go back a notch. I'm going to go back halfway.
Let's get this out of the box, and we're going to need the punch first. And I've already marked up where I want the hole to be somewhere where that mark is. So all you do is select the punch hole size that you want. So we have these various sizes. Oh, it's really stiff. I don't use it that much. Different size holes. I think I'm going to go for the largest. So you just turn it around to the punch size. Actually, I think I can see some leather inside there from back when I made the other hole. And you just squeeze it together like this.
So going to line it up with my hole, try and make it sort of on the same alignment as the other holes, and then just press really hard. That's not really doing much, but I can see the impression on the other side. So I'm just going to go the other side and just go at it from both sides, I think. So if I push really hard on the edge of the pliers to get maximum force. Ah, I don't know if you heard it click then, that definitely went through. Twist it around, a clean hole. Look at that, perfect.
But I wonder if I should demonstrate the rivets for you. I’ll put an eyelet in so you can see what that looks like. For that, I'll need this kind of press pliers thing. Wow, it's really hot today, so these have really heated up already. And then I'll get a rivet. Now, I don't really want one on my belt. I'm just doing this just to show you what it looks like. So you put the rivet into the hole with the eyelet. We'll get this press thing. I'll put that into the eyelet this way around, push it together really hard. And that is how an eyelet would work.
The other thing we get in this kit is a press stud. So again, I'll open up these pliers here with the safety catch, and you get like a kind of press on each side. So say you wanted to add a press stud to two pieces of fabric so they click together. We would need a stud and a receiver. So I'd need one of those, and I'd need one of these, like this. I would put the press stud on. You can see the pins pushing through the fabric. And then I'll put the press stud on. Oh, oh, man, line it up like that. And then you get the pinch press to push it into place like this. So push really hard. There we go. So the press stud is now in place. And then where you wanted the... where it to attach to, maybe it's another piece of fabric. I'll do it on the same piece of fabric again. I'll put the spiky bit through where I want the press stud to attach to, and then I'll put the receiver. I don't know if that's what you call it. Then we'll get the pliers to push them together like this. There we go. And there's the receiver. And now you can press stud the two pieces of fabric together. So maybe it's... I've got this as a catch on my rucksack. I've put them on here just to seal up the pockets for when I was out and about, just to stop people opening them when the rucksack's behind me.
And the press stud just goes into the hole, into the receiver like this, and you push them together for a satisfying click. I have put this on my playlist for gifts for dad, and I've also put a link in the description to things like this that you can get your own and try it out for yourself.
If you've reached this point of the video, thanks for your thumbs up or even hitting the Subscribe button. It really helps me to keep this channel going. Really appreciate it. And right here is what YouTube knows you're going to love watching next. Can you please help my daddy get 10,000 subscribers? Just click on his face. Thanks. Bye. Alright, this is going to be the proper one, right?


Previous post...
How to CANCEL AMAZON PRIME membership subscription


All about me, and getting these by email.