Showing posts with label Ideas. Show all posts

Friday, 18 July 2025

Is a theme park FAST PASS worth it?


I try to review as many Chessington World Of Adventures rides as possible, with our very first VIP Lane Fast Pass Reserve and Ride Virtual Passes.
Is a Fast Pass for a Theme Park worth it? Join me, who hates theme parks as I put Chessington World of Adventures' Virtual Reserve and Ride VIP passes to the test! Discover if spending extra money on queue jump passes genuinely improves the theme park experience, even on a quieter day. We'll explore popular rides like Mandrill Mayhem, Dragon's Fury, Gruffalo River Ride, Tomb Blaster, and Tiger Rock, cost up the infamous unlimited drink refill, and share an honest review of the VIP fast pass queue jump system. 

Is a FAST PASS worth it? (Chessington Theme Park Reserve & Ride Virtual pass!)


TRANSCRIPT: (CLICK PLAY ON THE VIDEO ABOVE)

THIS IS THE TRANSCRIPT - CLICK PLAY ON THE VIDEO ABOVE!

Hello, welcome back to the channel. This is the Dad Delivers vlog, where we try new things to make your family happy. And the new thing I'm trying today is taking a dad who hates theme parks to a theme park with VIP passes. Ah, so I don't know what it is about theme parks, apart from the sensory overload and the enormous cost. I think the biggest problem is that you have to, obviously, you have to queue for everything. That's, you know, they charge for that scarcity, but then that's the whole VIP ride situation, VIP pass. Now, we've never had a VIP pass until today. This is our very first time. We've gone for a VIP pass. We bought them for the kids. So, we have two teenage kids. Oh, ow. So, we've come to Chessington World of Adventures, where they have three tiers of passes, and what we've tried, which is a virtual reserve and ride, and I'll explain that as we go. It's actually quite clever, and I think it's working out for us quite well today. So, it's a Monday, and it's quieter than usual, so that's a good thing already. But I'm going to show you as many of the rides and features of Chessington World of Adventures as possible. Here's the entrance. Got to find our tickets.

Now, this is the Vampire ride. My son has taken the camera on board, and I think he's going to get this a shot right now. There we go. So, I've hit 'Reserve and Ride' for Mandrill Mayhem, and it's a 40-minute wait. So, it's counting down from 40 minutes now while they're in the queue over there for Vampire, which is this ride. It's just all this administration you've got to do. It's just like being at work. I just want to sit down. So, you just got off Mandrill Mayhem. I swear when we went backwards, my eyes were like forced to close. It felt... it felt like I was going to black out. It just went like that, very fast. It forces you to scream because it's so quick. It's just kind of like a shock, and then when you look down at the height, it's terrifying. What... what score would you give it? 10. 10. 10. 10 for Mandrill Mayhem. That's just... just behind us.

So, this is how the virtual reserve and ride works. I think I'm just doing this for the first time. You can reserve your place in a queue ahead of time, but you can obviously only do that once. So, you can only be queuing for one thing at any one time. So, we've got the virtual passes for my two kids, which cost us £25 each. So, for £50, they are going to queue slightly less. We've never done this before, so it is good to try it once in your life, I guess.

Dragon's Fury. How much for Dragon's Fury? Not how much. Can you describe it? What is it? You're in a carriage of four. Yeah. And as soon as you get on the ride, it's this steep track, and then you just drop and go up and down and up and down again, but 'round. It's hard to explain. And what score would you give it? A nine and a half. Nine and a half. 10. Solid 10. It was very quick though. I'm going to have some. So, we've already hit the thing I love most about theme parks, which is the misleading wait times. I just got a call from the... from the line to say it wasn't 35 minutes. It was, and I've looked at the app, it's now 75 minutes. So, the time that you see when you go in isn't accurate.

This is the Blue Barnacle. Oh, that was really fun. This is the pirate ship where it goes back and forth and back and forth. Yeah. When you... when you're not at the front of the queue, you're guaranteed to not get at the back of the pirate ship. But if you can get at the back of the pirate ship, that's the best place to be. Then you have the biggest swing. Oh, that's cool. But I rate it like an eight and a half. Okay. There's no signal. There's no mobile signal. So, you can't set the pass. So, the pass that you paid £50 for, you can't use because there's no phone signal.

It's the Gruffalo River Ride Adventure. We're entering the world of the Gruffalo. Oh, look. Gruffalo. It's like Gruffalo.

Owls like ice cream. This is good. We're... we're learning about literature.

So, score out of 10. What would you give that? 10. What would you give it? A nine and a half. Nine and a half. 9.75. 9.75. I give it... I'll just put a cap over the camera. I'm going to give that a solid 10 because you get to sit down and you get a nice little rinse.

Now it's the scariest ride of all. The one I've been dreading: the unlimited drink. So last time... So, we've never... It looks like we're a couple of high ballers. Last time we got the dreaded unlimited drink just to see if it was worth it. I can't remember how much we paid. I've got it. I've got the actual footage from that here. So, we're trying to guess. We sent our son in to find out. We're trying to guess how much the refresh refill cups are. I reckon it's 15. I reckon it's eight. You reckon it's 8? 12? 12. Okay. 15. 8. 12. Let's see who's right. Okay. We've come in and actually it's £16. So, I was right. I won. And we know that the prices have gone up since last year. So to buy one of those cups today, at the time of filming, is £18. £18 for unlimited drink. But we managed to keep the cup and bring it back. And I think to reactivate it, it doesn't cost £18, but we don't know how much it costs. You went to the till. I... I'll reveal how much it costs. "Present them this. Ask if they can react." Yeah. They say, "Okay, you pay £12." £12? It used to be 10. Oh, brilliant. So, for £12, you get unlimited refills at the filling stations. So, when you buy it once, save it. But when you come here next year, it'll be 20.

So, this is an investment, right? Yeah. Yeah. Okay. So, there is a catch. The catch is you have to wait 5 minutes before you can refill it again. 6 minutes. What is this place? They're just obsessed with counting down time. So you need a 5-minute countdown to... you need to factor that into your queue time on your Reserve and Ride virtual queuing pass.

So this is my favourite one of the whole park. It's my only request that we do this twice. It's Tomb Blaster.

Right. Got my gun, and there's a display down here that shows you your score. So, the idea of this is to get your laser gun and to shoot at the... at the flashing targets and obviously try and hit as many of the targets as possible. I think I've got a bit of a weak laser, unfortunately. I'm blaming it down to my poor... my poor laser sight. So, we got some coffee and donuts. We got five of these donuts for £8.50 for the donuts. So, it's £15 for one latte and five of these mini donuts, which is a bit crazy 'cause we got the unlimited cold drink. What's the donut taste like? Is it good? Yeah, it's good. Try it. Oh, fantastic.

We're just right next to a tiger. That's really cool, and it's my favourite bit. I'm giving that a 10. Tiger Crossing gets a solid 10. So, this is the Rattlesnake. It's like a winding roller coaster. It was really jolty. It was so jolty. Each turn I felt like I was getting punched. I hated that. That was like five. A five. It was really quick. It was really quick, and it was really jolty. And it's a... what a roller coaster, and it was just you and then two random people in front of us 'cause there was only two of us. That's a four actually. Four. So, you make it a four out of 10. Yeah. It wasn't... it wasn't great. It was funny. It was funny, but it wasn't maybe like a six. A six. It was less for like the thrill of it. More like it wouldn't be worth the queue. It wouldn't be worth the queue. It's too... But we've been on that like last year. We like... It was a lot fun. It felt a lot more fun last year for some reason. So that's the Rattlesnake. Not a very high mark. That's probably the lowest so far.

This is a bench. Give the benches a 10. The benches are brilliant. They need more of them. I'd have a 'ride and reserve' pass just for the benches. What's this called? Um, Tiger Rock. Tiger drop. Tiger rock. Tiger rock.

Where am I? So, this is Tiger Rock. We were on this last year. I think we were queuing for this about 90 minutes. Today, without any kind of reserve ride, it took what would you say? Half an hour. And that sort of feels worth it. Oh, here we go. First drop. Oh, no.

Okay. I didn't think you'd get that wet that quickly.

You did the intro at the top of that. I did. I should. Okay, I'll do the intro. I'll do the intro. "Taking a dad who hates theme parks to a theme park with VIP passes."

That was absolutely brilliant. So, I think that was the second ride that we've done. What would you give that? A two and a half? Seven. We did kind of wait 40 minutes for it, but I... I'd give that a solid 10. I love that. If the wait were longer, the score would be lower, I think. Oh, toilets.

So, here's a review of the Chessington World of Adventure Reserve and Ride virtual queue pass. I don't know if it's because the park is quieter today, but it just feels so much less stressful being able to queue in advance and not having to wait 90 minutes on every ride and then only getting four or five rides in a day. I... I just never thought that spending £50 to queue jump one queue at a time would actually feel this good. It does actually improve the experience, and it massages my downer on theme parks. We did only get them for the kids though, and the kids are now teenagers. I think if you had younger kids, you'd probably want four passes, which would obviously double the cost, which this year, at time of recording, would have made it £100. Yeah, £100. So spending 50 so the kids can run off, the teenage kids can run off, go on the rides that I really don't need or want to go on, it's been absolutely fantastic. So maybe our case scenario is unique, but getting two passes so that you can jump on the really popular big rides has really helped. And it's been enough to get through the day. I don't know if it's going to be different if it were in the middle of the summer season, and this place behind me would be completely rammed. Today, it's been really pleasant, and actually, we've done enough rides, coming up to 4:00 now, and it really feels like we've had almost £180 worth of entertainment, and this has been used quite a few times as well. So, that's worked out about £3 each for unlimited drinks, which that's pretty good actually. So, my downer on theme parks on this one visit has, I think, it's kind of been cured. So, the day at Chessington, I'm calling this a Dad Delivers success!

I'm calling this a dad delivers success. Thank you for hitting the thumbs up or the subscribe button. It really helps me to keep this channel going. So, thank you. I'm soaked. Uh, leave a note in the comments, what's your favourite ride? And right here is what YouTube knows you want to be watching next.

Previous post...
Riding the Seaton Tramway! A Scenic Family Trip with Our Dog


All about me, and getting these by email.

Friday, 21 February 2025

Easy Teenager Day Out: Our Night London Ebike ride


It's really difficult to find easy cheap day out activity with my teenage kids. This one is PERFECT! Santander Cycle hire (London blue Boris bikes) E-bike ride through London from the Tower of London to Tottenham Court Road at night. The camera battery conked out when we hit the Strand, but sharing this so you can ride along with us and our Ebikes.

Easy Teenager Day Out: Our Night London Ebike ride


TRANSCRIPT: (CLICK PLAY ON THE VIDEO ABOVE)

THIS IS THE TRANSCRIPT - CLICK PLAY ON THE VIDEO ABOVE!
all right here we go okay

yeah feel already there's no power on this let's go

[Music]

[Music]

do you know where we're going just going to turn left on St onto the cycle Lane

Okay we

okay for

[Music]

he just to a lamp post you see that horse was tied to a lamp post TI yeah they're like that

did you check the time we left Joe do you know the time we left okay okay

[Music]

did it I think we're good till 6:35 okay

I've got no power you know my batter's on

zero my battery's on zero

d

a

yeah for

oh

[ __ ] car yeah it has a Cera a 360 CA does it and they drive oh wow any with those cameras in the back of the car got like 600 horsepower yeah yeah still hear

it

yeah that tense I need to change my seat

can me get to

m

come

I might change should I change my batteries no

okay yeah full one hang on hang on you can keep going if you want or you on dark yeah okay I'm trying to stay under the half an hour cuz it gets really expensive if you go over the half an hour but I've got no battery on that one so if I pick up one a bit more battery I don't even know if you can see me in the dark uh let's try this one that's okay that's good one

I might need to have to wait sometimes you have to wait for a moment for the key to work

again okay good declined yeah it's um you need like a minute to cool off um have you found there's one there that's really full yeah yeah I got that okay um what we might do is go halfway and then turn right and then go to Covent Garden go that way okay uh I don't know where I'm going let's try

again

great here we go I don't know if you can see you probably can't see it but there's Pony mess on the uh cycle PS cuz some uh Pony and trap Riders were riding on the cycle pods uh just after uh Tower Hill they were all parked up for the pub they had the horses tied to the um tied to the lamp post you you good yeah okay so we're going to go down here and turn right and see if we can get to Oxford Street that way through somewhere like Covent Garden I don't know how long my bike will last out we just we'll just ride for however long

okay oh Crown

bik Jee check my seat hang on should have done that before I got on it's a little little too high get nice stretch with my legs though oh is it jammed okay let's try let's try that okay you good let's go before hiring oh okay so that cost us a pound uh probably earlier than we needed to but it's so much better to be on uh this kind of battery level as we're riding along the embankment we're now leaving the city of London it's a dragon poking its tongue out at Westminster

uh I think we'll go up here not sure about this route but we'll give it a try so try to turn right and hit the uh signal let's try

this you make it to the middle mind you don't

overhang but mind the back of your bike cuz it might hit the traffic we might get into

front a damn it

here we go

great this isn't the best route

sorry yeah yeah oh my God I can't even do it

ah ebike here we go so we go up there and turn left we up there and turn left at the lights go go

go thanks yeah pull left cuz we got [ __ ] in a car

here right so many C driver

surprise I'm a son of a black cab driver so nothing but respect for taxi drivers only ones that deserve it okay uh turn left here should we get onto the let's walk onto the

pavement okay so the camera cuts off cuz the battery ran out so I don't know how much you saw of that but we just going to do the final leg now which is the park up in Top Court Road here we go ready we got a car coming backwards

there we go on this nice pedestrianized

section and then we're going to swing onto the two-way Top Court Road again I'm not used to it being two-way but here we go more time

I think the docking station is here somewhere no don't do it so we going to turn left no one's going to look here we go it's just there thanks

wow nice new docking station here

oh there we go lovely lovely lots of electric bikes and spaces double whammy so we just park up keep stand for

me there we we go so thank you for coming on this electric bike ride with us um sorry it was a lot shorter than I thought it would be the uh the battery the camera didn't last as well as the battery on the ebike but anyway uh thank you for hitting the thumbs up or the Subscribe button it really helps us to make these videos thanks for coming on this nighttime bike ride with us

Previous post...
Easy Air Fryer turkey meatballs in minutes! NINJA FOODI MAX AIRFRYER RECIPE #mealprep


All about me, and getting these by email.

Tuesday, 9 April 2024

Amazing Fridge Freezer American Style at SAMSUNG EXPERIENCE KX Kings Cross RS6HA8891SL


BUY a Freestanding FRIDGE FREEZER on Amazon HERE! 👇👇👇👇 (commissions earned)

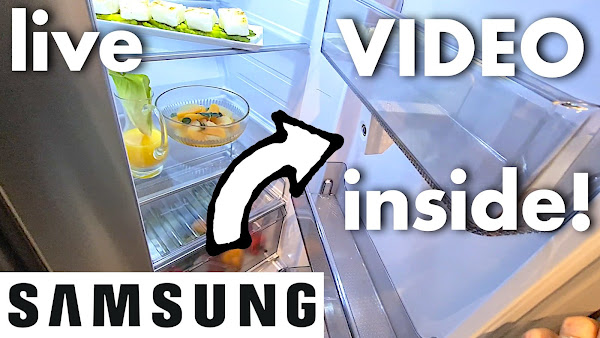
Come Fridge shopping with us! We're taking a look at the stylish SAMSUNG RS6HA8891SL American Fridge Freezer at the new SAMSUNG EXPERIENCE KX in Kings Cross, London. 
This Fridge-Freezer has SmartThings cooking: a live video screen on the door and camera inside the shelves!
It can connect to your Ring doorbell so you can see inside the fridge and outside your house.
Also features large door trays and fridge storage, plumbed in water and ice dispenser and a multifunctional rack-and-shelf. 
Hope this tour is useful if you're looking out for the best new Samsung American Fridge Freezer reviews for your kitchen.

Amazing Fridge Freezer American Style at SAMSUNG EXPERIENCE KX Kings Cross RS6HA8891SL


TRANSCRIPT: (CLICK PLAY ON THE VIDEO ABOVE)

THIS IS THE TRANSCRIPT - CLICK PLAY ON THE VIDEO ABOVE!
Hello if you're looking for American style fridge freezers you know how much of a pain it is going out to actually see them. 
We need to see these things in real life before deciding what to look out for let alone which fridge to buy. 
We are looking for a double width fridge freezer so I've been filming every single one we've seen and putting them in this playlist here. 
I even reached out to Samsung's PR to see if they'd lend us a fridge for us to show you! 
That request didn't go down very well but - they said - but Neil, have you seen our Samsung Experience? 
I hadn't and it turns out there's this brand new Samsung Experience KX in King's Cross in London. 
It's sort of like a Samsung theme park which has three American style fridge freezers - all in kitchen settings with other Samsung products sprinkled around. 
So in this video we are looking at the Samsung family Hub RS6HA8891SL American style fridge freezer with smart things: a live video screen on the door in aluminium. 
Or is it aluminum. 
Here's how the fridge looks like inside. 
So inside the Samsung Experience... here we go. 
Hang on, I'll just put my bag down... 
I... I will put the model on screen now and obviously there's a... there's a camera inside the fridge for this screen. 
It's got a water dispenser uh... so it's got the... the handles on the side. 
As you know, fans will know that I prefer having a handle that you can hold, but I guess this makes it more Sleek. 
Let's go freezer first: and there's the... the water dispenser section which... and crushed ice... which I'm... I'm not a huge fan of because it takes up so much space in the freezer section uh... 
I'd prefer to have extra shelves but what's lovely about the Samsung fridges is that their shelves are really deep. 
There's only one shelf there and then there's a little shelf down here. 
And then we've got these bins at the bottom um you have to close that one before the top one opens. 
Also it's um prevented by the door, you have to open the door all the way to uh to open those fully. 
But really nice five shelves there one two three four shelves and two bins. 
But then... there... the I'll save the screen for a moment... in a moment.
What I love about the fridge interior is that it has the metal back um... it just looks nice. 
I don't know if it functions differently and we've got one two three four shelves uh... and I believe this is special, I can't remember 
I'll put it on screen now. 
There's a word for this tray that can hold bottles as as well as be a shelf. 
And then we've got fruit and veg storage. 
I'm saving the best bit for in a moment but we've got five shelves. 
So four big ones and one little one at the bottom. 
And these these shelves look smaller than the regular... than the other Samsung models um yeah... that's a bit small for me. 
And then there's a camera there for the... the what's on the inside. 
And a speaker I can see food getting in that cuz we got food all the way up our fridge. 
I can see that speaker getting damaged. 
God I can see this... this screen getting damaged as well in our house. 
I don't know how our fridge got dented but it has and this shows what's inside. 
Takes a snapshot. 
So if I take the drink, what happens if I take the drink? 
It takes a while to update it's not a video feed it's a snapshot. 
Maybe this is just a demo thing oh no there there we go, it's updated!
I don't know what food list is... oh look... is that automatic I'll put that on screen if it's automatic. 
And you can add things.
[Music] 
That's good, it's got a little inventory and if I put that on home and we've got the smartthings home. 
And then I love this, it's got fridge manager. 
Oh look you can move... move the window around.
[Music]
That shows inside the fridge, so it's 26° in here it's quite warm. 
30% humidity. 
Making Ice is on. 
Water filter is clean. 
And then you can set the temperatures here. 
Oh look at that so I can make it 2° and hit save.
[Music] 
I can reduce this to - 18°?
[Music] 
No. 
Wow and it syncs up with your phone through the smartthings app.
[Music]
This is this is what it looks like.
[Music] 
And there's a thing over here: it's linked up to ring so if I click on the ring doorbell.
[Music]
I can hit view oh go back. 
I don't know what it did there... oh oh well you got a little snapshot of who was at the the front doorbell. 
Which is Handy if it's you know, Ocado or a Tesco delivering. You can holler them in from the fridge. 
Got a lovely display here. 
You get a much better idea of what it looks like in a home. 
Looks really nice. 
Lovely logo in the corner. 
Let me give you uh... open both shelves so you can see... see inside. 
[Music]
Yeah so look first impressions is: I... I still think the drinks dispenser would eat up space for the freezer storage and also our kids would feed the dog by just pushing it there. 
I could see that not ending well um... 
The shelves feel a bit small for me but it does have one big shelf down here, so I could get my big fat six pint bottles of milk in there. 
And yeah... this is this happens with most most fridges, let alone the Samsung ones... that the fruit and veg is blocked by the door. 
You have to open the door all the way to get all the way into the baskets. 
That's not... that's not a biggie. 
It's just something to bear in mind. 
[Music] 
And I hear that there's a special digital inverter compressor which is guaranteed for 20 years um... 
I mean I don't know in practice how you'd get it fixed if something went wrong. 
And obviously with this, I could just see this screen getting cracked. 
You know my family... we've got four phones in the family and three phones screens are cracked at the moment which is why I was here in King's cross to see if I get screen repair... 
oh wonder if they do that here I I'll check if they do that here um...
But yeah... 
That is the Samsung RS6HA8891SL SpaceMax. 
Thank you for hitting the thumbs up or the Subscribe button if this video is helping and right here is a playlist for all the American style fridge freezers we're looking at right now!

Previous post...
BEST FLYMO on AMAZON? Why Hover Vac 270 is perfect for lighter mowing!


All about me, and getting these by email.
Thursday, 1 February 2024

Girl's bedroom storage idea: IKEA Rashult Trolley!


Looking for storage inspiration ideas for your kids teen bedroom? We're trying out this IKEA RASHULT TROLLEY: it has three storage trays, and the height of the middle one is adjustable. The trolley comes with sturdy castors and this video shows how easy the assembly instructions are (they aren't!) I put this Rashult trolley together step by step in the video so you can follow along. We chose the Rashult instead of the Raskog so that it would fit under our daughter's desk. If you're looking for teen girl bedroom inspo decor ideas, or IKEA Rashult reviews you might enjoy this video!

Girl's bedroom storage idea: IKEA Rashult Trolley!


TRANSCRIPT: (CLICK PLAY ON THE VIDEO ABOVE)

THIS IS THE TRANSCRIPT - CLICK PLAY ON THE VIDEO ABOVE!
Hello, welcome back to the channel. I've not done one of these in a long time, one of my Ikea dad videos. 
Let's close the door because my wife and daughter are watching Gladiators next door, and I've got Casper just making a mess, and you probably hear him chomping in the background there. Today, we're opening this, the Rashult. I don't know what you call it; it's a trolley. 
It's a trolley of trays, I guess. It's a storage trolley, and it's for my daughter, and it's from Ikea, so that makes this an Ikea dad video! 
This is what it looks like after I've built it. 
I mean, it's a really tall trolley, but it comes in a small cardboard package like this. So this was the only thing we bought in Ikea, well, apart from the meatballs and six hot dogs and two fries, but this is the only thing we managed to buy on this trip, which was very restrained, I think, and it's very strategic. 
This is for my daughter's new bedroom makeover. This is one of the first things to go in there, so it won't look like this in the future, but this is just one step towards the new future for my teenage daughter. 
Well, she soon to be teenage, not a teenager yet. 
So let's open up. 
I've got the steak knife, you know, the... all the American vloggers use, a really crazy piece of knife work. I've got... I'm not going to use the steak knife. 
I'm going to use the Ikea scissors, and I've only just found out the Ikea scissors no longer exist in Ikea, so that makes these vintage scissors. So I'd better take care of them now.
So this is how the Rashult trolley arrives. 
I've got the instructions. 
I'm hoping this will be an easy one, but I thought I'd share this with you in case you're searching for Rashult trolley or kids' bedroom ideas or teen kids' bedroom inspo, and this is what comes in the package. 
I didn't ask how much this was; I was busy queuing up for the hot dogs. 
So we get three trays, there are two sizes as well. 
We could have got one that's 65 cm tall and another one that was 78, I think. 
But we'll speed this up, so let's start the speed build now, and I'll just talk all over it, and I'll try and point out things along the way. 
Now, this is looking really straightforward because the way I think this works, this is how the instructions look, by the way, and it looks as if all we've got to do is to put these interlocking poles into one another. 
So we'll just snap the poles together, well, no, you just push the poles together, and then we use a screw. I'll need my screwdriver to hold these poles in place. 
And the most difficult thing is to actually find the right poles and to get them the right way round so that there is only one way that you can put these together. 
So these poles slot into each other, but you've got to slot the right poles together, and it all depends on the little kink in one of the double poles that we've got here.
Now right from the get-go, I think I messed this up. 
I find it really difficult; I instantly put the poles round the wrong way round, and it is... it is quite difficult to match up how they bend outwards and where the brackets at the end should go. 
So I try... I put them together. 
I'm not quite sure that it was right, so I take them apart again and look at the picture. 
And actually, I think there is only one way that they can go because the holes on the end of one pole only match up one way round with the holes of the pole that slots inside the pole, if that makes sense. 
So I just jiggle them around and stare at them a bit longer, and now I can go in with my completely wrong screwdriver. 
It's a flathead screwdriver; you need a Phillips one. 
And we're going to screw in these tiny, tiny... I thought they'd be big and silver, but they're tiny black kind of stud screws that just go in here to hold the poles in place. 
The next step is to assemble the base, and that involves these four pieces. 
The hardest part with this trolley, this Rashult trolley, is to work out which bit corresponds to which bit in the instructions. But once you have a look and manage to make the link, it seems to be okay.
So for the base, the easiest way to spot which bit goes with which is that there's only one way that the two poles can interlock. 
You kind of push them together and twist them, and they stay in place. 
And then we can get the two legs that we just built, and they go either side of the base locking the two base legs together. 
Again, it's a pole fitting inside a pole, so it is really easy to go in once you've worked out which bit goes where and which way around. 
And then we hold these in place with four screws, those tiny black screws. 
I'm just putting two in on the left-hand side and two in on the right-hand side just to keep those locked together. 
This doesn't feel like the sturdiest trolley in the world. 
I guess these screws are going to hold, I hope, and if they don't, I'll just screw them again, tighten them up later on. 
By the way, hello. 
But by the way, sorry if there's some noise in the background, but Casper's having his dinner, and he's having trouble... he's having trouble keeping the bowl in the thing that holds the bowl in place. 
So he's kind of taken the bowl for a walk around the kitchen. 
It's rice and peas and beef and biscuits, one of his specialties, and he is evenly distributing it across the floor and his ears and anywhere else it will go. 
I should put the bowl back into the silicone holder, really, but he seems to be getting some extra exercise from it, so we might as well leave him to do his thing.
It's going to take even more shape now; it's going to get noisy because we are going to put the trays into the frame. 
But the instructions say they've got to go a particular way, a particular way round. 
I'm going to do it because it's like a crease or a fold on the side of the trays. 
So I'm going to have all of those on the same side, and the idea of it is, I think the bottom one will be locked, the top one will be locked, and the middle one is adjustable using these clips that kind of hold them in place. 
So the first thing we're going to do is slide this one over, get it down to the bottom, and we need two of these plates on either side.
They... they all look like identical. 
So I get two here and two there, and then they are held in place by these bolts. 
I put one here and one inside the tray. 
Then we've got to get all the holes to line up, so I put this into the bracket; it's got a square bit on it to hold it in place. 
I'll push that in. 
I've really got the Gladiators theme in my head; I really want to sing it or play it to you, but I don't want to get a copyright strike, so you have to imagine the British Gladiators theme, the '90s version. 
Tell you what, I'll recite it to you while I'm assembling the brackets on the trays. 
"Do you feel the power of the Gladiators? Can you face the challenge of the Champions? 
Do you have the courage of a hero? 
Do you have the will and the skill?" 
Okay, so I got it wrong, ignore the last bit. 
Basically, there's only one on each side, there's one bracket here and one bracket here, and the bolt goes through, and there's like a nut that holds it on the other side. 
And now we get to tighten the nut; they very generously given us two spanners. 
I suppose that's just assuming that someone will be here to help you or maybe they think you're going to snap it or something. 
And then the bolt is held in place by the square hole, so all we have to do is just tighten the bolts with the provided wrench, and we can tighten this nut. 
I always go too far with this and over-tighten and end up wrecking the thing, but I'll still do it with this one, so we'll just tighten these bolts.
The next part of the instructions kind of gone a bit crazy now because it's suggesting we can put it on its side. 
Don't forget to put the middle tray down; otherwise, we won't be able to get it in. 
And I'm trying to do it so that the folds are all on one side, so just guide this in, and it does advise don't put the trays into each other because I think it would just scratch the paintwork, so I think that's why they're advising doing this on its side so this doesn't get scratched into the bottom tray. 
And now we can put the brackets on this top tray; let's speed this up. 
So I don't know it yet, but I'm doing this completely wrong, and I'll tell you why in a moment, but let's just enjoy for a moment this speeded-up footage of me turning a bolt round and round and round, wondering why it's not locking but still turning it anyway. 
There's something really wrong with this bolt on one side; the other one goes in, and it goes in really easily and really well. 
So I'm thinking, well, maybe that holds it in place, and I just can't work out. 
So I'm squeezing harder between the poles and the tray just to make the trolley bolt together, and it's not... it's just spinning around. 
And I think it took me far too long to work out why. 
Oh, I've done it [Laughter] wrong, okay, so it could not be clearer, and I've managed to screw it up. 
I've completely forgotten to put the brackets. 
If I can zoom in on the edit, I'm twisting this thing, and the bolt's going round and round and round, and I'm thinking, but it should be held in place. 
Well, it would be if I'd put the bracket on that you're supposed to do. 
Why is it so hard? 
So now I've got to take the bolt off... it comes off really easily. 
So this goes through the bracket, which would be really obvious. 
I don't know why I missed that. 
That's really—I think it's because it's on its side; it broke my flow. 
Let me give you a closer look of what this bolt situation is like. 
They give you a wrench that fits exactly, but you have to kind of lock it over the bolt each time to give it a twist. 
And this is really giving me an arm exercise and a half. 
But all we need to do is to keep turning this bolt with the brackets on the other side, and eventually, it holds the top tray in place.
This is the creative part; we get to choose where this middle tray goes. 
You can choose... it can go wherever you want because the bracket can hopefully hold it in place. 
So if you want some like tall bottles at the bottom, you can put it higher up, and if you want it—I'm going to have it pretty much equal just so it looks nice. 
You can configure it how you want, go crazy with the middle shelf. 
This bit is way too tough; it's a lot harder than I think because the poles are held apart by the top tray and the bottom tray; it's really difficult to get the bolt through and meet the nut in the middle. 
There's no give in it at all. 
I'm using all my strength to hold the bolt and actually push it through the hole far enough to get a thread through so I can get the nut on. 
I think it might be easier to go against the instructions and do the middle one first, and that way, you've got a bit more play at the top. 
But doing it in the middle means that the middle poles are fixed, so it's really difficult to squeeze through the bolt and get it to latch and hold the thing in place. 
Dammit! 
What I'm going to try now is I'm going to have to take the top tray off, and I'll try and put the middle tray on first and see if that works. 
It is really energy-zapping to have to undo your work, and I end up doing this every time I put something together with Ikea. 
Maybe it's just my brain; maybe I'm unable to follow the instructions correctly. 
But every time, I have to undo the work to get the work done. 
If you face this with your Ikea Adventures, say hi in the comments below because I'm sure I'm the only one who has to do it, and then completely undo it to do it back up again. 
And I'm also dropping the bolts all over the floor. 
It’s at this point of the build that just sucks, and I just want to finish it. My family wants to eat their dinner, but I've got this all over the dinner table, so I've got to get this done. I've got to get it done. Oh, Casper, what's up?
[DOG BARKS]
What, it's pretty that naughty Black Cat from up the street, probably outside. 
He can sense it. 
Mind you, he goes nuts when we open the Loft so, oh no, what! 
Okay, so the—sorry about the noise in the background. 
But I would say definitely do the middle one first and do it loosely, and then do the top one to hold it in place. 
The only problem with it is that it does—it will scratch the paintwork. 
If you're too rough with it, so I'm just going to do it this way. 
And now the slightly more fun part of... because I’m getting a bit grumpy.
The slightly more fun part of screwing on or bolting on the four caster wheels. 
These wheels look really good; I think they look really substantial. They feel substantial; I mean, they don't have to take much weight
These wheels look really good; I think they look really substantial. 
They feel substantial; I mean, they don't have to take much weight because of the flimsy trays. 
But my tip with this is to use the nut that's closest to the wheel as the one to turn. 
So there's another loose nut on the caster so you could adjust the height of the wheels if you wanted to by about a centimetre or half an inch. 
But I'm screwing the nut all the way down tightly so that the whole wheel can just twist into place, and there won't be any height adjustments. 
It will hopefully be as tight as possible on the base of this Ikea Rashult trolley. 
This is what Ikea says about the Rashult trolley:
"The sturdy construction and casters make it easy for you to move the trolley and use it wherever you like. It even fits in tight spaces because of its small size. The trolley is easy to adapt to suit what you want to store in it because the middle shelf is adjustable.” 
It's got lots of storage capacity in it, and I suppose being able to move the middle shelf might be useful if you've got some bigger things than others. It fits in quite well; we're going to try and put this under the desk, so it'll be kind of like under-desk storage. 
And because of the four caster wheels, she'll be able to pull it out whenever she wants and tuck it under, hopefully out of the way. 
You can get the Rashult in these different colours; we went for the cream one because this will be the look for the new bedroom renovation. 
This isn't it yet; this is just the—I've got to emphasize this is just the first step in the transformation for my teen daughter's bedroom. 
And thank you for hitting the thumbs up button or the Subscribe button; you'll be able to follow our journey. I really appreciate it; it really helps us to keep this channel going, so thank you. 
And right here is what YouTube knows you want to watch next, maybe some more Ikea dad stuff. 
Can you please help my daddy get 10,000 subscribers? 
Just click on his face; thanks, bye. Alright, this is going to be the proper one, right?


Previous post...
How to make AIR FRYER MEATBALLS! Ninja Foodi Recipe


All about me, and getting these by email.

Friday, 1 December 2023

Our new kitchen design from VERY BEGINNING for remodel and renovation


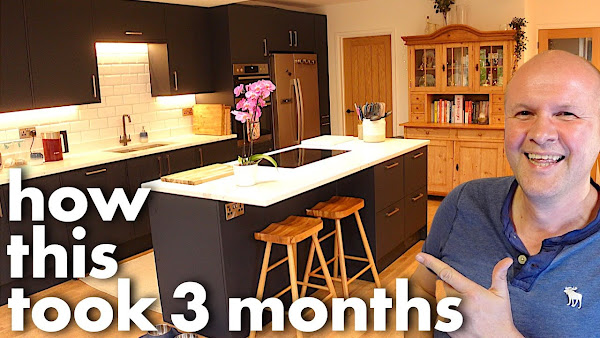
This is a kitchen tour of our remodel before and after, in case this gives any design ideas to renovate a small kitchen. We found it hard to find inspiration for kitchen design and watched lots of videos, kitchen photos and plans like these! If you're planning to remodel your kitchen: hope you find some inspo and how to here.

We made this playlist for the full beginning to end kitchen remodel tour here:  👇👇👇👇

BUY AEG OVEN HERE! (I earn commissions from qualifying purchases)
Buy Fridge freezer here 👇👇👇👇
Buy Dualit toaster here 👇👇👇👇
Buy Neff Dishwasher here 👇👇👇👇

Our new kitchen design from VERY BEGINNING: for remodel and renovation


TRANSCRIPT: (CLICK PLAY ON THE VIDEO ABOVE)

THIS IS THE TRANSCRIPT - CLICK PLAY ON THE VIDEO ABOVE!

Hello, welcome back to the channel. 
I have wanted to make this video for 2 years now. 
I want to show you how we changed this kitchen, which we appreciated but which was broken and out of date and not at all energy efficient. 
It was cold, dirty in a way that could never be cleaned properly, and someone else's kitchen design. 
We wanted to remove the wall that runs down the middle, splitting up the space into two dark, small rooms that don't work because the width is not big enough for either room. 
And we wanted to renovate it into something that looks more like this! 
An open plan modern kitchen that follows the hot trends in kitchen design, a spacious living area that regains the space taken up by the supporting wall. 
It allows energy and light to flow. 
With stylish radiators in the right places that actually work. 
With two double patio doors which are double glazed, two light wells: skylights in the ceiling that allow natural light to flood into the room. 
New windows and doors down the side of the house. 
I thought, how can I show you this project that took months to build? 
How can I tell a story this big? 
Well, every day this month I will release a video that shows the progress each day so you can follow our trendy kitchen design renovation construction in real-time. 
All of the videos each day appear in the playlist that's in the description below so you can jump forward at whatever speed you want to get to the end. 
So, let's take a look at how things look right at the very start. 
And this isn't my voice by the way! 
So the idea is: a shower room accessible from the hallway door which covers about half of that wall there. 
And then the rest of it is a utility (room). This, yeah, fireplace is being knocked out.
Kitchen units will begin about halfway along the fireplace. 
All the way pretty much to the end where this table is will be an island. 
And we're still uncertain where we're going to put dining and where we're going to put, hopefully, some kind of chair seating sofa area. 
This wall, just a small thing to mention, is completely coming out, including pillars. 
So there'll be no wall, so all of those cabinets will go. 
Basically, the kitchen is being relocated to the other side of the room. 
What were you going to say? 
Well, it's just really funny seeing it now! 
So, this was how the kitchen looked and we're going to give you a tour. 
I think this was 2 days before the builders arrived and, yeah, we're going to see a lot of this. 
Just to give you a full tour, let's go into the nooks and crannies. 
I mean, we had no storage space, did we? 
No, not much, as you can see. 
But I don't think I tidied it up for the filming either. 
Yeah, well, I think this is actually probably better than it looked. 
And look there's the... not only did this not work, we had a little heater there next to the cooker 
because only two of the rings worked, 
Yeah, two-- 
And this was the sink area and this, this is the best bit.
Look, this is actually a huge chasm that had opened up. 
We filled it with filler so many times and gave up because we knew the kitchen was going to happen. 
And it's called the sink because your heart sinks when you stand next to this. 
And look, we got some healthy fruits here among the profanity of junk. 
Obviously some baking, and obviously you've got the scales out, 
yeah, yeah. And we've got a nice toaster 
- a working kitchen. - Yeah, and look at that, we got this really nice... toaster in the middle of this just kind of bomb site of awfulness from the 1990s. 
But I like that we dual used it, you know, for clothes hanging.
Some of that colour is coming back.
I don't think it will last, but it's just making a very brief comeback right now.
Great, so now we've ripped it out.
We've ripped it out, it's gone.
It's now coming back in again.
But we didn't do it for trendiness, it wasn't to be a hot trendy kitchen, was it?
Look, talk about the dual-purposing.
You can see the, um, what the dungarees-- 
dungarees, but there's like a lesson for the kids behind the dungarees, 
yeah, 
and I think you talk about the bread maker later.
But you can see on the left-hand side that the water is actually coming through the walls.
You can see the paintwork is bubbling up.
There was mould on the ceiling as well.
I don't if there's any sound, there's no sound.
Our son points out what's on the ceiling in a minute.
Um, but we're just giving you a full 360-degree “before” and hopefully you'll understand why the “after” was such a big transformation.
So that's the wall we're going to knock out, isn't it?
Yeah, and how did we get the idea to knock the wall out?
I don't know, I can't remember.
Well, we did have some plans drawn up, didn't we?
Yeah, to start with.
Um, some grand plans, yeah, which we scaled back a bit.
Yeah, and we did say we wanted, you know, the dream open plan dining kitchen area. 
And originally we were only going to knock the wall out partway, weren't we?
We were going to keep some of the wall in to keep it, yeah, to make it, um, cheaper.
We actually spent money on an architect, and that's why there were holes in the ceiling there because a structural engineer came around just to see what was there underneath just at the top of the picture.
I think just skipped it there.
And this is my favourite part of the whole kitchen, it's the place we're sitting right now.
Where I love that window, I love sitting next to that window.
So, we wanted to turn that into a seating area, didn't we?
Yeah, that seemed to work best for dining, even though our table is a bit too wide for it.
We could do with a slimmer 80 cm slim table.
But yeah, it's fine, it was the best spot for it.
And this is the lounge area, this is where we'd watch all of our TV in this really dark corner of the house.
It's the darkest area of the house, yeah.
I heard that you should turn the darkest area into a utility and that was the lightbulb moment on what to do, how to lay it out.
That's a really good tip, the darkest area, think of a utility room.
So this is a walk-through again, and this really demonstrates the Berlin wall that we had, uh, on the left-hand side:
The kitchen from Circa early 1990s and it had been built up over the years so it was like two extensions that’d been badly done next to each other.
Hmm. 
And then on the other side, you’ve got this room where we couldn't ever do anything.
So we tried having the TV here and it never worked, did it?
No, there was always a No Man's Land bit wasn't there that wasn't really good for anything.
And you can see Casper was a puppy then so the floor just got worse and worse, didn't it?
Yeah, and it, we could never get anything in here, could we?
It was just never wide enough for any furniture to go in without it feeling like a corridor, yeah, and then over here.
So we got a lovely big picture window and then we got this frosted window and we knew we could do something with that.
And we, we had so many different combinations, didn't we? We were going to put the kitchen there.
Um, it would have been cheaper to keep the kitchen in the place it currently was, so it was more expensive to move it over... but it definitely made sense having it along this side and then being able to look out and keep the windows where they were.
Now we've got French doors here. 
These doors didn't work, they were so warped that they wouldn't close properly, and this is what the back of the house looks like.
I don't think we worried that much about how the back of the house looks, it was how it looked from the inside.
But it gives you an idea that we thought we could put two double doors in there rather than the bi-fold doors, and that's probably going to come up over the days where we're commentating.
But are you happy we went for French doors? 
Yeah.
Well also, it was sort of a budget decision, um, obviously it's cheaper to do French doors than a whole bi-fold all the way across but also we were running out of wall space and places we could put a radiator so another budget decision was not having underfloor heating, um, so we needed some wall space for radiators, um, so that meant we could have the radiator in the middle and then I just like the um, you know how the French doors were kind of in symmetry, yeah.
So this window is going to get replaced by a pair of French doors and then the bricks between them will stay... um as this kind of central pillar that we can put the radiator on but I just had we just had a close-up there of the all the pipes and the tap there that's just where all the utilities are for the kitchen at the moment, so we're going to move the kitchen over to the left hand side of the... of the room you'll see that as the days progress but the first job is to knock out all of this and see what's left standing.

And the architect plans originally that's... that was the idea for the roof lights wasn't it and where we positioned the roof lights as well, 
Yeah we actually uh paid for an architect and didn't follow the plan because we're going to knock out the whole wall but uh... 
We've kept some of the elements of his design so it was it was money well spent wasn't it in the end I think, ‘cause it kick-started everything. 
It did Kickstart everything but then it was years before we finally landed on a plan of where we were going to put yeah everything 
yeah we were talking about it for years so yeah this is probably four years after we moved in and I think three and 3/4 of that was spent discussing the different options. We just couldn't work out how to... where to put the kitchen 
Because... because we weren't um building an extension on the side it was a very long room wasn't it - Long and narrow... 
Two long narrow rooms and it just wasn't quite wide enough um it just looked too long. 
But when we... when we sort of bisected the room with the um wall for the utility... 
yeah when we... when we did that then suddenly the... the room becomes more of a nice rectangular shape rather than long... too long and too - yeah - not so wide. Knocking out that middle wall that I'm pointing to is... it really freed up some space didn't it? 
I mean it's like 3/4 of a metre-squared running the full length so that actually gave us more floor space. 
It did but it also meant we lost all of that... all of those cupboards and all of that cupboard space 
yeah so this is some footage of… 
Cleaning! 
Casper-- 
Attempt at cleaning 
This was earlier in the year just to show you what it was like as if you couldn't picture it anyway! 
This is what it was this was what life was like in this kitchen. 
I think you’re probably cleaning up some Casper something.
Casper wee.
Oh, now you took so many photos. 
This is a photo of your scrapbook, so I've only found four of these, but you had like dozens of pictures for inspiration, kitchen inspiration, kitchen inspo.
And this is-- it was funny that the four that I put into this video are this one, this one showed the skylights and showed the effects of the skylights and hanging lamps which is good. But we didn't know what to do with the kitchen island, did we?
No, well, we needed to just play around with it, didn't we, and see where it would fit, yeah, and how big it was going to be. 
So that kitchen island didn't seem right. And then, but having a table in the middle looked good but it felt like we needed to use the middle of the room for space.
We needed the island to be cupboards that would keep stuff in because we lost a whole wall of cupboards by knocking the wall down so we had to have the island to put everything in. 
Otherwise we wouldn't have had enough storage. So it would have been nice to have like a big Cook’s table and just you know, yeah that would have been lovely but then we probably would have had to have considered having cabinets down this side as well.
And it was nice to Zone it wasn't it and just have cabinets on the one side and that is the kitchen area and then this side is the dining area and then there's a little sit down area as well. 
It was so hard because it was a blank canvas it was completely an empty shape and it was really hard talking to the designers about what we wanted because we could have had the kitchen on any wall and in any corner so it took a while to land the kitchen in where we've got it now... which is down... down this side.
This picture here illustrates my problem with kitchen islands. 
I... I... to me that just looks ugly because it's a thin... right! 
Because it's a thin top um there's just something sharp and angular about it that it just it depresses me - it doesn't spark Joy 
It's just a bit cold isn't it? 
Yeah both the colour and the shape and the stools! 
I don't like those stools as well 
The idea of this breakfast bar - is the thing that you see. 
So you spend all that money on the kitchen but all you see is this really ugly lip and backs of ugly chairs after you spent - you know - five figures? 
Doesn't seem right. 
Yeah we needed it to look more homely didn't we 
yeah but... and it was really difficult working out how that Island would... would work. 
I can't remember how we decided on... I know you... I know it was you who were... you were quite insistent you didn't want you know four stools all the way along 
So I think that was your idea wasn't it to put um to put the cabinets in one end and just have a couple of stools 
yeah you'll see on... on the later videos 
You'll see what we went for with the island and how we actually got there because we actually filmed ourselves trying to work out how to do the island. 
So this is after the building work started and we're still working out where exactly the island is! 
And... and what it was as well, so it's uh pretty much like when we moved in. 
But this is what the room looks like on our last night before the builders come. 
So this is a “before” 
We can get into the corner now the telly’s gone 
[MUSIC]
[MUSIC]
And this is what the kitchen looks like. 
Well, this will be the area where hopefully we'll get some kind of seats and a table. 
And over here this is what the kitchen looks like currently 
[Music] 
Let's put some light on - get that shot again 
I'm going to go right into the corner there we go.
[Music] 
[Music] 
[Music] 
I am calling this a dad delivers success! 
The first day of the build is in this playlist here or you can jump to any day you want to see the progress. 
I've put more details of the gadgets down in the description. 
Say hi in the comments, it would be lovely to hear from you and your questions. 
Thank you for hitting the thumbs up or the Subscribe button it really helps me out and right here is the complete new kitchen design renovation. 


Previous post...
How to make a new Google Account


All about me, and getting these by email.
Thursday, 21 September 2023

LOCK LACES save me time every day! No Tie Laces!


BUY LOCK LACES HERE!
(As Amazon Associate I earn from qualifying purchases)

What are the best shoe, trainer, sneaker replacement laces? 
Do No-Tie shoe laces work? What do Triathletes use for speed laces?
I walk through how I've replaced every lace on my shoes, trainers, sneakers and boots with Lock Laces. I love these. The things I can do with the time I free up from not tying shoe laces... writing books, recording podcasts, helping charity... and definitely not playing wormmate. This is my second Vlogmas video... I'm not sure I can keep this up.

Save time EVERY DAY... using these LOCK LACES!


TRANSCRIPT: (CLICK PLAY ON THE VIDEO ABOVE)

THIS IS THE TRANSCRIPT - CLICK PLAY ON THE VIDEO ABOVE!

Hello I'm Neil welcome back to the Happy Hut! 
The Tower of Power... the shed of Dreams... look there's Casper there keeping guard 
you're doing good work, thank you! 
I'm going to share with you how I'm never going to tie shoelaces again 
This is the dad delivers Vlog where we try new things to make your family happy and I'm a bit obsessed with not tying shoelaces with these... 
they're called lock laces and they are the little bungee ropes with a gripper on the top to stop them falling off and stop your shoes falling off 
They're brilliant - they’ve changed my life. I’ve put them on absolutely everything 
I've put them on all my shoes and trainers and Boots 
Not my funeral shoes - the one bit of Footwear that's avoided these is my funeral shoes 
I’m in no rush to tie those on, but with lock laces I put them on absolutely everything else “Epsolutely?” That’s quite posh, isn’t it? absolutely! 
Here's some footage shot in sunnier times... oh man I wish it were that warm now uh and this footage demonstrates how I've put them on all my shoes because I... I shot this for my random nine gift ideas video which is doing stormingly well... I think I've got 100 views on it 
You can get the lock laces in different colours... uh I've gone all the way from black all the way through to Blue - I put blue onto my boots. 
I wasn't quite sure about this but I sort of like it. 
Now there are different types of lock laces - there are pretenders to the crown - copycat challengers to the lock lace realm - and on these dare I say cheaper ones, you squeeze the gripper from the side... 
And the gripper is also metal, and it's... it's really difficult - it’s a complete pain because look these lock laces they've just got one button 
They're one and done, and we notice you've got to squeeze them from side to side - you’ve got to use two hands, so even in the space of being lazy with your shoelaces there's an even lazy option and that's the lock lace like, which I heartily recommend 
So let's get these on 
I'm putting them on my son's boots. 
He's been begging me to do this for about a month now and he couldn't wait to get started on his new boots which is completely understandable. 
Let’s take out the laces. By the way while I'm doing that, these lock laces are in the link in the description if you wanted to buy these ones 
They're not cheap, unfortunately but they're worth every penny, so you've got two grippers 
Two things that go on the end and two laces, so we're gonna lace up the boots first 
I'm just gonna go to there... I can't be bothered to do the... the two eyelets at the top and I'm gonna get it fairly tight but not really tight, just to get an idea... and then we've got this bit on the end 
Let's do the other one. By the way I've just noticed I've only bought these a week ago and the eyelets are already rusting 
It looks cool but I was hoping it would last longer than a week! 
Right so now we've got these dangly bits - you could just leave them like that but it would really annoy you 
You know you'd be tripping on them. This is a delicate part of the operation because obviously once I've cut it I can't go back. Let’s put the gripper on. 
You don’t want this to be too long so I'm going to pull it tight to there and I reckon I'm gonna go to about there, so I'm gonna cut those and do it on the other side 
Now just measure how much I want it to be out by. and then I'll cut those there 
Put the lock lace gripper on 
I'm not sponsored by them 
I should be shouldn't I? 
Now we've got a stopper on the end to stop the gripper from flying off 
We just feed the laces into the stopper and then we can snap it shut like this 
There we go, that looks really tidy 
Do the same on the other shoe and squeeze it shut. 
There we go - lock laces on the two boots for the boy yeah! 
I'm calling this a Dad Delivers success! 
Hey this is the first time we've done this in the Hut isn't it? I kind of like this! 
The link to the lock laces is obviously Down Below in the description: thanks so much if you do use that link and right here is what YouTube knows that you're gonna love next!
Lock Laces for the win! 


Previous post...
Best Ikea Lamp KNIXHULT


All about me, and getting these by email.

Tuesday, 5 September 2023

Visual countdown clock timer Gift ideas for ADHD Dads


BUY a VISUAL CLOCK HERE! (As Amazon Associate I earn from qualifying purchases)

Looking for a gift for Dad? Or to help yourself and your kids with time management and procrastination? This visual countdown timer clock could be just for you!  Also great as a kitchen timer... or maybe someone with ADHD... this clock shows the countdown as a colour block and can be used for the 25 minute pomodoro technique...

Get more done! ADHD DAD


TRANSCRIPT: (CLICK PLAY ON THE VIDEO ABOVE)

THIS IS THE TRANSCRIPT - CLICK PLAY ON THE VIDEO ABOVE!

Hello, welcome back to the channel. This is the Dad Delivers Vlog, where I try new things to make your family happy. And I really don't like how that's... 
Hello, I'm Neil. This is the Dad Delivers Vlog, where I try new things to make your family happy. And today, I have got this to make my family happy. 
This is part of my Dad gifts playlist. 
It's really difficult coming up with ideas for dads, so I'm road testing these gift ideas as a playlist down in the description. Today, we have got this. 
It's a visual clock timer or visual timer clock. Um, I think I've got a bit of the old ADHD, so I'm an ADHD Dad. I'm an ADHD dad, but this could be for neurotypical dads as well because this is a really useful timer. I've got some footage of it when it's unboxed. I've got it in a fetching pink colour. Let me show you what comes in the box, and then I'll demonstrate it. I've gonna put batteries in. I forgot about the batteries anyway. This is what it looks like. This is how it comes out of the box, is that in focus, with this clock. The hardest thing, because I've bought a couple of them, they're brilliant, oh, it's getting the back off without feeling like you're destroying the thing. I need some batteries. Do you know what? A battery holder that... I'm definitely going to do that on the channel, and I think it takes AAA’s, they'll do. So, we'll get these bad boys into the clock, and I'll show you how this works. What is absolutely fantastic about this clock, that's a bit low, isn't it? What is absolutely fantastic about this clock is, see, I use my phone as a timer, and the trouble with that is, it just, there's so many distractions on it. This is really simple. You just dial up the number of minutes, and it shows you visually how your time is counting down. I think this is, this is supposed to be for kids, but I find it's so useful for getting work done or Pomodoro time management technique. That's where you set 25 minutes. That's why I put 25 minutes on as the ideal block of time to just devote to a single activity. The productivity gurus say that this works, and it does. It really works. If you set this little time block for yourself and see if you can get what you need to get done in that time, it usually works. There is a link to it down in the description. We've got three of these in the house, and they all work beautifully well. And do you have any ideas for gifts for dads? This would work for me, but if it doesn't for you, leave a comment down below. If you have ideas for dads for gifts, for dads, for gifts, for gifts for dads, and right here are all my ideas for gifts for dads. 


Previous post...
How to make a red on air light for recording studio


All about me, and getting these by email.

Monday, 12 June 2023

How to say news of death to children


This was a long time ago, we're all okay now thanks. But what happens if you have to break the news of a death to a toddler or young child? Where do you even start?
Sharing this in case you're searching for something like this - if you are we're really sorry to hear that. How do you break the news of a death of a grandparent or relative to a toddler or young kid?

Not saying this is the best parenting advice, but sharing this if it helps as a starting place for what you want to include or exclude.

"You know that Nanny's been very poorly and that she can't be mended. 
Well, I'm sorry that last night she died. 
It’s very sad. 
We're all going to feel very sad for a while... 
because we won't see her again.

But she loves us very much.
And we can talk some more about this any time you want."

How we told our child about a grandparent's death


TRANSCRIPT: (CLICK PLAY ON THE VIDEO ABOVE)

THIS IS THE TRANSCRIPT - CLICK PLAY ON THE VIDEO ABOVE!
Hello, I'm Neil. And if you have a grandparent who has passed on, firstly, I'm so sorry that you're in that situation and that you might be looking up videos like this. And secondly, I'm sorry if you are looking into how to break that news to a child or young child, or even a toddler. I'm not a child psychiatrist or a Child Development expert. I'm just a parent that's gone through this, and I thought that it might be helpful to share what we did, rightly or wrongly, in case it helps you to come up with what you're going to say to your kids. 
We didn't know how to tell our kids, who were two and four at the time, that Nanny, my mother, had died. She had secondary progressive MS, so they saw that she was frail and often in the hospital. When she left us, we had no idea what to tell our kids. So we planned out something to say to them. Well, it was mostly my brilliant wife who wrote this and ran it past me, and I thought it was perfect, and we will share it with you. It's very short.
Just before I do, let me tell you a bit about the thinking behind this paragraph, which is also down below in the description. We wanted it to be short. We didn't want to talk about some kind of made-up fairy tale. We thought an elaborate story about heaven would probably more likely confuse our kids, and then it would create even more questions for them, questions where we would have to make up even more stuff. This was just to break the news and let them know that it happened and Nanny had passed away, so that any longer discussion about the meaning of life that could happen separately, but we needed to break the news first. We also wanted it to be matter of fact so that they could process it in their own time. And obviously, we would give them a big hug. 
There's no good way of saying this and a lot of bad ways of saying it. This is what we chose, for good or bad, and I'm hoping that it helps someone somewhere sometime. This is what we told them: 'You know that Nanny's being very poorly and that she can't be mended. Well, I'm sorry, but last night she died. It's very sad. We're all going to feel very sad for a while because we won't see her again. But she loves us very much, and we can talk some more about this anytime you want.' 
And then we gave them a hug.
It was deliberate that we talked about her loving us in the present tense, to keep her with us. When we dropped this news we didn't know how they would react. They were silent, totally silent. And then they gave us a big hug, which is probably what we needed. 
Please feel free to adapt or change or completely ignore this approach to find your right way of telling the kids that a grandparent has died. And if this does help, thanks for letting us know with a comment or a thumbs up. And here are some happier videos about being a dad.

Previous post...
How to remove Biro from fabric armchair or sofa


All about me, and getting these by email.

Sunday, 30 October 2022

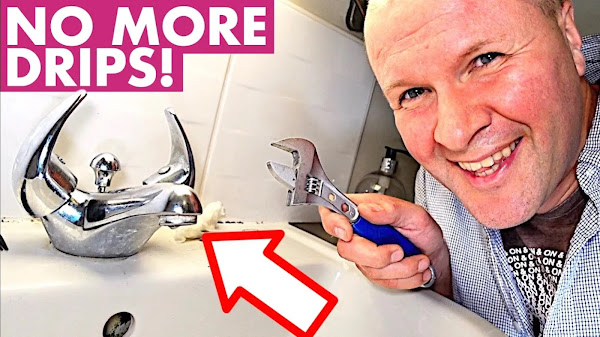
How to fix a dripping bathroom tap


BUY A SPANNER or WRENCH HERE! (As Amazon Associate I earn from qualifying purchases)
CARTRIDGE SPLINE FINDER CARD TOOL - for measuring your cartridge to find a replacement
https://amzn.to/3fhB9sh - sorry, can only find this in the UK
ALLEN or HEX KEY SET
WD40 SPRAY

How to fix a dripping bathroom tap or faucet? Our bathroom taps were dripping, constantly leaking so I knew I had to do something like replacing the washers or O ring, but I've not done this for a very long time... So this video shows me repairing our dripping tap by replacing the whole mixer tap cartridge.

How I fixed our dripping tap: LEARN FROM MY MISTAKES


TRANSCRIPT: (CLICK PLAY ON THE VIDEO ABOVE)

THIS IS THE TRANSCRIPT - CLICK PLAY ON THE VIDEO ABOVE!
hello I'm Neil welcome back to the dad delivers Vlog where I try something new every day to make your family happy and today we're making your family happy here! 
we're back in the bathroom so we've already done the toilet seat and the toilet roll holder 
that's been a big success 
It’s look... it's wobbling just a little bit don't tell anyone 
the seat is holding out - the Ikea toilet seat is holding out but it is kind of cracking here 
so it's not wearing too well there and I don't know what we're doing to uh to cause that but fingers crossed that can hold out for another year 
and today we're now working our way around the bathroom because this video is all about this! 
yes it's the classic... the dripping tap 
I don't know how we've managed to avoid this for so long 
I knew when I started this Channel and I just wanted to record the little jobs that I do around the house - almost as proof that I do something now and again 
but this... I hope this day would not come and... and it's here... it's here now the tap is dripping 
obviously if I get this wrong we can expect a trip - an expensive trip - from Mr Plumber which I really really want to avoid 
and that's even if you can find a plumber 
we can't even find a plumber at the moment and I wouldn't bring a plumber into this situation but if I make a wrong turn or disable the tap like you know it could like drip quite more violently than it is at the moment 
it means that we're wasting water which is terrible for our water bills I mean the environment 
and most importantly at night the sound of this is really really annoying 
but here's the thing I've not done this in a long long time like I mean like decades 
so I don't know if I've even got the right tools I... 
I definitely haven't got the right washer the right o-ring that we'll need inside that tap 
the kids are home from school you can probably hear them in the background I've got it... [DOG BARKING] oh and that's Casper I don't think...
I don't think Casper is very happy with the kids 
he... he tells them off more than we do! 
he's a great dog 
I think the first thing I need to do is to shut off each pipe to each tap to work out which of the Taps are leaking 
maybe both of them are leaking! 
and to do that I'll need to get a screwdriver - a flat headed screwdriver - come with me down to the toolbox let's try in here
that one looks like a good one the... 
Casper's been chewing the end of it but I think that might be the one 
back up the stairs and we're lucky because we've got... we've actually got these shutoffs 
you might not have them 
this is the pipe for the hot tap so I'm going to turn this so that it shuts off the water 
I think if you just turn it like that... yes brilliant so that water's off
and it's still dripping fantastic! 
this is really good news because it means that it's the cold tap that's dripping not the hot tap so I'll probably turn this back on and then I'll go around the other side 
just get the lights 
and over to the cold tap pipe and I'll turn this sideways... and as if by Magic the leak has stopped 
so it's definitely coming from the cold tap which is on this side so the next thing that I need to do is to take off this thing 
I don't know what do you call it? it's like an indicator 
your tap obviously will be different but pop this off 
I know I'm going to get qualified plumbers in the comments telling me how I'm doing it wrong which is good! 
please leave me a comment and tell me how you would tackle this 
well maybe I need a small... oh there it goes yeah it's just... Levering it up and this comes off like this 
yeah fantastic and what's in there? 
that looks like a bit of an allen key job 
back downstairs to get the Allen key and good job I didn't tidy up the toolbox - Allen keys
so put the Allen key into the hole 
hey it’s too big - okay so this is classic dad delivers Vlog - the actual Allen key that I need is the one that is missing 
that's too big and this one's too small 
gotta get back to the Allen key collection  
oh you know I... I'm this close to throwing away all my Allen keys because I've got a really good Allen key set 
but it's a good job that I keep lots of old ones so let's try these ones now oh man 
these jobs would only take like two minutes if I did them properly 
okay that's way too big 
this is smaller this might be the one 
my options are getting Slimmer by the minute 
right now I'm going to turn... oh no it's not good 
oh yeah right so this is a tip I saw once 
close... put the plug in because if you drop something into the sink then that's bad news 
so I've... I've hit a wall before I've even started 
I've Got to Now not only get a washer and an O-ring but I've got to get an Allen key that's like this - but one will actually work 
there's only one place for this 
this is a place that we have in the UK called poundland 
you've probably got something similar in your country if you're not in the UK where everything in the store is one pound 
this is me wandering through the aisles trying to find an allen key set 
and I found the DIY section and oh my goodness 
this is what the one pound Allen key set is worth now 
oh my God £2.50? 
I don't know if things are like this wherever you're watching but the prices have definitely gone up 
but anyway I've got the... the Allen key so now back home to take it apart 
I was kind of hoping they would have O-rings or washers as well but they didn't 
there we go, brilliant - it's going
okay this is why it's definitely definitely worth putting the plug in so you don't drop any vital bits but this is what's come out 
Is that in Focus? oh it won't come off oh no... oh wait oh... oh there he's done 
right so now we're into this I guess the... the washer is inside here maybe 
I'm gonna try and undo this and see if there's something inside that needs replacing 
this might be the most difficult part of the job because the WD-40 is in here somewhere 
okay I've got this it's not quite as good because the wd40's got this really nice straw on the end of it so you can put it on really accurately and this? 
this just kind of sprays everywhere
Let's give this a go 
I guess it's cleaning the tap 
yeah I don't even know which way to turn the bolt around 
it's probably been here... I think it's been here since 1990 so it's about 30 years old 
okay I really do not want this to go snap!
brilliant I'll send you a picture 
all right then see in a minute bye bye 
so my my Unstoppable wife is at a DIY Superstore now - she just happens to be passing - but I can't... I can't tell her what rings to get 
I don't know what washers because I just can't get it open 
I'm going to send her a picture of what I've got so far and we'll see how that goes 
my brilliant wife did give me a tip off though that the WD-40 
I don't know how she knows these things 
but she said have a look in the cupboard in here 
oh there it is! 
how does she know these things? how do you do... how do you do that? 
I'm gonna watch this with her - this video - I'm gonna ask how... how did you... how did you know this was in here?!
it's only one thing for it - I'm gonna give it one really really hard turn 
I don't want it to fly off and hit me either
I did it! 
I did it! look at this Dad delivers success no, no not finished yet 
come closer look at it turn 
magnificent - whoa there we go - I'll be able to call my wife now oh
is it in there? oh where is it? where's the washer? so it's stuck in there [PHONE RINGS]
I've got it! I've got... I've done it so now I've kind of shredded the washer that's inside, I can't get the washer out 
I've got some O-rings of different sizes 
oh brilliant oh tweezers! do you know a tweezer, there have been some blue tweezers hanging around yeah?
yeah I was gonna do my eyebrows, I left them in the bathroom - on the glass thing - oh yeah of course yeah I moved them all right thanks okay alright bye! 
okay bye 
I can't get this washer out and it's coming out in bits 
there we go 
oh whoa look at that! that's what we needed! 
let me try to explain what happens next 
my wonderful wife came home with a load of washers 
none of them fit - it's just an O-ring! I just need an O-ring for this cartridge! 
the next day I went to the big DIY Superstore myself 
I didn't mind - it's a... it's a day out isn't it 
here I am pulling up after the 20 minute journey and it's quite exciting so I go to the plumbing section to see, well I had to find the plumbing section first to see the amazing array of products that might be able to help 
I don't know where to start 
what my wife did get me - which was absolutely crucial - was this! 
it's like a... it's like a guide so you can hold your cartridge up because obviously there are hundreds of these 
you hold your cartridge onto the card and you can measure some really specific things - it's now getting really complicated! 
I just want... I just wanted the O-ring 
I could not see any o-ring here 
I mean feel free to pause the footage - I would 
I don’t know where to begin! 
which means that the only thing I can do is to buy one of these! 
these cartridges and I don't know which one 
I mean I've done my measurements but there was only a small selection of a few on the shelf and they are 15 quid for literally... for an O-ring! 
I'm gonna have to replace the whole thing 
this stuck in my throat ever so slightly and I wasn't convinced that it was the right one 
the extra confusion is that this is blue because it's on the blue... the blue tap because it's for the cold tap so it opens anti-clockwise and closes... no 
so they only sell them in pairs and I only need one! 
it just felt like I'd be buying in a panic if I just grabbed this cartridge here and... and I don't need two of them as well - I just need one for the cold tap so I got a refund for the washers, came home and I found this page here 
a pair of them for... for half price so I ordered them and here they are! 
They’ve just arrived - I'm very excited 
now we can go into the bathroom and try this out 
this is getting to be a catchphrase on the channel isn't it 
what do we say 
it's never easy! 
I really want this done now as much as you do because look we've got pork chops! 
I've gotta... I've got to do this before the chops are ready 
so I've managed to tidy up and close this again... I managed to tidy up after Friday 
it's now Sunday 
we've been without a bathroom sink for two days 
this should be as easy as just screwing this into that hole 
and sorry my kids are playing electronic Monopoly at the moment so you might hear some shouting and some swears in the background sorry 
I'm going to try and get some of this water out here
actually oh it's probably not a good idea using tissue oh no 
oh this is trapped in here for all time 
That’s clean now 
let's try this 
so I'm hoping this will just screw in 
well it fits - I've got the right size one... oh this is looking too straightforward 
then I'll get my spanner oh this is looking very promising 
the next big test is to see if the tap handle fits onto this, so this has to be the right number of teeth is this gonna... this could still go very wrong
it's like Cinderella's slipper! it fits 
just make sure it's straight 
that's not straight oh man, now I can screw this on 
fingers crossed let me take you closer 
we'll get the crucial piece here and then I'll put this in right side up and I need to screw it tightly enough for the handle not to wobble
and finally I'll put the little top on for Elegance 
I'll just push that on - oh
Kids?! where are you? oh there you go 
kids please come see this 
come see what your old man's done 
how long did that take you 
two days and 10 pounds 
well it yeah it took a lot longer than I thought but you know, given I haven't done this before 
the final thing is - maybe you could do this - can you just turn that - yeah okay quarter turn... quarter turn? 
yeah which way 
oh okay you ready 
okay let's do... you do the cold tap, I do the hot tap oh go on, go on you do both
oh and is it dripping 
I'm calling this a dad delivers success! 
I win! I win!
No you don’t - I do! 
you and me are on such a voyage of Discovery thank you for making it to this point and if you're hitting the thumbs up or subscribe button thank you for being awesome and right here is what YouTube knows that you're gonna love next! 
we did it 
Can you please help my daddy get 10000 subscribers just click on his face thanks bye! alright this is gonna be the proper one right?


Previous post...
L Shaped Bench easy project - how to put the sides on


All about me, and getting these by email.