Thursday 27 April 2023

Get your PODCAST onto YouTube


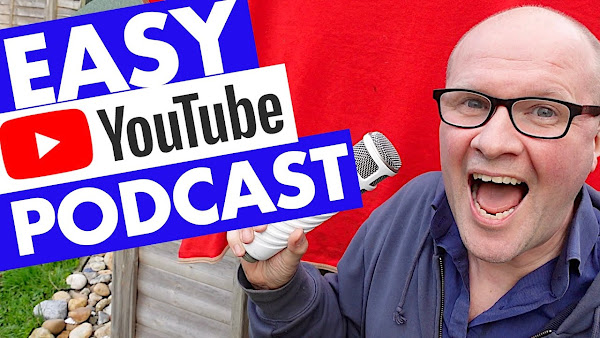
How to make an audio podcast tutorial: 
How do you start a new PODCAST on YouTube? How to use the new YouTube Podcasts tab feature? In this video, I move my Great British YouTubers Podcast onto the new official YouTube Podcasts shelf, home page and tab. I walk you through the basics so you can follow along as a step-by-step tutorial.

Get your PODCAST onto YouTube!


TRANSCRIPT: (CLICK PLAY ON THE VIDEO ABOVE)

THIS IS THE TRANSCRIPT - CLICK PLAY ON THE VIDEO ABOVE!

Hello, welcome back to the Happy Hut. I'm Neil Mossey. 
Have you ever thought about starting a podcast here on YouTube or using a podcast that you already have and making that available on YouTube? 
AND have it be recognised by YouTube as a podcast rather than as a regular YouTube video? Apparently, YouTube is the number one platform for listening to podcasts. Look, I've done 12 seconds of research on Google there! 
YouTube itself even claims to be one of the top places where people listen to podcasts, which is probably why YouTube has brought out this podcast tab for our YouTube channels. 
And in the create button at the top here, you can now make a new podcast in YouTube Studio. 
I have a podcast. It's called the Great British YouTubers podcast, where I get to interview YouTubers to hear their stories and gain knowledge and insight about running their YouTube channels. 
And right now, I'm going to create this as a podcast within YouTube right here, step by step for the very first time because these are the features that we get from making our podcast listed as a podcast on YouTube. 
I'll put this official YouTube help article in the description, but as you can see here, we get a special podcast badge. And that's not all, we get this cool podcast tab on our YouTube channel. 
Why don't we make one now? 
Here are three ways of creating our podcast on YouTube. 
First, we'll go to studio.youtube.com, which is our YouTube Studio dashboard. 
We'll click on Content on the left-hand side, and then on the tabs along the top here, we'll choose Playlists. Then find the playlist that is your podcast. 
It's all the way down here, and if I hover my cursor just to the right of the thumbnail, you'll see these three dots come up. 
I wish the button was there ready for us, but it's not. We've got to hover this cursor. I can't even say it, and then I'll click on the three dots. 
And you'll see there's an option here, which is "set as podcast." 
So I'll click on that, and wow, look, it's already brought the title in the description from the playlist into the podcast information boxes. 
The only extra thing we'll need is this box here, "upload a square picture." 
This is for the cover art of our podcast. 
I won't do it just yet; I'll do it on the next version, so I'll hit cancel. 
We do need a square thumbnail to make this podcast work. It doesn't let you progress without this thumbnail, and to do that, our Channel needs to be verified. 
So, you might be asked to verify or confirm your phone number. 
The second way to do this is through the podcast tab. So, we'll go into YouTube Studio, and then I'll click on Content, and then I'll click on the podcasts tab on the top here, and you can see there's a kitty cat waiting for us right now. 
All I need to do is to hit the "new podcast" button. 
We have a choice, which is to either create a new podcast or to set an existing playlist as a podcast. So, I'll click on that button. It takes me to the playlist button, which we saw just now, and then I've got to find my playlist again. 
There it is. 
Click on the three dots, "set as podcast." So, as before, it brings up this information box so we can fill in the title and the description. 
I'll go down to the "upload a square picture" choose my cover art and hit "open," and that should upload my podcast square logo. 
All we need to do now is hit “done," And is that, is that it? 
So, if I click on the podcasts tab now, it’s there! 
I have a podcast on YouTube! 
The third way to create a podcast on YouTube is to - believe it or not - hit the create button at the top of our YouTube Studio dashboard. 
So, if I click on create, you should be able to see this option here, new podcast. 
So, I'll click on that and again, we have the choice to either create a new podcast or set an existing playlist as a podcast. 
If I hit create new podcast, you can see it brings up the title, description, and cover art options. 
Next, I'll show you how to change the order of our episodes in the series, but just to say things might change, and the very latest YouTube help article is linked down in the description below. 
To add new episodes or videos to our podcast, I've got a new episode that I want to add. 
I'll go into content and I'll look up the video. I know it's this one here and then I'm going to hit the edit button, the pen icon, to go into the details. 
This is my episode with YouTuber and TikTok-er Steven McKell. It's a great episode. Oh, by the way, here's a link to the YouTube... to my YouTuber's podcast, and it's in the description! 
Just in case you want to have a listen and see how this podcast works on YouTube. 
But aside from that Shameless plug, I'm gonna go down to playlists. 
There's a pull-down menu here and if I scroll down, these are my playlists, but ah, can you see this? 
I recognise this playlist! 
It's the Great British YouTubers podcast and it has a podcast badge next to it. 
So all I need to do is add the video to that podcast, oh it’s disappeared because it's now shot up... Where's it gone? It's now disappeared from the playlist list, a little bit worrying, but all we have to do is to hit save. 
And then if I go back into the podcast tab in studio and then open up the podcast by clicking on the videos button, there it is, right at the top. 
It’s set as private at the moment, so I need to give it a thumbnail and you know, tidy up the description. 
Once I've done that, I can set that to public and that will appear at the top of my podcast series. 
We can change the order of episodes in our podcast. 
All I need to do is click on the three buttons here, and on this pull-down menu, click on edit on YouTube. 
And here it presents the podcast like it's a playlist, even though it's not because look, I've got the podcast badge here. 
But can you see these grab handles? 
Excuse me, Steven, I'm just gonna grab you and pull you down. 
You can order the episodes this way by just dragging them up and down the list, and you can have whatever order you like for your podcast. 
So someone coming to this podcast will come to this episode first. 
There, I've set the order, we're good to go. 
Leave me a link to your podcast in the comments below. 
I'd love to see how this works out for you. 
And obviously, thanks for being awesome with a thumbs up or subscribing. 
It really helps me out. 
And right here are all my awesome YouTube tips and tricks. 
I mean, it's, it's literally everything I've got right there. Thank you.


Previous post...
How to DELETE your YouTube Channel


All about me, and getting these by email.

Wednesday 26 April 2023

How to DELETE your YouTube Channel


How do you DELETE a YouTube channel? Or... how do you delete YouTube videos and search and watch history? Remove and delete everything!
I'll walk you through how to delete your YouTube account step by step, as well as remove, hide and delete your videos on YouTube. If you delete your channel, you will also delete your playlists, comments, replies and thumbs up on videos, your search history (searches) and watch history. 
Follow along to delete your YouTube channel!

How to DELETE your YouTube Channel!


TRANSCRIPT: (CLICK PLAY ON THE VIDEO ABOVE)

THIS IS THE TRANSCRIPT - CLICK PLAY ON THE VIDEO ABOVE!

Hello, my name is Neil Mossey, and you are thinking of deleting your YouTube channel. Just removing it, disappearing it, making it go away. 
Maybe your channel is slightly embarrassing (I won't ask), or maybe you just want to start again. 
I'm going to delete this YouTube channel in real time, step by step, so you can follow along with me and see how to remove a YouTube channel.
Now, if you want to just do that right now, just hit the big delete button, jump forward to this timecode that's on screen now, and you can just get rid as soon as possible. But I'm going to share a few things first for safety before you delete everything because closing our YouTube channel will permanently delete all content (I hate the word content), but that means it's just going to remove all your videos, comments, play history, and watch history.
The first thing we can do is download everything, including comments, playlists, as well as our individual videos. Maybe we might want to use those on another channel after we've deleted this channel. To do that, we can go to this website here. It's called Google Takeout, and that's takeout.google.com from any browser. And sorry, I have to do this on the desktop. I can't do this on a mobile. Google takeout is the place where we can download all the data that Google holds on us, and because Google owns YouTube, one of the services we can use is down here at the bottom, YouTube and YouTube Music.
I don't need to download all the other things. We just want our YouTube stuff. So I'm gonna go to the top, and then I'm going to click here on "deselect all," and that unticks all the boxes. So scroll all the way back down again, go to YouTube, and then we're going to click on the tick box next to it, and we have all the options for things we can download. So we can download our history, my comments, my posts, my playlists.
I'm just gonna leave everything ticked and I'll click on OK, and then we'll go on to the next step. We can choose how we want to download this. These are the options. I'm just going to send a download link via email, and I only want to export it once. You have to download it zipped up, so we'll have it as a zip file, and the file size I'll just set that to 10 gigs. This is for how big the chunks you want to download are, and then I'll click down here, the big blue button, create export. What it does now is tell us that it is preparing the files to be able to be downloaded. It depends on how big your YouTube channel is, so it can take a few minutes or a few hours. Let's do a time jump. Whoa, it's only a few minutes later, and you should get an email to let you know when the export is ready. But on the Google takeout page, it says, 'Your latest exports - YouTube and YouTube music.' So what we can do is hit the download button here. That opens up 'Manage your exports.' So, this is where we can download our YouTube channel. Let's click on the download button here. That has downloaded. So, let's open it up, show it in Finder, and this is everything from my YouTube channel. How exciting! Look! So, we've got history, playlists, and videos. You might have more things like comments, but those are my videos. They're safe. So, now these are downloaded onto my computer, I can use these somewhere else. Google takeout if you want to back up your YouTube channel. 
The second thing we can do instead of deleting the whole YouTube channel is to set our videos to private or unlist them, which means that either only you can see them or only people with the link can see those videos. And to do this, just go to studio.youtube.com, and I'll open up the menu on the left-hand side, and we'll click on content.
And this lists all of the videos on our YouTube channel, and you can see in the very first column “visibility”, we can change the visibility from public to either private, which means that only we can see them, only the people logged into the account can see these YouTube videos, or unlisted. 
They don't appear in YouTube search. 
You can only see this video if you go to the video link. 
Or we can go into the video itself, into the dashboard, and there's a visibility box here, a pull-down menu. Again, I can click unlisted if I wanted to unlist that video and not make it appear in YouTube search. And when we go back to the list, you can see that that video is unlisted. 
The third thing we can do is just hide our entire YouTube channel. So instead of going through all those videos, we can do that at a channel level. So all we need to do is to go into YouTube Studio, and we'll go down to, let's expand the menu. We will go down to the bottom here, settings. And in this window, we'll hit Channel, and then click on this Advanced Settings tab. At the bottom here, you can see this option: Remove YouTube content. Even though we're just hiding the channel, and this opens this page which has two options: I either want to hide my YouTube channel or I want to permanently delete my content. So let's go for hide my channel. Although we're just hiding our YouTube channel... Got my glasses on. You need to confirm that you understand that hide your channel will make your channel name private, my public videos like subscriptions and subscribers, they'll all be hidden, but it also means that it will permanently delete comments made on YouTube videos and my replies to comments. And then you can click the big blue box down here, Hide My Channel. 
And it wants you to confirm this, so I'm going to hit hide my content. 
Channel hidden, you're all done. 
Please allow some time for your channel to be hidden across the site. 
Even though this channel is now hidden, we can still watch, like, and subscribe, and that activity will be fully private. And if we change our minds, we can re-enable our channel anytime. There's a link for the instructions to do that down in the description below. 
So to delete your YouTube channel, you're ready to just wipe it off the face of the Earth?
If this is helping, by the way, thanks for the thumbs up or leaving a comment to say hi. 
We currently can't delete a channel on our phone or just using a mobile device. It has to be here on desktop. And the way to delete a YouTube channel is to go to your studio dashboard. So, that's studio.youtube.com. 
If we go up to the top left-hand corner, press those three bars for this menu, and we'll scroll down to the bottom here and choose settings. Then, on the left-hand side of this pop-up window, hit Channel and then choose this tab, advanced settings. 
Scroll down to the bottom and you will see two options: manage YouTube account or remove YouTube content. 
We're going to click on remove YouTube content and then we have two options. We can either hide the channel, which we've just seen, or we can choose to permanently delete my content. This is a really big moment. Now it wants us to confirm that we know that the following will be permanently deleted: all my videos, my Channel, all my comments, replies, Thumbs Up, YouTube gift settings, search, and watch history. And there's another box to tick here, any paid subscriptions will be cancelled. I don't do any of that, so let's hit this button, delete my content. Shall I do it? You ready? Hold me. Here we go. It knows that this is a really big thing to do, so we have to confirm yet again that we know that this will permanently delete all our YouTube content. Ah, just make sure I'm logged into the right channel. 
Look, this is just a test Channel, but I'm still worried it's going to delete my proper Channel. 
If you can still see this video, it didn't, so we will confirm it by typing in our YouTube address and then hit again delete my content. Your content is being deleted. Usually, this takes a few minutes as the message says, but it can take up to a couple of days if you have a lot of videos and a lot of YouTube content. If you have any questions or just say hello, let me know if you've done this. I'd love to hear from you. Just hit the comments down below. Thank you for hitting the thumbs up or the Subscribe button if you want more YouTube tips. And right here are all my YouTube channel awesome hacks.


Previous post...
How to LINK your channel to other YouTube Channels


All about me, and getting these by email.

Tuesday 25 April 2023

How to LINK your channel to other YouTube Channels


How do you link your YouTube Channel to other channels on YouTube?
And how do you get the CHANNELS tab on your YouTube page?
In this video I walk you through step-by-step how to link other channels on your own YouTube channel, using featured channels in Customization.

LINK your channel to other YouTube Channels!


TRANSCRIPT: (CLICK PLAY ON THE VIDEO ABOVE)

THIS IS THE TRANSCRIPT - CLICK PLAY ON THE VIDEO ABOVE!

Hello, I'm Neil Mossey and welcome back to the Happy Hut. 
It's a lovely warm day today in the Hut because... let's come back in... 
Do you want to add a channels tab to your YouTube channel? 
Like this one here! 
This is my YouTube channel page, and you can see these tabs along the top here, but there's one here marked “channels”. 
Let's click on that, and that opens up a list of channels that I want to be linked from my YouTube channel. 
It's a really nice feature to have so I'm able to link to some of my other channels. 
Like right here, I've got my dad Channel, my trains and my Ikea Channel. 
Or you can link to your friends, or just the channels of your favourite creators on YouTube. 
So, I've got Casey and Shelby represented here. 
I don't think it actually does very much for your channel, but it does publicly showcase the channels that you want to be seen to be linked to. 
But it's not that easy to add this list, so here we go now with the step-by-step instructions.
I'm going to walk us through this. 
There are two ways we can get to the place where we need to add the channels. 
Either on YouTube, just go to your channel and if you're logged in, there's this button here, 'customize Channel.' 
Or, this is the way to do it on a mobile or desktop device. 
Go to studio.youtube.com and on the menu down the left-hand side here, way down at the bottom is this tab, 'Customization.' 
This is where we make the featured sections on our Channel. 
You know, those rows that you get on your channel page, like these ones here on my channel. 
We need to make a row for our featured channels, and that row is where we can put the channels that we want to link to. 
On the right-hand side, we'll click on this button here, 'add section.' 
These are all the things that we can add to our main YouTube channel page, but right at the bottom here is 'featured channels.' 
I'll just click on that. 
There's a search box here where we can search for the channels that we want to add. 
Here's a quick tip, if you're finding it difficult to find the channel, you can get their unique URL from their Channel page in the address bar, with or without the '@' symbol. 
So, look, I can paste the @ handle here, and it shows the channel to add. 
To add it, you just click on it here. 
Then it lists them on the right-hand side.
Once we have a few channels, we can put them in the order that we want by using these grab handles down the side of the channel names. 
So, I could bump up my Ikea dad Channel, I could bring Shelby, should I bring Shelby all the way to the top? 
Not quite top, they'll have it under the dad Channel. 
I think this is the order I want, so we can now give this collection any title that we like. 
I think I'll stick with that one. 
Now, when I click "done" down here, that saves the featured channels as a row on our YouTube channel page, and I'll hit "publish" at the top. 
And look at this, there they are, my YouTube channel buddies! Looks perfect. 
But not only are the channels here, if we click on the "channels" tab at the top, there they are, they are now in our channels tab. 
Of course, we can do the same process to edit or change these at any time. 
Leave me a comment to say hi if this is helping, and thanks for being awesome and hitting the thumbs up button. 
And right here is a bunch of videos with some other tips and tricks for your YouTube channel. 
Can you please help my dad get to 1 million subscribers? Just click on his face. 
Thanks, bye! 
Can we have dinner now?


Previous post...
Upgrade your YouTube gear setup... 8 ideas... YOUTUBE STUDIO TOUR


All about me, and getting these by email.

Tuesday 4 April 2023

Upgrade your YouTube gear setup... 8 ideas... YOUTUBE STUDIO TOUR


CAMERA: SONY ZV-1 VLOGGING CAMERA (Amazon Associate paid links) 
CAMERA: DJI ACTION 2  
MY TELEPROMPTER       
ZV1 LENS: NEEWER WIDE ANGLE  
VIDEO CAPTURE CARD   
USB HUB FOR TELEPROMPTER      
DESK MICROPHONE: DEITY D3 PRO MIC    
DESK MIC ARM: INNOGEAR heavy duty microphone arm   
WIRELESS MIC: DJI MIC dual cordless microphones
MACBOOK PRO 2021 14 inch M1:   
USB DESK HUB:               
LED CLOCK:
VISUAL TIMER CLOCK:

Upgrade your YouTube gear setup... 8 ideas... YOUTUBE STUDIO TOUR!


TRANSCRIPT: (CLICK PLAY ON THE VIDEO ABOVE)

THIS IS THE TRANSCRIPT - CLICK PLAY ON THE VIDEO ABOVE!
Hello, welcome back to the Happy Hut. I'm Neil, and this is a bit self-indulgent, but I thought this might help you if you are starting your YouTube channel. It's been a while since I've done a video on my YouTube Studio setup, so I thought I'd show you how things are looking here in the Happy Hut. Because I've picked up little ideas from here and there from other people's videos, so I was hoping that while sharing how things are going in here might actually be useful if you are thinking of upgrading equipment or having a setup. I'll just turn this to the side there because that's blasting us. So this is the current setup. Welcome to the Happy Hut. Here's the camera I use the most, this is the Sony zv1, and I'll put links in the description for all of the bits of equipment that I'm showing. Let me go back to this camera here. By the way, this camera is the DJI action 2. And I've got a new attachment here. This is the DJI mic, but I'll talk about that in a moment. That's what you're hearing me on now, but let me show you the main setup for my desk videos. I use this Sony ZV-1 or ZV1 camera, and I don't usually have a Portaprompt attached to it, but I've started to use that in the last week or so, so we'll see how that goes. I have a video all about how to set up an Autocue or Teleprompter for your camera and your YouTube setup. That link is in the description. Now, this is wonderful. The way it works is it reflects the screen that's below it, which in this case is an old mobile phone of mine, and I'll show you how that setup works in a moment. And this Portaprompt just clips onto the end of my Sony ZV1 lens. But that lens, if you're familiar with the zv-1 or zv1, you'll know that this doesn't usually come with it. This is a Neewer wide-angled lens, and I don't really need the wide angle in here, but it is really handy for clipping the Portaprompt onto the body of the camera here. I've got a video in the description. It's playing on screen now where I show you how the Neewer lens works with this Sony camera. It's been absolutely brilliant, and I keep it on all the time there. I've got the Portaprompt hood, and I've managed to somehow finally connect. I can show you what I'm seeing. I've managed to connect my PC to my prompter there. If I change the, let me get a script up on my PC.
So this is something I recorded the other day, so I've written out the script in Google Docs and made it really large font, but I've also made the screen size really big on the PC. Then I output, I don't know which camera to look at! Then I put the... I output the PC on an HDMI cable. Let me show you that. That's the yellow cable here. So, I've got the PC going out to the monitor, but also, it goes in this cable, and it's a bit hidden back here. I might wreck my setup. Took me a while to figure out, but I've got the HDMI cable going into a video capture card. That link's in the description. It's about $15. It's brilliant. It turns the video signal into a USB feed that then goes into this adapter. I needed this adapter because it needs to be powered, to power the capture card, so I've got a power lead, USB-C power lead powering that adapter, and then that sends the video signal into my Samsung S8 phone. 
Oh, it's falling down, it's still holding out though, and I can see the script on screen. I only needed to do one more thing, and that was to make the video “mirror image”. And I've used an app on the Google Play store called, I think it's called OTG camera. I've got it on screen now. The reason I have that is that it turns the video feed and it turns it backwards so that when it's reflected in the lens hood of the teleprompter, it reverses it so it reflects it, so I can now read it. So you can see that's my script, and I can change the size by just changing it on the PC. Let's double the size, there we go. Oh, look at that, nice big text to read.
And that's made it much easier to deliver long videos to camera because I can have all my notes in my eye line and see what I'm supposed to be saying or, you know, at least not lose my thread in the middle of a sentence. The usual microphone that I use is this, it's the Deity or Deity D3 Pro, and it's a shotgun mic. So I'm not sure that you're supposed to be using it this way, but I get it as close as possible using this, Mic Arm. And this is, it's like a podcast or radio studio arm, it's an Innogear arm, again, that link is in the description if you wanted to take a look at that, but it's desk mounted, and it's really easy to just angle. I can just pull it over and not make any noise, so I can pull it close, I think that's probably bit too close, or have it out of shot so you're hearing this microphone right now. And I think it has a really warm, uh, warm voice. It's not cheap, but because this is an older model, this microphone is quite heavily discounted at the moment on Amazon. So if you're looking for a shotgun mic, can really highly recommend that. I've got a video all about how it works and its features. That's in the description and on screen as well. I've got this microphone feeding out onto this cable. That cable goes into the camera, the zv1 there, and that is how I record my voice these days.
But if I am out and about, I now use this. It's the DJI mic. It's a wireless mic. You get two mics in the box, and it has absolutely transformed my vlogging and filming because I haven't got a cable now connecting me to the camera. 
I can go wireless. So let me show you how that works. I'm wearing the mic, one of the microphones here, it looks like this, really small and discreet. I've actually coloured in the DJI logo so it wouldn't just show on screen all of the time, and I can tell that the receiver here is receiving this microphone because you can see the green bar going up and down as I speak. So at least I know is capturing audio. I just click that microphone to me here. It's a built-in microphone, but you can plug in a better microphone or a different microphone if you wanted in that socket there. And also, this little unit also records audio as well, so if there's a problem with the radio connection between the transmitter and the receiver, this will be recording it. So that has been an absolute video creation lifesaver. 
I'm still using the DJI Action 2. This is wonderful because it's discreet, and if I'm out filming in public or on the streets or on trains, um, it's tiny. It has really got me out of some filming difficulties. I've even clipped it to my cap while I'm doing some DIY over on the other channel, the dad delivers Vlog Channel. 
Let me just show you the studio setup. Uh, this is my desk. It's a Skarsta, Ikea Skarsta adjustable standing desk, so I can wind it up. Oh, it's going to hit the camera. I'm always going to demonstrate it, this all standing up. Anyway, you get the gist. I could do this standing up, and that's a lot easier sometimes when you're demonstrating something. Also, on the desk, the Field of Dreams, I've got the MacBook that I edit on, and over here, I've got this hub - so I can plug things into my computer just by doing it on the desk without having to go behind the desk and on my hands and knees to plug things in or unplug things. 
I still have to do that. You can see the spaghetti back there. I do need to plug things in now and again, but it's a lot easier having the easy access to them on the desk. I've got a new clock too, so I have a radio clock over there, which is handy because that keeps time. But over here, I've got this. I love this clock. It was only 10 pounds on Amazon. I'll put that in the description as well because I just love the look of that. And I've also, just to help me with script writing, I've also got a visual timer as well, which really helps me to stay focused. So, if I turn this up to say, I don't know, you can turn it up to say 25 minutes, and that will count down. I'll be able to see it visually as that countdown goes, so it's very difficult to lose time when you've got this in your eye line. That has really helped with the editing and the script writing. So, that was it. That's my brief whistlestop tour of the Happy Hut YouTube studio. Is there anything that you would recommend or anything that you want to see me try out here on the channel? Leave a comment below or share pictures of your YouTube setup. I'd love to see them. And right here is what YouTube thinks you would love to see next.


Previous post...
How to set a day rate and INCREASE it!


All about me, and getting these by email.

Monday 3 April 2023

How to set a day rate and INCREASE it!


What is your day rate? How do you decide what your day rate is?
How do you set a day rate? And how can you increase your day rate? Or at least not fall into a situation where you take a job and then realize you're not being paid enough for the work you're delivering... In this video I walk you through 8 easy questions to ask BEFORE you give your day rate. This is mainly for content creators, or producers, people working in TV, radio, podcasting or YouTube... but guess this might help in any industry. Have I missed any good questions you would ask before giving your day rate? Leave them in the comments below, I'd love to see them!

BOOST your day rate with these 8 easy questions...


TRANSCRIPT: (CLICK PLAY ON THE VIDEO ABOVE)

THIS IS THE TRANSCRIPT - CLICK PLAY ON THE VIDEO ABOVE!

Hello, welcome back to the Happy Hut. My name is Neil Mossey, and this is a bit of a forward question, but what is your day rate? 
If you are a freelancer or a contractor, or just someone doing work for someone else, the question that always comes up when I'm approached for work is, "What is your day rate?" 
It usually comes up just at the end of the conversation. 
"Oh, can I just take your day rate?" 
And I have no idea how to answer that question. And you might be in this position as well, so I want to share these questions that will help you feel good about the day rate that you charge. 
I think it also might help you to increase your day rates. 
It's really difficult setting a day rate because obviously you want it to be in the right ballpark so that they give the job to you, and you also don't want the day rate to be too low so that you undercut yourself. Naturally, I want my day rate to be 
one million dollars! 
But what it's really about, I think, is when you accept the job, not getting to the point where you're in the middle of the job, realising that you're being paid too little. 
And there's a problem with the question, "What is your day rate?" because it implies you should know how much you charge, Mr. or Mrs. Professional. 
And your rate should be in line with the norm of what this job usually pays. 
It makes no sense to have a fixed figure that's just the same for all circumstances and all clients and all companies. And that's why I'm sharing these eight questions that you can ask before answering the question, "What is your day rate?" 
We need to know the full scope of work and what is expected of us. So, these are the questions on screen now. Let's go through them one by one, and I will explain how and why they would affect our day rate. 
These questions aren't in any particular order, but the first question is: How many days of the day rate do you think this might be? 
Now, this might put the person you're asking in a difficult position because, on their end, they may have a budget and might want to change the number of days so that you fit their budgets. 
They won't want to tell you the budget because they actually want to move things around. But I would suggest we should at least get an idea of: Is it a two-day contract? Or 30 days or more or less? Because the number of days will affect our day rate. 
If it's, say, 30 days, I can apply a discount in reward for the block booking, and that's a nicer way than saying “if it's two days, it's more expensive because I've got to protect those days because I can't take on any bigger contracts. Plus, I've got to find work either side of those two days.” 
None of that is the problem of the person hiring you, so let's not burden them with it. The reason more days is better for your clients hiring you is because you can apply a discount, and that needs to be reflected in the day rate.
The second question is: What is the schedule? 
Will delivery need to happen tomorrow, or over the course of a couple of months? 
Urgent jobs will cost you and me more to deliver because we have no resilience, no margin for error. The schedule affects the day rate because if it's urgent, I need to make sure those days are protected and that the delivery is protected. And you can join in with the catchphrase: that needs to be reflected in the day rate.
Question number three is: are the days consecutive? 
Do they expect the days of work to be done together in a row? 
Or do they expect the work for Monday to Friday? Or is it three days per week for three weeks? Or is it completely flexible? 
This kind of ties in with the earlier schedule question. 
I think three days of doing work on working up the actual idea for an overall project, for example, is different than 20 days of working on the project. And say it with me, this needs to be reflected in the day rate. 
We're plowing through these, we're halfway already. 
This is question four, is any work needed before the project? You and I will be expected to invest our time in getting up to speed with the project that the day rate is for. Let me give you a personal example. 
If I'm writing on three episodes for a TV series, I will need to know how that series works, so that's time spent on the background of the project. I'll also need to know what episodes have been done already. So that's time being spent getting up to speed on the current status of the project. I'm spending my time doing that. And let's say this together: that needs to be reflected in the day rate. 
I'm going to be talking about holidays and IP next, but thank you for the thumbs up or hitting the Subscribe button if any of this is useful so far, and if you want more of this. 
Question five is, will there be anti-social hours? 
So will there be work during evenings, weekends, and national holidays? 
For me, I've worked on projects here in the UK that are co-produced in the United States, so there's a time difference which means causing the evening questions and emails at night. 
And some of the delivery dates have been on bank holidays, national holidays here in the UK, which I can do. I'm more than happy to do that, but it needs to be reflected in the day rate. 
Does the schedule mean that you'll have to work at the weekend to deliver the projects on time? 
Guess what, that needs to be reflected in the day rate. 
Question six that we can ask before for giving our day rates is, will people be working to me? Which is a nicer way of saying, will the job put me in a position where I'm have the ability to fire someone? That responsibility needs to be acknowledged and paid for. It reflects seniority, but it also reflects stress for me, because you're not just responsible for your work, but you're also responsible for the work of others. 
And if, for any reason, any of those people fall down, that work will need to be done by me or I'll need to do work to fix that. 
And that needs to be reflected in the day rate. 
Question seven is, will I need to create any IP or intellectual property? 
So, will I need to make something that will have a life after the job that I've been paid for? The contract usually the person paying for your days will want to own everything that you do, which is fair enough. 
That is why they're paying the day rate. But we need to acknowledge that that work, the work that we deliver, has a worth beyond those days where we've done the work. 
And that needs to be reflected in the day rate. 
I'm going to walk us through what these questions actually mean for us, but the final question before that is, what actually needs to be delivered? What are the deliverables? 
This doesn't affect our day rate, but you and the clients need to know what these days are expected to deliver. 
For instance, um, for me, having to write three scripts in three days is different than writing 16 scripts in three days. 
For those scripts to be two pages long is different than me writing scripts that are 40 pages long in three days. 
That needs to be reflected in the day rate. 
After all of these questions, we might feel better about giving our day rates, but you don't have to give the day rate here and now. 
We can take all of this information from these questions and then send over a quote for our day rate with a proposed scope of work, or “plan for the job ahead”. 
That means when they are comparing your day rate with someone else, they don't know if the other person who's cheaper has included any of this. 
We look like we're good value because they know what our day rate covers. 
For me, that works much better than blurting out a figure on the phone and hoping that I'm right when they ask the very innocent question, 'what is your day rate?' 
It also defends me against cheaper quotes, and if the client wants to reduce your day rate or negotiate you down, at least we have a list of things now that they can change to bring that day rate down. 
Are there any questions that you would add? Is there anything specific to your industry? 
Leave it down in the comments below. And thank you for being awesome and hitting the thumbs up button or the subscribe button. And right here is what YouTube thinks you should be watching next.


Previous post...
How to upload a video to YouTube STEP BY STEP for beginners


All about me, and getting these by email.