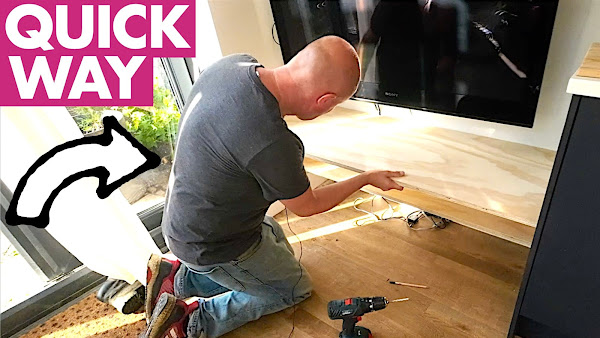
Sunday, 30 October 2022

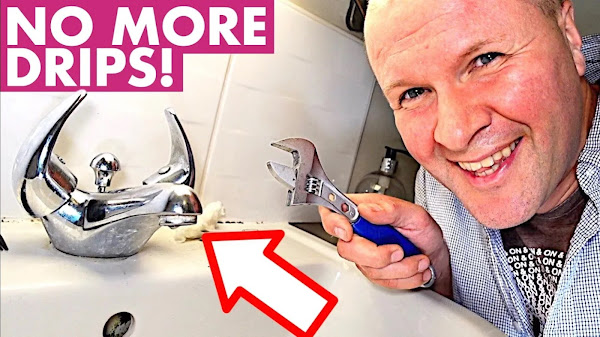
How to fix a dripping bathroom tap


BUY A SPANNER or WRENCH HERE! (As Amazon Associate I earn from qualifying purchases)
CARTRIDGE SPLINE FINDER CARD TOOL - for measuring your cartridge to find a replacement
https://amzn.to/3fhB9sh - sorry, can only find this in the UK
ALLEN or HEX KEY SET
WD40 SPRAY

How to fix a dripping bathroom tap or faucet? Our bathroom taps were dripping, constantly leaking so I knew I had to do something like replacing the washers or O ring, but I've not done this for a very long time... So this video shows me repairing our dripping tap by replacing the whole mixer tap cartridge.

How I fixed our dripping tap: LEARN FROM MY MISTAKES


TRANSCRIPT: (CLICK PLAY ON THE VIDEO ABOVE)

THIS IS THE TRANSCRIPT - CLICK PLAY ON THE VIDEO ABOVE!
hello I'm Neil welcome back to the dad delivers Vlog where I try something new every day to make your family happy and today we're making your family happy here! 
we're back in the bathroom so we've already done the toilet seat and the toilet roll holder 
that's been a big success 
It’s look... it's wobbling just a little bit don't tell anyone 
the seat is holding out - the Ikea toilet seat is holding out but it is kind of cracking here 
so it's not wearing too well there and I don't know what we're doing to uh to cause that but fingers crossed that can hold out for another year 
and today we're now working our way around the bathroom because this video is all about this! 
yes it's the classic... the dripping tap 
I don't know how we've managed to avoid this for so long 
I knew when I started this Channel and I just wanted to record the little jobs that I do around the house - almost as proof that I do something now and again 
but this... I hope this day would not come and... and it's here... it's here now the tap is dripping 
obviously if I get this wrong we can expect a trip - an expensive trip - from Mr Plumber which I really really want to avoid 
and that's even if you can find a plumber 
we can't even find a plumber at the moment and I wouldn't bring a plumber into this situation but if I make a wrong turn or disable the tap like you know it could like drip quite more violently than it is at the moment 
it means that we're wasting water which is terrible for our water bills I mean the environment 
and most importantly at night the sound of this is really really annoying 
but here's the thing I've not done this in a long long time like I mean like decades 
so I don't know if I've even got the right tools I... 
I definitely haven't got the right washer the right o-ring that we'll need inside that tap 
the kids are home from school you can probably hear them in the background I've got it... [DOG BARKING] oh and that's Casper I don't think...
I don't think Casper is very happy with the kids 
he... he tells them off more than we do! 
he's a great dog 
I think the first thing I need to do is to shut off each pipe to each tap to work out which of the Taps are leaking 
maybe both of them are leaking! 
and to do that I'll need to get a screwdriver - a flat headed screwdriver - come with me down to the toolbox let's try in here
that one looks like a good one the... 
Casper's been chewing the end of it but I think that might be the one 
back up the stairs and we're lucky because we've got... we've actually got these shutoffs 
you might not have them 
this is the pipe for the hot tap so I'm going to turn this so that it shuts off the water 
I think if you just turn it like that... yes brilliant so that water's off
and it's still dripping fantastic! 
this is really good news because it means that it's the cold tap that's dripping not the hot tap so I'll probably turn this back on and then I'll go around the other side 
just get the lights 
and over to the cold tap pipe and I'll turn this sideways... and as if by Magic the leak has stopped 
so it's definitely coming from the cold tap which is on this side so the next thing that I need to do is to take off this thing 
I don't know what do you call it? it's like an indicator 
your tap obviously will be different but pop this off 
I know I'm going to get qualified plumbers in the comments telling me how I'm doing it wrong which is good! 
please leave me a comment and tell me how you would tackle this 
well maybe I need a small... oh there it goes yeah it's just... Levering it up and this comes off like this 
yeah fantastic and what's in there? 
that looks like a bit of an allen key job 
back downstairs to get the Allen key and good job I didn't tidy up the toolbox - Allen keys
so put the Allen key into the hole 
hey it’s too big - okay so this is classic dad delivers Vlog - the actual Allen key that I need is the one that is missing 
that's too big and this one's too small 
gotta get back to the Allen key collection  
oh you know I... I'm this close to throwing away all my Allen keys because I've got a really good Allen key set 
but it's a good job that I keep lots of old ones so let's try these ones now oh man 
these jobs would only take like two minutes if I did them properly 
okay that's way too big 
this is smaller this might be the one 
my options are getting Slimmer by the minute 
right now I'm going to turn... oh no it's not good 
oh yeah right so this is a tip I saw once 
close... put the plug in because if you drop something into the sink then that's bad news 
so I've... I've hit a wall before I've even started 
I've Got to Now not only get a washer and an O-ring but I've got to get an Allen key that's like this - but one will actually work 
there's only one place for this 
this is a place that we have in the UK called poundland 
you've probably got something similar in your country if you're not in the UK where everything in the store is one pound 
this is me wandering through the aisles trying to find an allen key set 
and I found the DIY section and oh my goodness 
this is what the one pound Allen key set is worth now 
oh my God £2.50? 
I don't know if things are like this wherever you're watching but the prices have definitely gone up 
but anyway I've got the... the Allen key so now back home to take it apart 
I was kind of hoping they would have O-rings or washers as well but they didn't 
there we go, brilliant - it's going
okay this is why it's definitely definitely worth putting the plug in so you don't drop any vital bits but this is what's come out 
Is that in Focus? oh it won't come off oh no... oh wait oh... oh there he's done 
right so now we're into this I guess the... the washer is inside here maybe 
I'm gonna try and undo this and see if there's something inside that needs replacing 
this might be the most difficult part of the job because the WD-40 is in here somewhere 
okay I've got this it's not quite as good because the wd40's got this really nice straw on the end of it so you can put it on really accurately and this? 
this just kind of sprays everywhere
Let's give this a go 
I guess it's cleaning the tap 
yeah I don't even know which way to turn the bolt around 
it's probably been here... I think it's been here since 1990 so it's about 30 years old 
okay I really do not want this to go snap!
brilliant I'll send you a picture 
all right then see in a minute bye bye 
so my my Unstoppable wife is at a DIY Superstore now - she just happens to be passing - but I can't... I can't tell her what rings to get 
I don't know what washers because I just can't get it open 
I'm going to send her a picture of what I've got so far and we'll see how that goes 
my brilliant wife did give me a tip off though that the WD-40 
I don't know how she knows these things 
but she said have a look in the cupboard in here 
oh there it is! 
how does she know these things? how do you do... how do you do that? 
I'm gonna watch this with her - this video - I'm gonna ask how... how did you... how did you know this was in here?!
it's only one thing for it - I'm gonna give it one really really hard turn 
I don't want it to fly off and hit me either
I did it! 
I did it! look at this Dad delivers success no, no not finished yet 
come closer look at it turn 
magnificent - whoa there we go - I'll be able to call my wife now oh
is it in there? oh where is it? where's the washer? so it's stuck in there [PHONE RINGS]
I've got it! I've got... I've done it so now I've kind of shredded the washer that's inside, I can't get the washer out 
I've got some O-rings of different sizes 
oh brilliant oh tweezers! do you know a tweezer, there have been some blue tweezers hanging around yeah?
yeah I was gonna do my eyebrows, I left them in the bathroom - on the glass thing - oh yeah of course yeah I moved them all right thanks okay alright bye! 
okay bye 
I can't get this washer out and it's coming out in bits 
there we go 
oh whoa look at that! that's what we needed! 
let me try to explain what happens next 
my wonderful wife came home with a load of washers 
none of them fit - it's just an O-ring! I just need an O-ring for this cartridge! 
the next day I went to the big DIY Superstore myself 
I didn't mind - it's a... it's a day out isn't it 
here I am pulling up after the 20 minute journey and it's quite exciting so I go to the plumbing section to see, well I had to find the plumbing section first to see the amazing array of products that might be able to help 
I don't know where to start 
what my wife did get me - which was absolutely crucial - was this! 
it's like a... it's like a guide so you can hold your cartridge up because obviously there are hundreds of these 
you hold your cartridge onto the card and you can measure some really specific things - it's now getting really complicated! 
I just want... I just wanted the O-ring 
I could not see any o-ring here 
I mean feel free to pause the footage - I would 
I don’t know where to begin! 
which means that the only thing I can do is to buy one of these! 
these cartridges and I don't know which one 
I mean I've done my measurements but there was only a small selection of a few on the shelf and they are 15 quid for literally... for an O-ring! 
I'm gonna have to replace the whole thing 
this stuck in my throat ever so slightly and I wasn't convinced that it was the right one 
the extra confusion is that this is blue because it's on the blue... the blue tap because it's for the cold tap so it opens anti-clockwise and closes... no 
so they only sell them in pairs and I only need one! 
it just felt like I'd be buying in a panic if I just grabbed this cartridge here and... and I don't need two of them as well - I just need one for the cold tap so I got a refund for the washers, came home and I found this page here 
a pair of them for... for half price so I ordered them and here they are! 
They’ve just arrived - I'm very excited 
now we can go into the bathroom and try this out 
this is getting to be a catchphrase on the channel isn't it 
what do we say 
it's never easy! 
I really want this done now as much as you do because look we've got pork chops! 
I've gotta... I've got to do this before the chops are ready 
so I've managed to tidy up and close this again... I managed to tidy up after Friday 
it's now Sunday 
we've been without a bathroom sink for two days 
this should be as easy as just screwing this into that hole 
and sorry my kids are playing electronic Monopoly at the moment so you might hear some shouting and some swears in the background sorry 
I'm going to try and get some of this water out here
actually oh it's probably not a good idea using tissue oh no 
oh this is trapped in here for all time 
That’s clean now 
let's try this 
so I'm hoping this will just screw in 
well it fits - I've got the right size one... oh this is looking too straightforward 
then I'll get my spanner oh this is looking very promising 
the next big test is to see if the tap handle fits onto this, so this has to be the right number of teeth is this gonna... this could still go very wrong
it's like Cinderella's slipper! it fits 
just make sure it's straight 
that's not straight oh man, now I can screw this on 
fingers crossed let me take you closer 
we'll get the crucial piece here and then I'll put this in right side up and I need to screw it tightly enough for the handle not to wobble
and finally I'll put the little top on for Elegance 
I'll just push that on - oh
Kids?! where are you? oh there you go 
kids please come see this 
come see what your old man's done 
how long did that take you 
two days and 10 pounds 
well it yeah it took a lot longer than I thought but you know, given I haven't done this before 
the final thing is - maybe you could do this - can you just turn that - yeah okay quarter turn... quarter turn? 
yeah which way 
oh okay you ready 
okay let's do... you do the cold tap, I do the hot tap oh go on, go on you do both
oh and is it dripping 
I'm calling this a dad delivers success! 
I win! I win!
No you don’t - I do! 
you and me are on such a voyage of Discovery thank you for making it to this point and if you're hitting the thumbs up or subscribe button thank you for being awesome and right here is what YouTube knows that you're gonna love next! 
we did it 
Can you please help my daddy get 10000 subscribers just click on his face thanks bye! alright this is gonna be the proper one right?


Previous post...
L Shaped Bench easy project - how to put the sides on


All about me, and getting these by email.

Monday, 10 October 2022

L Shaped Bench easy project - how to put the sides on


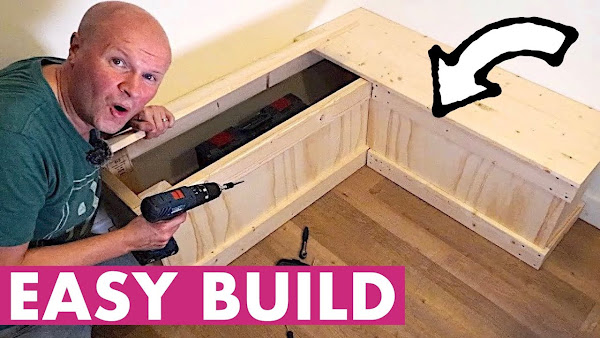
 I FINALLY get the sides onto my homemade L-shaped corner bench. It's an L shape seat for the kitchen, but I only built the frame. In this video I show you how to put wooden sides onto the corner seating for a dining table. 
I say it's finished, but I still need to varnish it and make a padded seat cover...

HOW TO BUILD AN L SHAPE CORNER BENCH: https://youtu.be/fapWGkXWyD0

BUY A BOSCH DRILL HERE! (As Amazon Associate I earn from qualifying purchases)

EPIC L-shape bench sides! Corner seat for kitchen FINISHED


TRANSCRIPT: (CLICK PLAY ON THE VIDEO ABOVE)

THIS IS THE TRANSCRIPT - CLICK PLAY ON THE VIDEO ABOVE!

Hello, are you looking to fill some dead space like the corner of this room in our kitchen? 
Maybe get some seats or a bench in there like this! 
And, even better, turn that bench into some useful storage? 
Plus do it extremely budget friendly? 
Well welcome back to part two of my L-shaped bench project. 
This is sort of how it's looking now but in the last video I showed how I built this L-shaped bench using wooden stud work to fill the corner of our kitchen. 
There's a link down in the description if you're interested in that, but it's now part two on the Dad delivers vlog where I try something new every day to make my family happy. 
You know how hard that is but I think I’m making everyone happy with this corner bench. 
This is more like one of my DIY vlogs but I’ve kind of left that video unfinished because as you can see I’ve got the sides not covered up. 
So if we were to use it for storage everything would sort of fall out the edges.
So today this morning I went to my favourite place on earth - not really - somewhere that I seem to be going a lot. 
It's another DIY superstore. 
This one happens to be B&Q and I wanted to find some plywood. 
I thought if I got some thick plywood I could use that to put the sides on. 
It's one of these and I think I found my perfect piece of wood but as you can see it is absolutely massive! 
I couldn't get that into the car even if I tried. 
And I decided to use their cutting service so I planned it all out I’ve got all my dimensions on my bit of paper but first I had to get the right piece of wood! 
And I saw lots of reviews online saying this wood falls apart and it's warped but actually I thought it looked great. 
I just knew that the top two sheets were warped. 
They looked really bent so I had to get a sheet from underneath. 
I think on the footage here you can see me getting the sheet that's three sheets down - that looks fairly new. 
But the only way I could get it out was by doing that magic trick you know where they pull the tablecloth off the table and leave everything standing? 
Well I thought if I whipped out this giant sheet of plywood fast enough I’d be able to get it out. 
But I think the footage shows quite clearly that that wasn't the best plan. 
But still I tried I kept pulling tugging. 
Finally after a lot of jimmying and walking around this... this truck that was left in front of it... I gave it one last push. 
Managed to get it out so now I can get it over to the cutting service area. 
Okay I’ve got the wood - time to get it cut now just over here!
And this is the cutting area. I don't like filming people when they're at work. It's bad enough when I do it on myself, let alone dragging other people into it, but I just wanted to show you sort of how it works. 
So got it cut. Looks perfect look at it! Just what I wanted, all those. Just go to the checkout now. 
I took my dad along we went shopping as well so we loaded it all up into the back of the car. Got the plywood back to the house. Now I won't need all of these bits because some of these bits are destined for the other corner of the room. 
I’m going to do some shelves for the TV area that's going to be on... on the next video. 
Just check with the spirit level? 
Spot on! 
But first I need to use these ones. These planks here that they very kindly cut up. 
I hope I’ve got the measurements right. I’ve not checked it yet, I thought I’d do it on camera and share... share the joy with you. 
Let me show you the basic idea. 
I’m gonna hopefully - if I’ve got the measurements right - it should slot into there so all I need to do is cut the right lengths.
But let's... let's just slide it in, just to see. 
Please work, please work. 
Oh looks really tight... oh that's really snug, is it gonna work? 
Oh yeah! Does it go in? It does look at that! Great! So all I need to do now is to cut  these to length and then figure out a way to secure them... screw them in somehow from behind.
The... the wall isn't true so that's not a true L shape unfortunately. 
I think I’m going to have some gaps. 
That gap there isn't my dodgy measurements, that is literally how the wall meets. 
It kind of comes out a bit. I managed to get four pieces cut from the board. I can only use one side because it's got this printing on it, and that one's a bit scratched. 
I think I did that in the car. 
This one has a load of filler in it. 
This one looks okay and this one looks okay. Whoa! 
I’m gonna use these two for the big parts - the long parts on the bench. 
It's the first of August, it's the middle of summer and it has just started raining, so I’m going to try and get this done as quickly as possible. 
One of them: I don't have to cut at all. I’m just going to run that the whole length, so if I can choose that one I think I’m going to... that's a hard choice. I think I’m going to keep this one so get that out of the rain.
Which means I need to make this one 79.2 cm long. 
I really do not want to mark these pieces of wood so I’m laying out the dog blanket on our IKEA Seglaro table, just to keep it scratch free! 
I know I should probably varnish it and protect it. 
I’ll probably do that later on, but let's just cut it to length now. 
I’m using my jigsaw and I’m trying to guide it as straight as possible. 
Which is a bit tricky in the drizzle but I’m sure I can get it through there. 
Casper's got his friend over! 
And now I’m going to cut this piece into smaller pieces. 
These will go onto the sides - onto the ends of the L-shaped bench to stop all my stuff falling out. 
I’m on a bit of a wing and a prayer with these measurements because I’ve got to keep the jigsaw straight!
Hoping the chair would catch that! 
Let's go and get these onto the bench. 
So I’ve put one loose on already. 
I want this to go on the end here.
Yes! Oh that is really satisfying. 
I think that looks really good and then I’ll push this one up a bit, so that it's flush. 
There like that. Completely flush. I just need to work out a way now to fix these to the bench so they don't fall off. 
To permanently fix the sides onto the frames of the benches, I’m using these L-shaped metal brackets and I can't help feeling like this isn't the best or the prettiest way of fixing them on. 
It is really difficult finding places to... to screw. 
I can't get my screwdriver into these tiny places so I’ve got to find the right brackets and the right screwdrivers to try and get in here. So I’ve got a bit of a gap here, but it's a bit unavoidable. I think that's the closest I can get and when the lids are on... let's put the lids on... there! Finally, I got the sides on and... and oh I could do this.
Put it away and never see it again! 
I’m calling this a Dad Delivers success! High five! Thank you so much for the thumbs up and the subscribes, I really appreciate it... it really helps me to keep these videos going. Videos like this that YouTube knows you're gonna love next! 
Can you please help my daddy get 10000 subscribers. Just click on his face! Thanks bye! Alright this is going to be the proper one, right?


Previous post...
Gift ideas for men - boyfriend, friend, brother, husband, dad, teacher - presents for him


All about me, and getting these by email.
Wednesday, 5 October 2022

Gift ideas for men - boyfriend, friend, brother, husband, dad, teacher - presents for him


BUY LAPTOP DESK TRAY HERE
(As an Amazon Associate I earn from qualifying purchases!)

WHITEOUT PEN FOR LABELLING

PHILIPS SERIES 3000 ELECTRIC SHAVER


These gifts changed my life. IDEAS for dad, boyfriend, brother, husband, teacher or best friend!


OF COURSE these gift ideas are great for anyone, but listing this as for men to help everyone searching gift ideas for Boyfriend, Dad, Husband, Brother, Teacher, Boss, Best friend or any friends!
Could equally be a great gift idea for girlfriend, wife, sister, mother or Mom in your life.

TRANSCRIPT: (CLICK PLAY ON THE VIDEO ABOVE)

THIS IS THE TRANSCRIPT - CLICK PLAY ON THE VIDEO ABOVE!

I’ve also got lots of other bits in here....
AGH!
It's robust! 
Hello, I know what you want! 
you are looking for gift ideas for him 
for men 
a gift idea for the man in your life, maybe it's a brother, husband, teacher, best friend... who knows 
it doesn't even have to be a man! 
I’ve got you covered. This is a quite a talky video but I’m going to go through a whole list of gift ideas for him. And everything on this list has been honestly... it's been transformative in my life, so I’m just sharing them in the hope that it might spark some ideas for you... if you are looking for gift ideas for a birthday or anniversary or Christmas! 
Christmas is coming! 
And they're also listed below in the description, so if you want to jump ahead any time you can just click on the little time stamps in the description. 
Let's dive into the first one, and this was a surprise for me because I got this as a gift and at first I thought it was one of those gimmicky gifts. 
You know the kind of things that you see in catalogues, or the “sharper image”. 
This is absolutely brilliant! 
It is a laptop or work desk for your lap so it's like a lap tray that's built for doing work on. 
I didn't think I’d use it and I’ve ended up using this every single day. 
Here's some completely not-staged footage of me at work using it in an armchair. 
These are the things I like about it: these are padded and the fabric is really nice. 
It feels quite luxurious, it's a bit like sofa material and the base... this is like a carbon fibre material. I don't know if that's coming across on the camera. 
There's a carry handle to move it around the house or bring it back when someone else has been using it - which happens quite a lot. 
And over here there's like a mouse pad here, and it's mouse material but up here you've got a thing to hold... hold a phone if you want that while you're working. 
You can have your little timer going. 
I think this is great and there's a link to it down below in the description. 
You'll be pleased to know the next gift idea is really cheap! 
I got this from poundland so you can get this from a dollar store or a pound store wherever you are in the world. Whatever currency you have. 
It's a correction pen - a white out pen. 
This has changed my life. I don't know if you have this problem and I don't know why men are obsessed with this, but I am. 
When you get devices they come with transformers and the boxes start to all look the same and you have no idea which box is for which. 
So I use this for labelling my plugs and the amount of plugs that have had to be thrown away has dropped a lot. 
And the number of devices that keep working is also increased, so if anything this... this pen is great for the environment! 
This is me demonstrating it just to ram the point home. All we need to do is to warm it up on a bit of paper. Get some white goo on the end so that it writes smoothly and then you can graffiti your plugs however you like. 
This plug is for my electric screwdriver. Look how easy it is to label this. 
You can get these in supermarkets, stationery stores... or there's a link in the description if you want to get one from Amazon. 
The next gift idea is maybe a little bit personal maybe a bit intimate? 
It's this! It's the Philips 3000 shaver. 
It's wet and dry: this shaver is absolutely brilliant and I don't wet shave. 
I’ve never wet shaved there's a whole other video that I need to make about that but it means that I am really, really fussy about my electric shavers. 
It's absolutely gorgeous. It's really easy to clean. You can dry shave or the kicker for me is that you can use this in the shower. 
Let's face it we're just out and out lazy. 
It's cordless, it's rechargeable and there's a really clear display to show you how much charge is left in the thing. 
There's a little beard trimmer at the back there and you can wash it. 
You can open it, empty it really easily but you can rinse it out in the shower or under a tap which is absolutely crucial... to be able to just drag this across your face and rinse it is... is absolutely brilliant. 
This is the next gift idea: not the beaten up trainer but this is a retractable elastic drawstring to replace your shoelaces. 
These are called lock laces and they're basically elasticated shoelaces so you don't have to... you don't have to do your laces up! 
I absolutely love these and I’ve put lock laces on all my trainers and even my walking boots. 
They even come in different colours so I’ve gone for blue on these hiking boots. 
Now this might come as a shock or you might have noticed that the man in your life is phenomenally lazy. 
We call it being time efficient or “prioritizing our tasks” but basically we're just out and out lazy and if we can save time doing up our shoelaces then... then this is a win! 
Let me show you how easy they are to put on and I’ll speed this up: so firstly you take your old laces off and then thread these through like they're normal laces. 
Next you put the gripper on and then cut them for length and then you can attach this tag on the end and that stops the gripper from falling off. 
I’ve tried other brands and they're okay but the reason I love the lock laces is the gripper... the gripper is so much easier to use. Like even within “not doing up your shoelaces” lock laces are even lazier and obviously if you want to check out the lock laces there's a link to them on Amazon down in the description. 
The next gift idea for him or any best friend is for the kitchen! 
It's a Microplane and if you've not used one of these before they are brilliant. 
They are like a very very fine grater. 
You can use it on chocolate to sprinkle some on top of your coffee, or put in an ice cream. 
Ginger for cooking or those power coffees you know those power coffees “that men drink”. 
This isn't a power coffee. You know the ones where they put the coconut oil in and some ginger. You can use it to grate garlic and I actually prefer to use this over a garlic crusher because it's so much quicker and easy to clean. 
I think it also goes in just a bit finer as well. 
And the one we use it for the most is parmesan cheese! On top of that lovely Bolognese sauce. 
We say parmesan, do you say parmesan? 
All you have to do is rinse it to clean it so we're back on that laziness slash time management hack. 
Anyway I think the microplane is a really unusual idea for your BBDH: your brother boyfriend dad or husband. 
Or all of them! 
The next gift idea for him is an expensive one, whoa hello! 
So maybe this is more for Christmas or holiday or a birthday? 
It's a Bosch GSB 18 volt cordless drill
Oh that's brilliant 
Oh 
Red arrows! 
THE RED ARROWS! 
Look at that it's... it's the red arrows! Flying over.
Okay I don't know what impression we give of um life in the United Kingdom but it's not every day that the red arrows flying formation team fly over you while you're making a youtube video!
I don't think I caught any of that did I? 
Okay I’m not sure I kept my composure then but I could see just over the camera 
I could see this arrow formation of our nation's elite royal air force pilots just flying over and I’m here with a drill! 
Back to the Bosch GSB 18v. 
I don’t know if I’ll leave that in!
It also has a hammer action and you can use this as a power screwdriver. 
I am absolutely inseparable from this drill. It comes in this robust carry case. 
I’ve also got lots of other bits in here.
AGH!
It's robust. 
I wish I could show it to you looking pristine but I use it all the time so here's some clips from some of my other DIY videos on this channel. 
What I love about the Bosch drill is that it feels really substantial and it actually comes with an extra battery. 
But the batteries last ages of mine and not just because I don't do any work around the house! 
I know men are particular about their tools and buying one unannounced might not be a great idea but I just wanted to share that this one has been absolutely great for me. 
I can't believe the red arrows flied past and I didn't film it.
Let's go for a gift idea now that is a lot cheaper but it is just as tough. 
This is my metal water bottle. 
The ones that I buy are from a brand called ion8. 
You can get these in a whole range of different colours and you can see that this one my one is absolutely battered because I’ve used it daily for about three years. 
The kids have these too so I’ve engraved my name on the bottom here and here's some footage from when it was brand new. 
Pristine, happier times. 
I don't like plastic water bottles. 
I don't like how plastic water bottles make my water taste all plasticky so having a metal water canteen makes me feel like Jocko Willink. 
You know that famous army guy. 
He calls it a canteen except you know mine's pink. 
The next three gift ideas are a bit more touchy-feely. 
Oh it's gone a bit quiet isn't it? 
After that testosterone from the red arrows. 
So they might come off as just a bit more thoughtful for your bbdh, your boyfriend brother dad husband? 
These gifts have transformed my life so they're a bit more left field. 
The first gift idea is this: I wish I had a copy that I could hold up and show to you but I’ve ended up giving it away to so many people because it's such a good book. 
It's a book called Sleep by Nick Littlehales and he is a sleep coach for elite athletes and elite performers. 
He was the first sleep coach for Manchester United? 
You might have heard of this football team or soccer team wherever you are in the world and he basically trained footballers how to sleep properly. 
And what's great about his book is that he shares all of these techniques for getting better sleep. 
He also describes how he trained the whole of team sky when that became a phenomenon in the tour de france and what he'd do in the bedroom - how he'd arrange the bedroom and the cleaning procedures that he'd go through to help improve their sleep. 
As you may know sleep is where we repair our bodies every night and Nick Littlehales’ book goes into really accessible detail about how our bodies go through these 90-minute sleep cycles all the way through the day and night. 
And what I love about the book is that he explains how you can deploy these power naps during the day just like team sky, chris froome, manchester united... 
There's also some really funny stories in there about footballers with plasma screens and how their girlfriends have decorated their bedrooms and how that affects your sleep adversely, so it's worth it for that and it's worth it for the team sky tour de france stories. 
So anyway that's Sleep by Nick Littlehales. 
The final gift idea - my gift to you - this I think this has probably had the greatest effect on my life... is this! 
It's a meditation technique called Acem. 
ACEM. 
It was developed by some Norwegian students in the 60s and they run courses basically teaching you how to do meditation. 
I thought the course is perfect for me I took it about three years ago and the technique is really simple. 
You just sit in a chair like this, sit upright close your eyes, and they give you a meditation sound but it's basically a nonsense word. 
It's a nonsense sound of about three syllables, and you just say this sound in your head over and over again in a loop with your eyes closed.
And the weirdest thing happens it's... it's brilliant. 
It's like um... it's like having a reset button. 
Because your eyes are closed and because you're saying this thing that doesn't make any sense over and over again, your amygdala - the bit of your brain that looks for threats and panics - eventually it just kind of shuts off because there's nothing to... to worry about. There's nothing to think about, and while you're doing it you get these thoughts coming into your head the... you know just stuff like “haven't paid the bill” or something that you've remembered from earlier in the week. 
These thoughts pop into your head while you're meditating and unlike mindfulness meditation, it's totally okay, these... to have these thoughts popping in. 
All you've got to do is to just keep saying this nonsense sound over and over again in your head. 
I think you're advised to do it for about 45 minutes a day. 
I do it for 10 minutes sometimes and it's like... it's just like flipping an on and off switch and you're just ready to do something after the meditation. 
It's like your mind has been cleared of junk. 
I’m just offering it as a gift idea that the ability to just take a break and to take a rest and to shut your eyes and to have something to do while your eyes are shut is... it's a really gorgeous thing. 
So I know that's a slightly uh odd and unexpected one to end on but I hope there's something... it may be the drill... Maybe the drill is the way to go for your boyfriend husband brother or dad, but if you have any gift ideas for him, for men, leave them in the in the comments. 
I’d love to hear them and I’d love to try them out as well. 
Thank you for hitting the subscribe or thumbs up buttons, and right here is what youtube thinks you'd love to see next! 
Can you please help my daddy get 10000 subscribers. Just click on his face thanks bye! Alright this is going to be the proper one right?

Previous post...
How to start a second YouTube channel


All about me, and getting these by email.

Friday, 30 September 2022

How to start a second YouTube channel


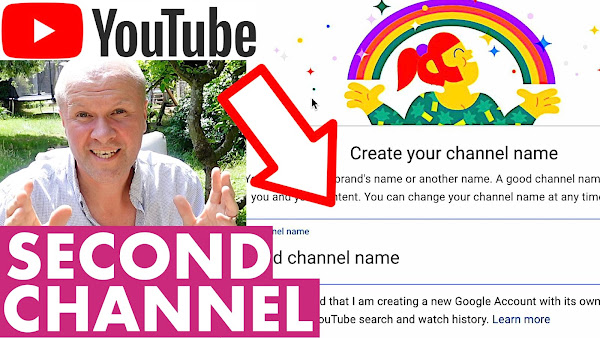
Ever wanted to create a second YouTube channel, or make a YouTube channel on your Google account? 
I share how to add a second channel to YouTube step by step for beginners. It's tough because it feels like you're splitting your focus, but I've found it really great for blowing off steam on other topics and the things I've tried out on other topics have really helped improve my main YouTube channel videos.

How to make a SECOND YouTube channel!


TRANSCRIPT: (CLICK PLAY ON THE VIDEO ABOVE)

THIS IS THE TRANSCRIPT - CLICK PLAY ON THE VIDEO ABOVE!

Hello I'm Neil welcome back to the Happy Hut.
You want to make a second YouTube channel. 
What are you thinking, you crazy thing!
Isn’t running one channel hard enough? 
But that's the fear isn't it?
That your focus will be split and then you will have two channels growing slowly.
I know that feeling, because I have these four YouTube channels.
I've got one for trains, one for Ikea stuff, one for my dad's stuff, and the channel that you're watching now. 
So I've been through this a few times but I've got some more videos that I want to put up on YouTube and they don't fit any of those channels, so I am going to show you how to start a second YouTube channel, step by step, so you can follow along with the process and start your second YouTube channel too.
The best place to start - at time of recording - ISN’T YouTube Studio.
Bizarrely it's right here on the regular youtube.com and the first thing that we need to do is to make sure that we're logged into the right Google account that we want to attach this second YouTube channel to. 
So up here on the top right hand side you can see my avatar. 
I'll click on that.
I’m going to go down all the way down to here in “Settings”.
That opens up this page youtube.com/account and you can see some various things that we can do on this page, but obviously we want to go down to here: “add or manage your channels”.
That opens up the list of channels that you have attached to your Google account.
And right here with a nice big tick next to it is “Neil Mossey” which is THIS channel, the one you're watching now. 
What we want to do is to click on this button here: “create a channel”. 
That opens up this page... [BIRD NOISE]
We've got some loud birds. 
That opens up this page: “Create your channel name”. 
You can use your brand's name or another name. A good channel name represents you and your content. 
The important thing here is that you can change your channel name any time, so I'm going to type in “Neil's Loft VHS” and there's a warning here. “I understand I'm creating a new Google account with its own settings including search and watch history”. 
So when you create a new channel you create a whole Google brand account associated with that channel.
Go down to the blue button here and click “create” and there you go!
You've now created a new YouTube channel. It was really that quick. We can customize the channel which is pretty crucial as well because you will need an avatar, which is a face associated with it. And it'll be nice to have a banner on the... on the channel page. We've been thrown onto this page, which is YouTube studio. 
If I click it, “continue” this is the YouTube Studio dashboard for your brand new second YouTube channel.
Right here we can set: it's a channel trailer, a featured video for returning subscribers and you can put in other sections here. 
So first I think I'm going to create... right now I'll create my avatar, we’ll put that in. 
Here's some terrible footage of me shooting the Avatar picture and the picture for the channel banner.
I mean it's hard enough pulling a face in front of the camera but to get an object in so that the banner will crop it in the right way is pretty tricky.
I've got videos for all of those down in the description if you want to pretty up and make your channel look like a good YouTube channel. 
Can you please help my daddy get 10000 subscribers, just click on his face, thanks! Bye! Alright this is going to be the proper one right?

Previous post...
How to put up toilet roll holder


All about me, and getting these by email.
Thursday, 29 September 2022

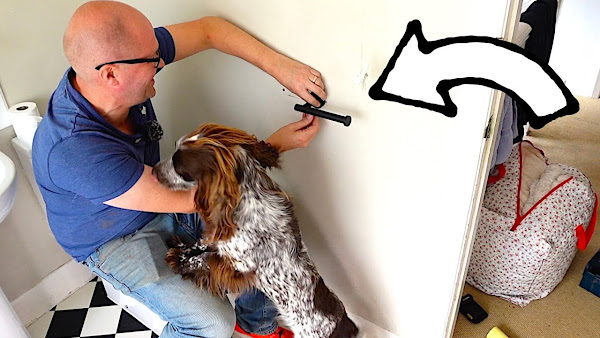
How to put up toilet roll holder


BUY A TOILET ROLL HOLDER HERE! (As Amazon Associate I earn from qualifying purchases)

Sorry the sound is bad at the start - like everything in life, IT GETS BETTER AFTER A MINUTE!
How do you install a toilet paper holder? In this video I try to show how to put up a toilet roll holder on the wall, which we bought from Amazon. It involves facing the DIY Home Improvement decisions of the house's previous owners and the demands on the bathroom from our family. It also covers the difficult decision of where to screw the holder to the wall: how far from the toilet?
What's your bowl-to-roll ratio?

How to put up a toilet roll holder.


TRANSCRIPT: (CLICK PLAY ON THE VIDEO ABOVE)

THIS IS THE TRANSCRIPT - CLICK PLAY ON THE VIDEO ABOVE!

Hello Casper... 
hello!

Hello, this is the Dad Delivers Vlog, where every day I try something new to make your family happy, and today we're here in the toilet where we belong! 
Our toilet roll holder has just given up the ghost... The toilet roll holder is of course the third most important thing in the bathroom. Maybe the fifth most important thing in the home? 
But the family had been on at me about this for about three months now and look over here they've even bought a new toilet roll holder from Amazon, opened it and placed it in the bathroom as close as possible! 
The smallest hint possible that they want me to do this right now. 
So for a long time maybe too long we've suffered by just having the roll of toilet paper within reaching distance on the floor or the... the side of the bath. 
My son actually did some artistic photography of the toilet roll... 
And I know exactly why this particular job has fallen to me. It’s because I have failed. I have failed to teach my family resilience and resourcefulness, so I'm just going to have to break the standoff and DIY! Do it myself! 
I think what's most annoying about this is that it's a home improvement that doesn't have to happen, and how did this get broken? 
The toilet rolls aren't that heavy, especially the ones that we buy! 
And I completely understand why my son won't admit that he rests his head on the toilet roll holder while watching Netflix there for hours on end, but here's the evidence! Thanks Netflix! 
There's a tricky thing with putting up toilet roll holders, and that's finding the optimum distance for the roll from the bowl. 
The bowl-to-roll ratio in our house is 330 millimetres... millilitres?! Or 13 inches. 
On the one hand you don't want the toilet roll holder to be too close to you so that it feels like you're sitting on top of it... but on the other hand obviously you need it within easy reaching distance from the toilet. 
The great thing about doing this job is you can actually sit down on the job!
Now I've got a small problem here because as you can see there have been a lot of DIY Home Improvement bodge jobs in the past. Not mine! But these two here, look at the state of that. 
I've got to somehow cover this up and if I did cover this up that also leaves this one exposed. The best thing to do would be to somehow cover them up with the toilet roll holder but no I mean that just looks upside down doesn't it? 
It should really be this way around, but that is too high of a bowl to roll ratio. 
It's just too far away, so this is the tricky decision for me now: do I Dare To Dream to increase the bowl to roll ratio? 
It's a longer reach to get to here, but it would mean that the ugly holes are covered up. 
This is now quite a reach... and could end up looking just a bit silly - it's a bit too close to the door. 
I'm really disappointed I can't take these out without completely destroying the wall which is why probably people haven't done that in the past. 
I'm going to take the plates off of the toilet roll holder. 
There's an Allen key hole here, and this one comes with a nice small Allen key which is good. 
That means I can take the back plate off which is... which is this and do it in a way that covers up the two holes that I'm leaving behind... and I'll have to do something about this other hole. 
What I want to do obviously is halfarse it, and just use this screw hole in the middle and just use one screw to hold up the toilet roll holder. 
But I know it would take about a week before it starts spinning - just being wobbly again. 
Instead, I'm going to properly drill a hole here and here and have the two holes either side of the giant metal hole that's in the middle.
Oh it's not looking good! Come closer. 
Okay so the problem I've got now in just before I put the wall anchors in is that the holes are so close to the terrible Metal Wall anchor that's there I mean it's just powder between it... so I'm worried that these two holes are actually going to work loose all of this is just going to collapse. 
It's just plasterboard! 
Let's get some wall plugs and I always explain this that I... I use the ones that don't have the wings on because they are impossible to pull out and the two wall plugs that are there - they have these kind of wings on the side that stop them being pulled out. 
Let's push this in... okay that one's gone in okay... good let's try the other one.
I think it might be hitting against this. 
Okay brilliant and it hasn't just all imploded and it also comes with yeah... I'm not going to use these. 
It comes with these two screws so I'm gonna put these in, we'll just screw on the bracket... and this bracket is going to have to be Netflix proof. 
It feels pretty solid - I did not think that would work - and then I can just put some filler in later on... AKA probably four years from now. 
Next we can get the holder and it's got to go this way. 
I want it to go this way so that the bowl to roll ratio isn't too high, but it looks so much better with this Allen key hole hidden underneath... so I'm going to reluctantly put it there. 
Now I'm using the Allen key to tighten up the lug that's underneath to just lock the toilet roll holder to the bracket that will hopefully now stay on the wall this time. 
Hi Casper! Hello Casper! 
Hello, yeah it's Casper everybody! 
Helping me with my home improvement, hi Casper! 
What do you think? Is this any good? Casper? What do you think, is that any good?
That's a good sign! 
This is almost a dad delivers success! No, we've got to stop. 
I've got to get rid of this wall plug that's here and I don't know if I can just pull it out... put it out... pull it out with a screw through my family have just arrived downstairs you probably hear them in the background. 
They're going to be so happy about this, so I think what I'm going to do is just cut it off and push it in and cover it with filler. 
There we go, right now I need some filler. I've got this. 
I know it's not the right stuff - it's wood filler that I got for the bench downstairs... the L-shaped bench that's in the description as well. 
I know I should be using plaster filler but I can't be bothered to take another trip to the DIY Superstore so I'm going to use the wrong stuff but see if it lasts! 
It's supposed to leave a bit too much on so that you can sand it down afterwards. 
I have to clean up this line. That's rust. The IKEA toilet roll holder is just rusted onto the wall!
Now do this side here.
Then I can put the toilet roll holder back on. 
I am calling this a dad delivers success! 
Aha, look at it, it's... it works! And next only one test for this, apart from the Netflix sleeping.
Leave a comment down below if you put your toilet roll this way... or this way. 
It works! Oh I'm so pleased with that. 
Can you please help my daddy get 10000 subscribers, just click on his face thanks bye! Alright this is gonna be the proper one, right?

Previous post...
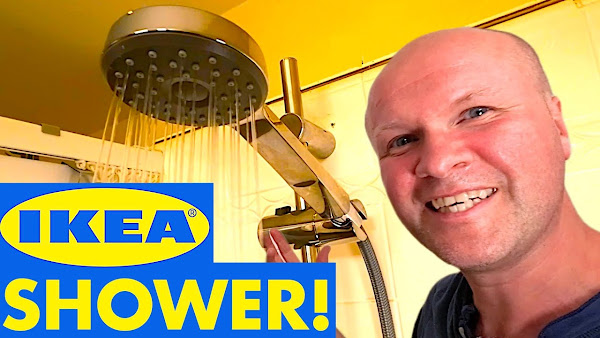
How to fit IKEA Vallamosse shower rail and head in 5 easy steps!


All about me, and getting these by email.
Tuesday, 20 September 2022

How to fit IKEA Vallamosse shower rail and head in 5 easy steps!


How do you install an IKEA VALLAMOSSE shower head and adjustable riser rail bar in the bathroom?
I follow the Ikea assembly instructions to replace a shower rail and put up a brand new Vallamosse shower head in my Dad's bathroom. 

How to fit a shower rail and head: 5 easy steps! IKEA VALLAMOSSE review


TRANSCRIPT: (CLICK PLAY ON THE VIDEO ABOVE)

THIS IS THE TRANSCRIPT - CLICK PLAY ON THE VIDEO ABOVE!
Hello welcome back to the channel 
it's the place where I try something new every single day and today it’s... it's not the dad delivers vlog... it's the - I’m over at dad's - it's the GRANDDAD delivers vlog! 
Hi granddad! 
And... and today I’m going to put up this! 
it's the... Ah ha! It has been amended 
it's the IKEA Vallamosse or VallamosseY today - shower rail 
I’m going to put up the shower rail to replace this 
this is how it looks at the moment - yeah it's a bit of a nice impressive design feature there: the green string holding up the shower head 
so we went to the big blue and yellow box to get this! 
the IKEA Vallamosse shower head - yeah - shower head and rail and this is what comes in the box 
let's do a little unboxing 
you've got a gorgeous shower head 
it is plastic but it's chrome coloured 
you get the shower rail to hang it up on whoa! just dropped a bit 
and helpfully it even shows you which way up it goes 
and you get the crucial hose to connect the shower head to your water fitting 
I’d say that's about a metre long? 
I’ll put it on screen now if I’m wrong 
I’m going to be putting up this IKEA Vallamosse shower rail and head step by step so that you can follow along with me, and hopefully avoid any of the mistakes that I make along the way 
and I think the very first thing we've got to do obviously is to climb into the delightful... it's almost like the TARDIS 
it is smaller on the inside than it looks from the outside, but we're going to get this delight off first 
this is my dad's long-serving shower head 
it is barely clinging on for dear life there after a long life of service to... to other owners of this house 
it's the green string that really is the... the finishing touch but... but we're gonna probably lose that today and replace it with some gleaming IKEA chrome 
now obviously your shower rail - the one you've got the moment you want to get rid of - might not be like this one but I’m going to just do this so you can see how mine comes down just in case it helps you take down your shower curtain 
I keep calling it a shower curtain - it's a shower RAIL 
where I’m going to start with this is to just start pulling at it and without much effort there might be a screw underneath on your one but this one just literally... oh my goodness... it just literally pulls off the wall 
so I should take off the shower head oh... 
oh dear that didn't sound too good! 
you probably won't have to get rid of a string but I will... and then I think the rail just comes out like that oh my god 
and then this just pulls off... oh my god and it's already... you can see that it's broken there 
I think the screw is just literally falling off with rust 
I’m not using a power tool for this because it would probably fly off and just tear the cheap metal screw 
and it's come off easily but it's left a couple of holes here so I’m hoping to cover those with the IKEA rail when we put that up 
there's nothing there 
alright I might try my power screwdriver and see if that works 
I am running a very big risk with this 
I’ve put a really sharp just flat head screwdriver on even though it's a cross head just to really dig in and try and turn it 
I’ve got a funny feeling it's just going to destroy the screw but here it goes
oh man it's bent my screwdriver
wow okay so it works by not using the drill to just turn the drill 
it's got all this weight and it's kind of pulling on the whole thing 
I’m using the thickest cross head screwdriver 
that's really satisfying 
one down one final one to go 
there we go... well that's one way to do it 
get rid of that 
this isn't looking good 
I’m going to try some wd-40 just to loosen the screw 
no it's not working so I’ve got a hacksaw I’m going to try and take it off but it's going to look really ugly! 
and it might crack the tile as well 
it's just going to take off the head it's not actually going to be flush 
it's turning! 
thank goodness - I think the wd-40 really helped 
yes yes yes! 
oh yes I did it so we're going to use these two holes now here to put the new IKEA shower rail into 
now I can put this top piece on 
it looks like this... it's got a hole going through it 
that means that the pole can pass all the way through and I’m going to fit this up here 
let's just screw this to the hole that's already there 
now predictably this the screw... the screw is too long! 
it won't go in any more than this 
I’m gonna try it with a smaller screw 
what we're gonna do now is to slide the pole into the holder and there is that sticker staying up so I’ll just feed it through the hole here 
so now I can fit the bracket underneath to hold it by the base 
let me get you closer to the action 
this hole here is going to take the pole in this little notch that matches that notch in the... in the pole there so now it doesn't spin 
it's locked... locked in place 
now I can put on these little chrome caps to cover up those ghastly holes and hold everything in place 
one goes at the top and obviously this one goes in at the bottom 
it is really crucial that you put this the right way around because this tab here - that actually locks the pole in place 
it goes into the little gap at the top there so make sure that this is the right way round 
now we get to put on the shower hose 
there's a little washer in there that means it doesn't leak so I’ve put those in and I’ve screwed the shower head to the hose here 
all we need to do is unscrew the hose that's already there, and it's a bit stiff but we can force this off 
and now I can put on the nice new clean IKEA shower hose that's connected to the head 
and now we can put on the shower head 
I’ve not been able to tighten this up all the way 
I don't know if the washer does go in there 
I’ve put it in for safety - doesn't seem to leak and we can put that on the... on the shower rail 
look and it tips down like that! 
ah I’m really really proud of this 
I’m calling this a dad delivers - sound effects - success! 
let's enjoy the beauty of the IKEA Vallamosse shower rail and shower head with hose
and there's not much room in here for me to do this, but right here is what YouTube thinks you would love to see next! 
can you please help my daddy get 10000 subscribers just click on his face thanks bye! alright this is gonna be the proper one right?


Previous post...
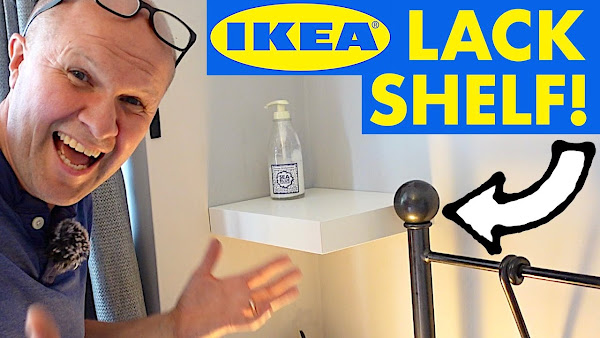
How to put up IKEA LACK small floating shelf


All about me, and getting these by email.
Friday, 16 September 2022

How to put up IKEA LACK small floating shelf


How do you put up an IKEA Lack small floating shelf? I try new things to make my family happy, and today I'm fitting this small corner shelving from Ikea that's been sat on our floor for about 2 years. I've fit Lack shelves before but this one is the hardest because you have to screw it to the wall pretty precisely for it to work.

How to put up IKEA LACK small floating shelf


TRANSCRIPT: (CLICK PLAY ON THE VIDEO ABOVE)

THIS IS THE TRANSCRIPT - CLICK PLAY ON THE VIDEO ABOVE!

let's go into the bathroom... see if I’m going to destroy any crucial infrastructure... 
oh! Oh man... who left the loft door open... 
oh hello welcome oh... got caught up... 
hello welcome back to the channel where I try something new each and every day and I think today's video is more for my IKEA dad channel! 
Because today I’m putting up this, it's an IKEA Lack floating shelf and it's the smallest one, so if you've got a shelf that's bigger than this little tiny thing? 
I’ve got you covered because I made a whole video where I put one up in my daughter's bedroom 
the much longer IKEA Lack floating shelf 
that link is down in the description but this is the smallest IKEA Lack shelf 
it's 30 cm by 26 and the back looks like this, so it doesn't look like the other one where you've got that big bar that you have to put on the wall first, and that's what makes it float. 
This Lack shelf gives you no margin for error.
You've got two screw points to put this up 
with the big shelf I could pretty much put that anywhere I wanted.
And the place I put it up is fairly arbitrary and completely made up. 
But with this little shelf I’ve got... I’ve got to put this exactly in the corner here so it has to line up exactly with this wall 
this alcove right next to the bed 
which means that the screw holes have got to be in exactly the right point and you and me do not want to screw this up because life's too short to be putting up IKEA shelves for a second time 
and we want to put it up right, so being level would be a win so that all the stuff doesn't fall off onto my beautiful wife's head in the middle of the night
by the way this is our this is our bedroom look... I... I know you've noticed that we've got separate duvets and it all I can say is it's summer 
we have two completely different temperatures 
I was explaining this hack to two younger colleagues of mine about how brilliant it was we got separate duvets! 
and they... they just looked at me and absolutely horror 
fresh in their new love 
why would you want a separate duvet? 
because my body is a whole different ecosystem and it works! 
it works really well 
I might have to cut this bit out and just not explain the duvets 
what we will need for our floating shelf is a pencil, a metal ruler that goes to the end, a nice spirit level and a drill and screwdriver 
as is always the case in the bedroom that is the screwing position. 
that is the issue with this floating shelf build 
I’ve got to get the screw in exactly the right point otherwise there's going to be an annoying gap or it won't go up at all 
what I’m going to do is just set the height first, so I’m going to put the shelf up this way up 
because these latches hold on to the screw it really won't work that way up 
it's going to go that way up and I’m just going to get the right height 
the request I’ve had is that it's roughly around here in line with this bar 
I’m going to put it slightly above it and just draw a little pencil mark there 
so that's the height of the shelf 
next I’m going to measure how far across the first screw is 
this is very kind of IKEA 
yeah I’m gonna... I’m gonna go with four cm 
that does give me like a millimetre or two the right side so it won't bang up against the wall and these walls aren't level! 
it's an old house 
the walls aren't flat or level 
the next measurement I want to take is how far down from that top line I want the screw to be so I’ll measure again and I make that 1.5 cm 
but it's okay if that's off because it can be however high I want it 
I want 1.5 cm down and then I want to go four cm across there so I know the exact point 
I’m gonna go for a number six - 6mm drill bit which I do on everything 
so I’ve got these rawl plugs, wall plugs or wall anchors and I always use the same wall plugs 
and they're these ones which controversially they don't have the little wings on 
the wings are really helpful because they hold it in place in the hole and it means it doesn't spin round when you screw in 
but you can't take them out ever! 
it will destroy your wall trying to pull one out so I took to like cutting them off 
if it goes halfway in and you want to pull it out and drill some more, those wings really don't help so I’m... I’m absolutely against them 
so let's do some drilling! 
now these walls are really hard 
actually no this is a stud wall so I think we're gonna be okay
okay that went in quite easily 
now I’ve just suddenly remembered there's... there's a shower the other side so I’m gonna check if there are any crucial pipes 
just take the camera with me 
I’ll take you on the journey 
let's go into the bathroom, and see if I’m going to destroy any crucial infrastructure 
oh man! 
who left the loft door open? 
oh, here's the shower and a metre down and about 30 across yeah I think I’m safe I think I’m really safe on this one 
oh man I need a crash helmet I really do
I always put them at the beginning of the video because I think... yeah all right thanks... just me Casper! 
you come to the... yeah I’m okay thanks... I’m safe... I’m safe thanks for checking on me 
do you like by the way that I checked if it was safe AFTER I drilled the hole? 
anyway where's my... here's my wall plug 
that's gonna go into the hole 
right, moment of truth 
it would help if I had an actual screwdriver 
I know, my son's got one 
he hates me borrowing them 
this is just a secret between you and me okay? 
a bedroom secret 
I think he probably does more work than I do but there we go 
let's put it in and obviously we're going to leave it far enough out so that the shelf can latch onto it 
now it has pulled to the left a bit 
I’m a bit worried about this 
fingers crossed 
it needs to be out quite a long way 
I might need longer screws 
yes! 
it's perfect, absolutely perfect. Yes! 
this is it 
already... we haven't finished, but this is a Dad Delivers success! 
even though it's an IKEA dad channel video 
the next thing I’m going to do is to measure the distance between the two screws on the back of the IKEA Lack shelf, so I’m going to measure 22.5cm on the wall and it's got to be level as well
Second wall anchor, wall plug or rawl plug. 
please? 
yeah! 
there you go 
this is it the literally the moment of truth I don't know what I’ll do if this doesn't work 
so I’ll line them up
No, it’s not working 
let's take it out slightly 
it might just be... again bedroom problem... a length thing 
yeah I feel that bite 
no I have got slightly bigger... slightly... slightly longer screws, so I’m hoping that this will fix my problem 
oh no because it's longer, it's coming in at an angle 
oh no! 
that goes there, okay this is... it's done! 
That’s a Dad Delivers SUCCESS! 
No... no hang on... no it's not right because the screws are out too far 
um... it's not locking so I’ve got to take them in a bit more 
Yes! totally solid! Yes! let's put some hand and body lotion on 
yes! this is a dad delivers success! high five! I am really pleased with this so the difficult bit is how much of the screw you leave hanging out of the wall 
I don't believe that anyone is watching these videos so if you have made it to this point thank you so much 
and say hi in the comments it’d be great to hear from you, and right here is a video that youtube knows that you're going to love! 
Can you please help my daddy get 10000 subscribers, just click on his face thanks bye! alright this is going to be the proper one right?


Previous post...
How much YouTube pays me for TWO channels


All about me, and getting these by email.
Wednesday, 14 September 2022

How much YouTube pays me for TWO channels


How much money does YouTube pay me for 2 channels?
I recently had a second YouTube channel monetized by the YPP program (my Dad Delivers Vlog!) and share how much revenue now I earn each month from Google Adsense.
It's my first month being paid by YouTube so I show my impressions, click through rate or CTR, my RPM or revenue per mille average watch time and view duration and as many other statistics and metrics I can see in my YouTube studio analytics.

How much YouTube pays me for TWO channels


TRANSCRIPT: (CLICK PLAY ON THE VIDEO ABOVE)

THIS IS THE TRANSCRIPT - CLICK PLAY ON THE VIDEO ABOVE!

Hello I’m Neil and you might be wondering “how much does YouTube pay me each month for having two monetized YouTube channels?” 
This is my first four months of having two YouTube income streams and this is my YouTube studio dashboard. 
I am going to show you absolutely everything: all of the tabs in my analytics, my click-through rates, my watch time, plus I’m going to explain what all these statistics mean to me and how they might affect your channel. 
Now my fear with all of this, and putting things on YouTube is... and this might be the same for you... 
What is the point of doing this if you're not getting views or money? 
I’ve watched loads of videos like this where creators go through their statistics and I’m a bit worried about... that it might be unhealthy for us to be comparing figures. 
But I thought it'd be better to put these things out there anyway just to share how things are going for me. 
And also, things can drop just as easily and just as quickly as they appeared. 
Look like... like my revenue did back in 2020! 
Hello I’m Neil Mossey, and I’m a development producer helping high achieving creators and performers just like you - high five! - to get ideas out of your head and out onto here on YouTube to make the world happier. 
But I’m also a dad and I used to have lots of videos about that on this channel, and I removed them to niche this channel to be just about YouTube... and I put them all over here on this channel: the Dad Delivers vlog... 
Household DIY, reviews and how to's... and one month ago my Dad Delivers channel was monetized. 
I made a whole video about that process and that link is in the description and on screen now but now we're one month on and this is the dashboard for my Dad Delivers vlog channel! 
Now my biggest worry with these videos is that it's going to be boring so I’m going to get through these figures as quickly as possible. 
In your studio you can click on the analytics tab on the left hand side. 
That brings up this overview and then along the top there are five options. 
Five different tabs. 
I’m going to click on content, and at the top you have three more options: 
You can either select all your videos or you can select shorts or you can select posts. 
These are your community posts. You know, they look like social media posts in... in the home feed. 
So I’m just going to look at videos and the number of views that I’ve had is the first tab here. 
26000, which is great because it's almost 1000 views per day for this 28 day period. 
You can change the period over which you're looking up on the top right hand corner here, so we've got last 28 days... that's the default. 
You can choose any time so we could go for the last year and this blanked out section here is that they're doing all kinds of weird things on YouTube analytics at the moment. 
That data isn't available, or I could choose “last month” so I could choose June and that's the last calendar month... 
But I’ll go back to 28 days. 
The next tab along is called “impressions” so I’ll click on that, and that is 203000 impressions. 
Impressions are the thumbnails that have been seen on YouTube so you know when you're scrolling through on YouTube as a viewer and you see thumbnails for everyone else's videos? 
Each time you see one of those thumbnails that clicks up as one impression on their dashboard. 
I have had in the last 28 days 203000 impressions across YouTube. 
I mean it's an interesting statistic but I don't really have any control over this so it's an interesting thing to scroll through but I think it's quite easy to get a bit obsessed about these figures, when really we should be getting obsessed about the things that we can control. 
Under this tab if I scroll down, you can see key moments for audience retention 
So I can see my top videos for holding viewers attention so these are how long into the video before they click away. 
So for example my Legoland ride where the... where the ride breaks down... Let’s set that playing in the background... 100 of the people who started watching the video at 30 seconds in were still watching. 
I don't think I’ll ever have a video like that again but I do do a countdown for 30 seconds. That was deliberate and it seems to be doing the trick. 
Again these... these... this is interesting information to have but I wouldn't be obsessed about it. 
Down at the bottom is how viewers find my videos, so mostly it's through YouTube search and that's to be expected because this channel is pretty much reviews and how-to's. 
So most of the videos are there to be looked up and you can see my top videos there. 
We're in summer time here so the top two are gardening videos. 
Let's scroll back up to the top and we'll click on the next tab here which is the impressions click-through rate, so we know that impressions are thumbnails that are served to everyone on YouTube. 
The click-through rate is the percentage of those thumbnails that are clicked on. 
So my overall click-through rate for the channel is 8.2 percent. 
I can show you how this works for one particular video, so if I go into my Legoland video... for this particular video the overall... since it was published... the click-through rate is 8.3 percent and if you go into the video analytics for an individual video you see this funnel down the right-hand side that shows you how they arrive at that percentage. 
This has been served as a thumbnail 6400 times 
532 people have clicked on those thumbnails so that means that 8.3% of the people who saw the thumbnails clicked on the thumbnail.
Which means this video has a click-through rate of 8.3 percent! 
But of course people can come across your videos by... maybe they're embedded somewhere else or they're able to get to your video with a direct link so those aren't counted as impressions and they, I don't think, would be included in your click-through rate. 
But I do know that of the 700 views, 532 of them were because someone clicked on the thumbnail. 
Let's go back to the channel statistics and my overall average view duration is 2 minutes 23 so that's for all my videos on my channel. 
Let's click on the audience tab, and overall this channel, you see we have a blue line up here which is for new viewers and the purple line that's bumping along the bottom there? 
That's for returning viewers, so viewers who've already seen my channel and have come back to watch something within 28 days. 
Because my channel is mostly how to's and reviews, once they come and get their information I don't think they come back at all. 
And they certainly aren't because only... or 10 percent are returning there of the 700. 
That's only 60 to 70 people. 
My top geography for this channel is United Kingdom. 
60% of the viewers are in the UK. 
Let me compare this with the channel that you're watching right now - my Neil Mossey channel, so I’ll go over to that dashboard and my top geographies on this channel that you're watching right now... it's mostly United States so hello! 
Welcome to the UK. No passport check needed. But 36% of my audience come from the US. This might have an effect on the money that I get. 
This is what you've been wanting to see: let's click on the revenue tab up here. 
This is how much money I’ve earned in the last 28 days and it's pretty much the first four months that this channel has been monetized. 
I have earned 158 dollars. I’m absolutely delighted by this and I’ll show you why because I’ll show you how much I’m earning on this channel... but the Dad Delivers channel is working on $6.11 per 1000 views so if you ever wondered what RPM stands for? 
It’s revenue per mille. It's a very pretentious Latin word, mille, which means thousand. 
I think uh YouTube have just uh borrowed it from the advertising industry who are known for being pretentious, but I get six dollars eleven cents for every thousand views on that channel. 
For this channel let's take a look. 
The figure is five dollars forty cents. 
On average for all the views on this channel the channel you're watching right now is five dollars forty cents and you can see here on the left hand side I earned $93.73 for this channel so I feel really vindicated that I moved the videos over and they can do their own thing and still earn me money. 
The figure on the end is CPM, which is cost per mille, and that is the... the cost to the advertiser so it's roughly double the RPM. 
You can see here in May I was monetized during the month of May so I didn't have a full month and I earned $45. 
The whole of June it was nearly $180 and I’ll just scroll down so you can see the rest of the statistics there. 
There's a new tab on the end which I’ve not seen many people talk about on YouTube. It might be because the YouTube gurus are earning money from services that also provide this service and they don't want to talk about it? 
I think this is absolutely brilliant. 
You can search any topic and it will tell you how well that topic is searched for on YouTube so if I put it on... I don't know... delete... delete Facebook? 
If I put that in, it shows all of the top searches on YouTube and there are about three pages of this, but you can custom the search. 
So if I put up here, you can see there are a lot of Indian searches in here and I guess with a population of... I don't know... is it like a billion people? 
Of course that's going to skew the statistics so you can look up individual countries so I’m going to choose United States. 
So these are all the searches involving delete Facebook in the United States and this can help guide you in how you might structure a video on this topic. 
The twist that they've put in which is absolutely delicious is... can you see this bar here where it says content gap? 
That means that there's a high search volume for the search how to delete Facebook accounts. But it's a content gap which means that there's actually a gap in content. There aren't enough videos on this topic to serve the number of searches. 
YouTube explain it more clearly there, you can pause the video. 
But you can do the search as a content gap only, so if I apply that...  
These are the topics on deleting Facebook that aren't very well served on YouTube. 
You have to be careful because down the right hand side it does give you an idea of the search volume so there's a low search volume on “how to delete Facebook account”, but there's still too few videos on the topic. 
You might want to use this for generating ideas for your next videos. 
I’ll just flick through my statistics for this channel. 
I have 104000 impressions... click-through rate is pretty much the same at 8.5 percent. 
On the audience tab I’m getting the same issue here, more new viewers watch this than returning viewers. 
And I’ll click on revenue. 
I’ve shown you already that's $93. 
Let me show you the last year... if I click on see more you can see how my money has dwindled. 
It was this time last year, it was 125 dollars a month. 
My best month was October, 135 dollars. 
Probably because people are buying things and looking up reviews and I’ve got some camera reviews and tech reviews on this channel. 
If this video is useful say hi in the comments below and if there are any questions that I can answer, put the question down below. I’d love to hear from you. 
If you've made it to this point in the video thank you for hitting the subscribe or thumbs up button. It helps other people to find this video, and I really appreciate it and right here is what YouTube thinks you'd love watching next!

Previous post...
How to build TV shelf unit


All about me, and getting these by email.

Sunday, 4 September 2022

How to build TV shelf unit


Ever wanted to build your own TV shelving unit to store your TV, video boxes, consoles and DVDs?
I share building my own floating shelves wooden TV unit with some plywood from the B&Q DIY superstore, and a pair of IKEA Granhult shelf holders.

How I'm building a TV shelf unit... plus IKEA Granhult brackets!


TRANSCRIPT: (CLICK PLAY ON THE VIDEO ABOVE)

THIS IS THE TRANSCRIPT - CLICK PLAY ON THE VIDEO ABOVE!

Hello I'm Neil we're going to be doing something not out here but in here in the corner of the kitchen where the TV is.
This is the channel where we try something... “we”... 
I try something new every day to make the family happy and today I'm going to make the family happy with this! 
I'm gonna try and get a TV shelf going in the corner of the kitchen slash living room slash the room where we do everything.
This is a tricky one because I've got something temporary going... this shelf is completely fake.
It’s not even wide enough - it's just a bit of rough wood that the builders left. 
I think they mixed cement on it but it was all I could put up here but the main tv shelf is down here to hold all the boxes.
We still have DVDs. 
Is that because we're old parents? Probably but we've also got consoles and a Freeview box which is behind that bench, so at the moment we’ve just got temporary stuff here just to soften it. 
It looks better than it being completely bare, so how do you make a tv shelf though or a shelving unit? 
Or just shelves to put around a big TV? 
This has been a tricky one for us because we... I don't think we're even convinced that this is the right place for the tv but it's been about six months now and this is where it is. 
We've got a sofa. This is pretty much the only place to have the sofa.
There is such a big distance from sitting here, to the tv being over there. 
It's about four metres and I try to get around that by rigging up a cable, if you see this audio cable, so at least we've got a speaker where we sit so we can actually hear the tv all the way over there! And it is a long way away. I think this camera is going to make it look a lot closer. But this is the view at the moment which isn't too bad. 
I've got an IKEA bench down there. There's a whole video on how I built that bench on this channel. 
It’s an IKEA Perjohan bench and it's great but it is designed for sitting on, it's not designed for putting boxes. 
I've taken the boxes off to try and measure up and get the right wood for this area. 
It's a big piece of wood that I need! 
So... 
Okay I've got the wood, time to get it cut now just over here. 
When I was building the L-shaped bench sides, which again is another video on the channel. 
I got the wood cut into strips for our bench in the corner of the kitchen over there.
That’s worked out really well but it was a huge piece of wood. 
I went to a DIY superstore B&Q in this case, I usually flip between that and Wickes. 
It's one of these! 
...And went on the hunt for the perfect piece of wood and obviously the bigger the wood, the more expensive it is. So I went for this, it's plywood. 
I always like the look of plywood: I like these strips down the side of the wood but it was a pretty huge sheet of wood that I needed to get.
I knew that if I cut the strips for the the bench over there I'd have a big piece left and the big piece is going to be the centrepiece. It's going to going to be the big shelf that's going to hide everything hopefully.
I even had enough left over for two other shelves underneath but this is footage of me trying to get it desperately off the shelf. 
And also film it so I could share my technique with you.
My technique being that if I whip it off like when you pull a tablecloth off a table and leave everything standing on the table... I tried that with this giant piece of plywood.
It didn't quite work. The first I think five times... but here I am just giving it one more yank one... oh no it's just it's just twisting around. 
And also they left a big trolley in front of it to just to make it that little bit difficult but it just makes the wood even more special, and with one final tug I managed to to get it out.
Next challenge of course is to get it onto a trolley and over to the cutting area. 
I'm sure I would have got help if I'd asked for it but I'm a man and you know asking for help is weakness. Especially in the DIY realm. The cutting service were absolutely brilliant. I had... I've got this. This is my map. You've probably seen this on the bench video but I managed to work out how to divide a 1.2m by 2.4m giant piece of plywood into what I needed for the old bench and for the TV area and the... the guy he must be so used to scraps of paper with bad biro on... and a mixture of metres and centimetres and millimetres.
So got it cut: it looks perfect look at it! Just what I wanted.
Go to the checkout now.
I saw some reviews about this particular piece of wood saying it's really bad and it falls apart but here’s me unloading it from the car.
Managed to get it back in one piece or in my case about 12 pieces and this is the wood right here! 
I think it looks amazing.
It is a cheap bit of wood uh in the scheme of things well I... you know, paid 50 quid for... for the giant sheet so it's not... it's not that cheap, but this is going to be the main shelf. The big challenge I've got now is that I was a bit too precise in my measurements so I've scored a little bit off the edge here. 
I'm going to cut the edge right now. 
First thing is to protect the wood from my grotty IKEA Seglaro table.
We’ve got all sorts on here so I'm just laying out a blanket so it's got a nice cushioned underlay and I've marked out a straight line. 
The line is straight but it's not square but I've taken a best guess at a proper square from the front and rear edge here and I'm going to take off about half a centimetre. 
I’m going to use a mitre saw and just use that to cut the straight line that I've marked out along the end of this bit of plywood.
This is how it will look, obviously without the bench. 
There's two things... I wanted the... the nice store-bought side on this side, instead of my rough sawing, but I can sand that down. 
The biggest challenge now is to build some kind of ledge for it.
I don't want to wreck these kitchen cabinets because they cost a fortune, and who knows how we might want to change it long into the future. 
I don't want like screw holes in here, this is going to be nearly impossible to change. 
So I'm going to build um I'm going to build like a ledge that will go up made of this wood. 
The shelf will just sit on top of that leg. 
How high would you make your TV bench?
Leave a... leave a comment down below. I'm kind of happy with this height of shelf and I've left almost the same amount of space underneath so there's some kind of symmetry to it. 
I don't want it to feel too boxed in. 
Also one day, maybe one day we'll get a bigger TV. 
The whole family are on at me to do that but I've got a bit more space just to make that TV uh even more huge than it already is. 
Uh the next tricky bit is to whip out this bench. 
Whoa! Of course I'll leave all the electronics loose underneath while I do this!
The shelf is 50 centimetres deep so I'm cutting this batten down to 40 centimetres so that it won't be sticking out at the edge. 
Hopefully if I do this right it could even look like it's floating and to do that I'm going to take off this diagonal edge from the end so that the the block holding up the shelf sort of looks uh invisible from the front. 
Look I know it's 2022 and it's not a thing anymore but I just want to see if I can get a dvd under it. 
These were my shelves before my last shelves see I don't like the big brace here but that was heavy enough to carry a really heavy tv before this one. 
So this one is just a little bit bigger than the Transformers Dark of the Moon DVD. 
I'll take it back to my new shelf and this is where the the bracket is going to be. 
So I'll just drill these pilot holes here, using a really thin drill bit and keeping an eye on the spirit level to make sure this bracket stays straight. 
I'll put a big drill bit in.
So now we'll get the screws in and get this bracket onto the wall 
I'm going to screw one side in lightly first and then get the other screw in just to make sure it's all lined up 
Let's check that it's level - no - yes it's just a really slow bubble, so one side done level and strong. 
Let’s cut this bracket to size 
obviously it's a lot shorter than the last one and I'll get the countersink drill bit out again just to knock in a couple of holes. So just lift the shelf up to where I want it to be without bending the wires too much. That is about as high as it goes: any higher it's going to really be difficult to put plugs in.
So, I need a bit of wood to go on the right hand side here. 
Oh will it be the correct height though? It won't stand up by itself - it's so not straight. 
Yes success!
That's the first one done. 
The next part of my scheme is over here. 
I’m gonna put another leg up here to bring it up to the correct height for this bracket here. Is my measuring up to the task? 
Now I can take this - whoa - into here... nearly hit the roof there... and then I could put it under here just to have it balance on that.
Just check with the spirit level...
Spot on! Yes that works! See I didn't think it'd be this far forward 
This is 50 centimetres deep 
I wonder if it should be 40 but we can leave it like this for now and I can always take 10 centimetres off the back if it's too proud. 
Now I've got a special drill bit - I think it's my favourite drill bit where you can actually drill holes - large big holes into the back of the shelves. 
This is so that I can run cables down and run the shelf flush all the way to the back of the wall and the cables and wires can all go down this little hole at the back here, so I'll just put one into the big shelf the top and then I can do the same for the little shelf. 
And if I wanted to run cables all the way to the bottom I can and they can run through the shelves.
The final thing I need to do for the TV corner is to put a better shelf up above the TV. 
And the plan was to have two shelves up above but um I only bought one IKEA Granhult shelf bracket pair. That’s what they look like. 
I wanted to try one pair just to see if it works and it really does so now that this shelf is up I've got to figure out a way to get some more wood that is identical without buying a massive two metre sheet of it, and then cutting it to size just for that second shelf above that shelf. So we've got two shelves at the top and two shelves at the bottom... I think this is done! 
Let's let's dress it and give you some beauty shots just to show you what it what it really should be looking like.
I am calling this a dad delivers - thonk - success! 
It's done! 
It's finally done thanks for being awesome and hitting the thumbs up button to help others find this video and subscribing to more adventures for you and me around the house to make our families happy. Can you please help my daddy get 10000 subscribers? Just click on his face thanks bye! Alright this is going to be the proper one right?

Previous post...
Jean Claude Van Damme interview with Richard Blackwood 2001


All about me, and getting these by email.