
Ever wanted to build your own TV shelving unit to store your TV, video boxes, consoles and DVDs?
I share building my own floating shelves wooden TV unit with some plywood from the B&Q DIY superstore, and a pair of IKEA Granhult shelf holders.
How I'm building a TV shelf unit... plus IKEA Granhult brackets!
TRANSCRIPT: (CLICK PLAY ON THE VIDEO ABOVE)
THIS IS THE TRANSCRIPT - CLICK PLAY ON THE VIDEO ABOVE!
Hello I'm Neil we're going to be doing something not out here but in here in the corner of the kitchen where the TV is.
This is the channel where we try something... “we”...
I try something new every day to make the family happy and today I'm going to make the family happy with this!
I'm gonna try and get a TV shelf going in the corner of the kitchen slash living room slash the room where we do everything.
This is a tricky one because I've got something temporary going... this shelf is completely fake.
It’s not even wide enough - it's just a bit of rough wood that the builders left.
I think they mixed cement on it but it was all I could put up here but the main tv shelf is down here to hold all the boxes.
We still have DVDs.
Is that because we're old parents? Probably but we've also got consoles and a Freeview box which is behind that bench, so at the moment we’ve just got temporary stuff here just to soften it.
It looks better than it being completely bare, so how do you make a tv shelf though or a shelving unit?
Or just shelves to put around a big TV?
This has been a tricky one for us because we... I don't think we're even convinced that this is the right place for the tv but it's been about six months now and this is where it is.
We've got a sofa. This is pretty much the only place to have the sofa.
There is such a big distance from sitting here, to the tv being over there.
It's about four metres and I try to get around that by rigging up a cable, if you see this audio cable, so at least we've got a speaker where we sit so we can actually hear the tv all the way over there! And it is a long way away. I think this camera is going to make it look a lot closer. But this is the view at the moment which isn't too bad.
I've got an IKEA bench down there. There's a whole video on how I built that bench on this channel.
It’s an IKEA Perjohan bench and it's great but it is designed for sitting on, it's not designed for putting boxes.
I've taken the boxes off to try and measure up and get the right wood for this area.
It's a big piece of wood that I need!
So...
Okay I've got the wood, time to get it cut now just over here.
When I was building the L-shaped bench sides, which again is another video on the channel.
I got the wood cut into strips for our bench in the corner of the kitchen over there.
That’s worked out really well but it was a huge piece of wood.
I went to a DIY superstore B&Q in this case, I usually flip between that and Wickes.
It's one of these!
...And went on the hunt for the perfect piece of wood and obviously the bigger the wood, the more expensive it is. So I went for this, it's plywood.
I always like the look of plywood: I like these strips down the side of the wood but it was a pretty huge sheet of wood that I needed to get.
I knew that if I cut the strips for the the bench over there I'd have a big piece left and the big piece is going to be the centrepiece. It's going to going to be the big shelf that's going to hide everything hopefully.
I even had enough left over for two other shelves underneath but this is footage of me trying to get it desperately off the shelf.
And also film it so I could share my technique with you.
My technique being that if I whip it off like when you pull a tablecloth off a table and leave everything standing on the table... I tried that with this giant piece of plywood.
It didn't quite work. The first I think five times... but here I am just giving it one more yank one... oh no it's just it's just twisting around.
And also they left a big trolley in front of it to just to make it that little bit difficult but it just makes the wood even more special, and with one final tug I managed to to get it out.
Next challenge of course is to get it onto a trolley and over to the cutting area.
I'm sure I would have got help if I'd asked for it but I'm a man and you know asking for help is weakness. Especially in the DIY realm. The cutting service were absolutely brilliant. I had... I've got this. This is my map. You've probably seen this on the bench video but I managed to work out how to divide a 1.2m by 2.4m giant piece of plywood into what I needed for the old bench and for the TV area and the... the guy he must be so used to scraps of paper with bad biro on... and a mixture of metres and centimetres and millimetres.
So got it cut: it looks perfect look at it! Just what I wanted.
Go to the checkout now.
I saw some reviews about this particular piece of wood saying it's really bad and it falls apart but here’s me unloading it from the car.
Managed to get it back in one piece or in my case about 12 pieces and this is the wood right here!
I think it looks amazing.
It is a cheap bit of wood uh in the scheme of things well I... you know, paid 50 quid for... for the giant sheet so it's not... it's not that cheap, but this is going to be the main shelf. The big challenge I've got now is that I was a bit too precise in my measurements so I've scored a little bit off the edge here.
I'm going to cut the edge right now.
First thing is to protect the wood from my grotty IKEA Seglaro table.
We’ve got all sorts on here so I'm just laying out a blanket so it's got a nice cushioned underlay and I've marked out a straight line.
The line is straight but it's not square but I've taken a best guess at a proper square from the front and rear edge here and I'm going to take off about half a centimetre.
I’m going to use a mitre saw and just use that to cut the straight line that I've marked out along the end of this bit of plywood.
This is how it will look, obviously without the bench.
There's two things... I wanted the... the nice store-bought side on this side, instead of my rough sawing, but I can sand that down.
The biggest challenge now is to build some kind of ledge for it.
I don't want to wreck these kitchen cabinets because they cost a fortune, and who knows how we might want to change it long into the future.
I don't want like screw holes in here, this is going to be nearly impossible to change.
So I'm going to build um I'm going to build like a ledge that will go up made of this wood.
The shelf will just sit on top of that leg.
How high would you make your TV bench?
Leave a... leave a comment down below. I'm kind of happy with this height of shelf and I've left almost the same amount of space underneath so there's some kind of symmetry to it.
I don't want it to feel too boxed in.
Also one day, maybe one day we'll get a bigger TV.
The whole family are on at me to do that but I've got a bit more space just to make that TV uh even more huge than it already is.
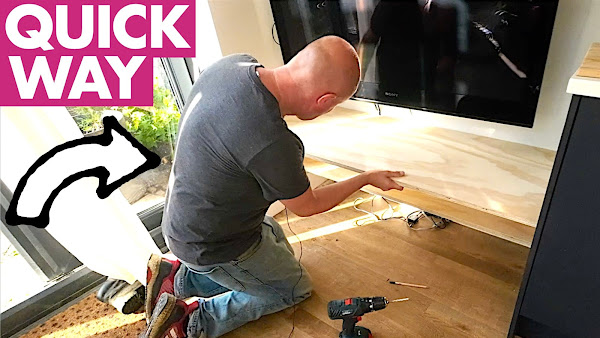
Uh the next tricky bit is to whip out this bench.
Whoa! Of course I'll leave all the electronics loose underneath while I do this!
The shelf is 50 centimetres deep so I'm cutting this batten down to 40 centimetres so that it won't be sticking out at the edge.
Hopefully if I do this right it could even look like it's floating and to do that I'm going to take off this diagonal edge from the end so that the the block holding up the shelf sort of looks uh invisible from the front.
Look I know it's 2022 and it's not a thing anymore but I just want to see if I can get a dvd under it.
These were my shelves before my last shelves see I don't like the big brace here but that was heavy enough to carry a really heavy tv before this one.
So this one is just a little bit bigger than the Transformers Dark of the Moon DVD.
I'll take it back to my new shelf and this is where the the bracket is going to be.
So I'll just drill these pilot holes here, using a really thin drill bit and keeping an eye on the spirit level to make sure this bracket stays straight.
I'll put a big drill bit in.
So now we'll get the screws in and get this bracket onto the wall
I'm going to screw one side in lightly first and then get the other screw in just to make sure it's all lined up
Let's check that it's level - no - yes it's just a really slow bubble, so one side done level and strong.
Let’s cut this bracket to size
obviously it's a lot shorter than the last one and I'll get the countersink drill bit out again just to knock in a couple of holes. So just lift the shelf up to where I want it to be without bending the wires too much. That is about as high as it goes: any higher it's going to really be difficult to put plugs in.
So, I need a bit of wood to go on the right hand side here.
Oh will it be the correct height though? It won't stand up by itself - it's so not straight.
Yes success!
That's the first one done.
The next part of my scheme is over here.
I’m gonna put another leg up here to bring it up to the correct height for this bracket here. Is my measuring up to the task?
Now I can take this - whoa - into here... nearly hit the roof there... and then I could put it under here just to have it balance on that.
Just check with the spirit level...
Spot on! Yes that works! See I didn't think it'd be this far forward
This is 50 centimetres deep
I wonder if it should be 40 but we can leave it like this for now and I can always take 10 centimetres off the back if it's too proud.
Now I've got a special drill bit - I think it's my favourite drill bit where you can actually drill holes - large big holes into the back of the shelves.
This is so that I can run cables down and run the shelf flush all the way to the back of the wall and the cables and wires can all go down this little hole at the back here, so I'll just put one into the big shelf the top and then I can do the same for the little shelf.
And if I wanted to run cables all the way to the bottom I can and they can run through the shelves.
The final thing I need to do for the TV corner is to put a better shelf up above the TV.
And the plan was to have two shelves up above but um I only bought one IKEA Granhult shelf bracket pair. That’s what they look like.
I wanted to try one pair just to see if it works and it really does so now that this shelf is up I've got to figure out a way to get some more wood that is identical without buying a massive two metre sheet of it, and then cutting it to size just for that second shelf above that shelf. So we've got two shelves at the top and two shelves at the bottom... I think this is done!
Let's let's dress it and give you some beauty shots just to show you what it what it really should be looking like.
I am calling this a dad delivers - thonk - success!
It's done!
It's finally done thanks for being awesome and hitting the thumbs up button to help others find this video and subscribing to more adventures for you and me around the house to make our families happy. Can you please help my daddy get 10000 subscribers? Just click on his face thanks bye! Alright this is going to be the proper one right?
Previous post...
Jean Claude Van Damme interview with Richard Blackwood 2001
All about me, and getting these by email.
No comments:
Post a Comment
Hi, thanks for leaving a comment - I really appreciate it!