Friday, 9 June 2023

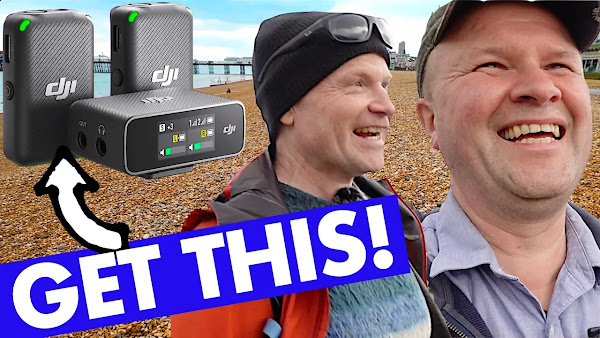
DJI MIC Best wireless microphone for video?


Microphone: DJI MIC WIRELESS DUAL MICROPHONE, BUY ONE HERE:
As an Amazon Associate I earn from qualifying purchases.
Camera: SONY ZV-1
Second Camera: DJI ACTION 2 CAMERA 

Three months ago, I bought the DJI MIC wireless dual microphone system - with my own money - to help me with my vlogging. I have not looked back - this is for me, the best microphone for my YouTube channel, and I use them all the time with my Sony ZV1 camera. But it's really pricey, so 3 months on, I review my DJI Mic to show you how they sound and share some of the features, pros and cons with these microphones. I also run a test with both mics at the same time in mono and stereo mode with friend, camera expert and YouTuber Gordon Laing from cameralabs as we walk around sunny Brighton Beach.

Is this the best microphone for video? DJI MIC 3 MONTHS ON


TRANSCRIPT: (CLICK PLAY ON THE VIDEO ABOVE)

THIS IS THE TRANSCRIPT - CLICK PLAY ON THE VIDEO ABOVE!

But something else happened three months ago. I got this, and this has absolutely transformed how I do vlogging and how I vlog. 
It's the DJI microphone, the DJI mic. And I thought, if you are looking into buying a DJI mic or just interested in upping your audio game here on YouTube, I thought I'd come out and plug it into my Sony zv1 camera and show you how it sounds, how it looks, what it's like to use.
I'm in absolutely the noisiest place I can be, which is Under the Pier with the seagulls and the non-stop waves, which are going to sound great in the edit. And I've actually got a second camera going. You probably see it bolted to me here. This is the DJI action 2, so you can see what I'm filming. And I'm wearing a lanyard. I'm wearing it like a magnetic lanyard so you can actually see the camera while I'm talking about the camera and the microphone plugged into the camera.
Let me take the camera off, and I'll show you that to connect the DJI mic to the zv-1. I'm actually not using the cable that came with the mic. I'm using a Rode curly cable because I like the look of it. It looks like a little hair band for my camera, but I just found this a lot more fun and flexible than the very dull black cable that came with the DJI mic.
Everything else is pretty much as it comes out of the box, except for the logo. 
It looks a bit scratched and dented. It’s not. I just coloured it in with a Sharpie pen, as you can probably tell. I'm going to do lots of talking, which I don't feel comfortable with, but I'm doing it so that you can get as much of a sense of the sound quality and how this microphone sounds.
So, this is quite a huge jump for me, though, because I think it's something like $320, and in the UK, it's about £290. This is an insane amount of money for me to spend on anything. I'd feel uncomfortable spending that on a camera, let alone a microphone.
I have a second channel. It's called the Dad delivers Vlog, and I do lots of vlogging. I also randomly stand on ladders, but I do some DIY and Home Improvement on there, and I go traveling with my kids and film those and share those as Vlogs. And getting a wireless microphone for those has absolutely transformed my vlogging. Being able to lose the cable between the microphone and the camera just makes it so much easier to shoot stuff.
Let's start with this. It's the transmitter. This is one of the two microphones that comes in the box. There is a little fluffy windshield to stop the wind noise. I'm not sure how effective that is. You'll be able to tell me in the comments what you think, whether it sounds windy or not.
I've chosen the worst, most difficult location I could to test it out for you. You can't see it because the wind... windshield covers it, but there's a little socket here so you can plug another microphone in. And the unit itself, it's got a USB-C port. Sorry, I'm trying to point the microphone and the camera to me, so I might go off-mic a little. But you can see there's a power button and a USB-C port. That's for charging, and also because it's a recorder, this actually records my voice onto this device, this little transmitter, as well as transmitting it to the receiver.
On the other side, there is a link button for pairing it with the receiver, and a record button here. Again, that windshield is covering it up, but there's a little red light. So, I'll show you some other footage. You can see there's a red light that comes on when you are recording on board. I can also see on the receiver there's a red light that tells me if it's recording on board. And if that accidentally gets turned off, if I accidentally hit the record button here, I can see that on the receiver, and I can remotely make this start recording again from the receiver, which is kind of cool.
There's a clip, a little gripper clip that can attach to your clothing. 
I'm not so sure about that because I think it sort of points it in an unhelpful direction. 
So, I keep looking behind me to see if there are any seagulls photobombing me. And there's also a magnet. This magnet... I can't do it one-handed, but you can, like I have done with the camera, you can put the magnet on the other side of your clothing, and it holds in place through the clothing. 
Should I do it? I'll try and do it one-handed. It's really... these bits are really fiddly and really easy to lose, though. So, that magnet is holding the microphone pretty... a bit low down, so that's holding it in place, and hopefully you can still hear me. 
I can see on the little audio screen the levels going up and down, so you should be able to see me, hear me. This is so difficult. 
Let's clip it back onto here.
This next bit is going to be difficult to show. I'll have to do it on this camera. But the receiver clips onto the top of the camera with the hot shoe mount. And this is probably one of the downsides of the DJI mic. This clip feels really fragile and really quite plastic. I know that I'm gonna snap this. Future me will not be happy about that.
Before I show you the receiver, let me pull the cable out, and you can compare how it sounds with the DJI mic. And this is how it sounds with no microphone plugged in. So, this is the on-board microphone. I haven't got the fluffy windshield on it.
I probably should, but I can't with the receiver up there on the cold shoe mount. 
But this is how the camera, the Sony ZV-1, would sound with no microphone plugged in. And this is how it sounds with the microphone plugged back in, so you can see the difference, hopefully. Rather, hear the difference. I don't know why I'm confusing those two.
So, the receiver itself doesn't record, it just receives the wireless feed from the two microphones. 
The DJI mic comes with lots of attachments, what, three attachments? So, you can either plug it in using the cable, a 3.5mm jack, or there is a USB-C clip-on, so you can actually plug it into your smartphone or even directly into your computer. I can put this into my MacBook. It also comes with a lightning connection. I don't use those, I don't have an iPhone, but if you wanted to plug it into an iPhone or an Apple device, DJI has got us covered.
These connections are... they're so easy to fall out, they just fly off. I don't know if I need to plug them in a bit more just to get a bit of wear and tear in so that they glide in a bit more smoothly, but these bits are so easy to lose.
There's a touch screen on the receiver, and on the touch screen, you can change all of the settings. You can press the power button to lock the screen. The screen warns you... if you're not plugged in, so if you pull the plug out by accident, it does put on this error message, which is really reassuring.
It comes with an amazing case that just presents the microphones. It's a real joy to open this thing up, and as soon as you pull the microphone and the receiver out of the box, it just works and it starts recording. That has been absolutely gorgeous, to just flip open the box and just pull the things out, and they're good to go.
The case itself is a recharger, so as soon as I put the microphone and the receiver back into the case, it starts automatically recharging them, ready for the next use.
I like the clear display. It's so easy for me to see. Even now, I can just look up and know that the audio levels are good. And this screen, the touch screen, is a little bit fiddly, and I think I have to use it more to get used to it, but you can get to all the features really easily with even someone as hand-fisted as I can get around these menus.
I love that - it's such an obscure thing, - but I love the record control. I love that if I've forgotten to set the microphone to record, I can see instantly if it's recording or not, and I can start it recording again if I've forgotten. 
It was one of the reasons why I didn't want a wireless microphone. I don't know whether you can hear me now, and I don't know if the wireless connection is actually working or if there's interference. And that is probably what stopped me from having a wireless mic for so many years, apart from, you know, the £290 price tag as well. And knowing that this microphone is actually recording here into here is absolutely golden.
To transfer the files, this would be a pro as well. It's so easy. You just plug in a USB-C cable, plug it into a computer, and this microphone right here appears as a little hard drive. And it's really easy to just copy over the WAV files that it records and just transfer them over to my computer, ready for editing.
And the way I've got it set up at the moment, you can set it up two ways. 
The first way is to set it up mono, so that both of our microphones are mixed, so you can hear both of us. 
So if we talk over each other, um, Neil, 
[TALKING OVER EACH OTHER: the thing about you at University, that's where I originally met Neil, and I actually used to have a lot of respect...] 
Why! You're not talking over me! 
But the um, the other downside of mixing, apart from it being much easier to edit because it just all goes into the camera and you can use it, oh, look, there's a train! There's the train that tried to run us over... 
Um, but the other downside with it is that you have two microphones, each with background noise, so it kind of doubles all the noise in the background.
What I can do is flip it in the receiver so that it sounds like this! 
Now, we should sound... I apologise if you've got earphones on, this is going to sound appalling because I'm in your left ear 
and I'm in your right ear, or the other one depending on whether you've got it switched. 
But the beauty of this is, is that if I talk over Neil and I do, the thing is, 
[TALKING OVER EACH OTHER: is that when Neil comes down to Brighton...]
So I can now mix out Gordon, and you can only hear me, you can hear him in the background.
And now, hopefully, you can't hear Gordon. I can keep talking, and I can fade him out in the edit, even though he's talking over me, the cheeky blighter. 
But this isn't CameraLabs! 
It's a typical drama student, not like me, I did a proper degree.
Let's move to the cons, the downsides with the DJI mic. 
These are the things, they're really petty, but they are the things that have been annoying me for three months.
So, the first one on the list is... This sounds so petty, but this lovely case, you can't store the cable or the mini deadcat windshields in the box. So, you've got to carry the box around and put it in another bag, which they provide. And it's nice to have a bag of bits, but it would be really good if all of this was just in one case.
It does have really small parts, and they are quite plasticky as well. Already, I've put things on the wrong way and almost snapped them off. 
It looks like they're easy to snap, and it's definitely easy for these little parts to fly off. 
And it's been the same with this camera here when I'm trying to get bits, like this magnet here. If you lose one of these bits, it's really difficult. You have to order them through DJI support. They've been really friendly and really helpful, but you can't just buy them off a website easily. And if you lose them, your microphone is pretty much useless.
The battery life has been amazing. If you're used to the battery life of a phone or a camera, you know, with this setup, I'm used to having to charge every hour or so. These microphones, I've worn them all day, recording all day and transmitting all day, and the batteries have just lasted. It's also really easy to top them up. Just pop them in the case and give them a little boost. Or if you needed to, I could, I think, plug in a battery pack straight to the USB-C port there and give them a little boost. I think I'm going to have to charge up my camera to do a range test.
The thing with a range test is - which is to see how far away from the camera you can walk and still be heard by the transmitter, is that I've never, ever seen anyone do that on a vlog. Have you seen anyone piece-to-camera 60 metres away? 
Um, someone might want to do it once, but for it to be a thing that needs a test, I'm not so sure.
So, this is how the DJI mic sounds. Is this something that you might want to get? Why not leave me a comment down below? It'd be great to hear any questions or your thoughts on how you think this sounds. 


Previous post...
How to install IKEA LACK floating shelf


All about me, and getting these by email.

Thursday, 8 June 2023

How to install IKEA LACK floating shelf


This is how I put up our IKEA LACK FLOATING SHELF!  It goes wrong during the install, so you don't have to!  In the video, I put the Lack shelf up in real time, sort of as a step by step tutorial in what to avoid.
You'll need a drill, a cross head screwdriver, some rawlplugs (or wall plugs, or screw anchors),  spirit level, tape measure, two cups of coffee, a bedroom and an Ikea LACK shelf. 

How to put up my IKEA LACK SHELF... or not... INSTALL FLOATING SHELF #IKEADAD


0:00 How to put up an Ikea Lack shelf, a floating shelf for our bedroom.
0:32 How to make sure your Ikea Lack floating shelf is level and positioned correctly.
0:58 How does a Lack Ikea shelf work? How does it float?
2:30 How to install an Ikea Lack shelf the right way up.

TRANSCRIPT: (CLICK PLAY ON THE VIDEO ABOVE)

THIS IS THE TRANSCRIPT - CLICK PLAY ON THE VIDEO ABOVE!
Hello, my name's Neil. I'm the IKEA dad, and today I'm putting up this. It's an IKEA LACK shelf in matte white. I did it absolutely completely wrong. There's a right way and a wrong way of putting this on the wall. This is upside down!

Hello, so this is it. Oh, hold it. That's the ceiling... Let's do this. Uh, open it up. This is 110 cm. I know I want it to go here like this. Find 55 cm to there. I've marked the corner of where I want it, so I just need to measure 55 centimetres from there.

It's the centre point at the top. I need the centre of the bit in the middle, so that is the middle... that middle hole there. That middle hole there, that's the middle, and I need that to be straight. Get the spirit level. Sit that on top. Put it on top of the bars, and I'll mark up two crosses in the middle of those two holes.

So, get a small drill bit. Stand on the bed, haha... [DRILLING NOISE]. Get the bigger drill bit. Rawlplugs. [MUSIC]. Get Herbie hammer to finish the job. [MUSIC]. Just check this is level. Yeah, perfect. [MUSIC]. So, I'm now going to take out these screws and drill four more holes. [MUSIC]. And again, I'll use the smaller drill bit. It's just to drill a little pilot hole. [DRILLING NOISE]. Now we change to the big drill bit. [DRILLING NOISE]. [MUSIC].

Now try to put it up and make it level. [MUSIC]. Then moment of truth - but make sure you slide it on with the two holes at the bottom because we're gonna screw into those to hold it into place. You don't really want those showing on top of the shelf. You've got a nice smooth side on the top. [MUSIC]. Check that it's level. Perfect. To make sure that it doesn't fall off, put the screws in underneath these two screws here, so they go into the small hole here and here, and they screw into this to hold it in place. [MUSIC]. Oh no! I've done it wrong! I've done it completely wrong. Learn from IKEA dad's mistakes. There's a right way and a wrong way of putting this on the wall. This is upside down! So, all of these have got to come out. [MUSIC].

So, it's this way up. The holes here should be underneath, not on top like how I had it. [MUSIC]. Say hi in the comments. Be great to hear from you. We're trying to get to 1000 subscribers. I don't think we'll ever reach that point, but you can take us one step closer, so thanks for clicking on the subscribe button. [MUSIC]. Right NOW, this is going to work. I know this is going to work. I've got the screws in here ready to go in. [MUSIC]. Okay, this is one screw. [MUSIC]. And then the other screw. [MUSIC]. One level in the right place. I did it! How did you get on? Please say hi in the comments. Be good to hear how well you managed to cope with the IKEA LACK shelf, and thanks for watching this video! Here is what YouTube thinks you should be watching next!

Previous post...
My Cockerspaniel leg problem


All about me, and getting these by email.

Wednesday, 7 June 2023

My Cockerspaniel leg problem


Is there such a thing as a Cocker Spaniel leg problem?
We're really worried about Casper the Cockerspaniel's limping. Well, it's not a limp. He does a kind of hopping, only after he has done some walking. The vet can't find anything obviously wrong.
Casper the Cocker Spaniel seems completely unbothered by the limping, but we are bothered about our poor little dog. What do you think?

There's something wrong with our dog


TRANSCRIPT: (CLICK PLAY ON THE VIDEO ABOVE)

THIS IS THE TRANSCRIPT - CLICK PLAY ON THE VIDEO ABOVE!

Hello, welcome back to the channel. I'm Neil, and I've got a bit of a problem, uh, and I'm hoping that you might be able to help. If you know anything about dogs, this is our Cocker Spaniel dog, Casper. He is totally fine within himself. He's really happy, loves running around, and doesn't display this problem ever. It's just when we go out for walks. We never see it around the house, and it's not like it all the time, but I'm going to try and show you the problem as we're walking along. I try to say the word "along" and "around" at the same time. There, can you see how he kind of hops and skips on that rear leg just while he's running around? I'm going to try and show you as much of it as possible, but it's like he doesn't want his back legs to touch the ground, you know, like he's sort of walking on hot lava or something. I'll also show you this lovely field that's near us where we do a lot of walking, and this might be the last summer where it looks like this, so it's a chance to video it and look at it before it turns into some new Housing Development. Okay, it's gorgeous. So, we don't know where this problem came from. He walks normally around the house. This is only when we go out for walks with him. Hey, Casper! There might be some causes of it as well, so I'll go through the probable causes, and you can do your 9 pm drama detective work and say in the comments what you think it might be. Oh, there he goes. This is the Dad Delivers Vlog, where we try new things to help make your family happy, but we're not a happy family at the moment because of this. Should we try and walk? This, show them your back legs. Okay, here we go. All right, can you see that? Looks okay at the start of the walk. It's like this. It's generally okay, but then as the walk continues, his hopping, skippity-pop hop on the rear legs just gets more and more pronounced, more, more bigger. As you can see, he is totally happy with running, walking, jumping around. So, he doesn't actually seem bothered by it. So, we took him to the vet, and the vet checked him over, and it was a bit inconclusive, really. They didn't, well, they didn't know what it was. They couldn't see anything wrong. They felt his legs and paws. Everything seemed fine. So, nobody knows why he kind of hops and skips, and they said, "Well, if it continues, then they'd look into surgery." And we've got a problem with that because it would be good to know what the exact problem is before going into a surgery situation, surely. So, Casper seems totally happy. He doesn't, like, wince or bark or make any noises. He just gets on with it. It genuinely doesn't seem to be bothering him, but it's really bothering us. So, here's what we've checked. We've checked his pads, we've checked between the pads on his paws, we've checked his claws. The vet clips his claws, so everything's checked out there. They couldn't feel anything wrong or sticking out or untoward with his legs. But every time we come out for a walk, he just does this kind of hop, hoppity-skip-jump thing. We thought he just didn't like walking on wet ground at first. We didn't think it was a problem. So, here are some probable causes. Oh, and this is like stretching a bit. So, the first big one was when he was a puppy. Um, he got hit by a car, and it was a very low speed, but enough for him to lift off the ground. Our lead had sat, the clasp had snapped on his collar, and he just went into the road. And thankfully, the driver was driving really sensibly and managed to kind of break in time, but there was still an impact. What I'm not sure about with this theory is, I mean, the impact would have been on one side, and he showed literally no signs, physical or emotional, whatsoever, that anything bad had happened, even though it had. You know, you don't get hit by a car and, and the hopping, that didn't happen then as well. And so, we've only noticed this in the last year or so, and that accident happened, like, two years. So, there's a distance between the accident and the hopping and skipping. But anyway, that's Theory number one. Theory number two is we've just done some Google internet research, and there are a lot of articles describing this condition and saying that it's a genetic thing. But we know his litter, and they're really good breeders. They've not noticed it with any, you know, of Casper's parents. We know his lineage. It's all been checked out with the Kennel Club, and there's no sign that there is a genetic problem with legs and hopping and skipping. So, anyway, that's Theory number two. By the way, we've only been out for, like, five minutes, and already, I'm out of breath. He is showing no problem, no sign of stopping, and it really doesn't stop him walking or running. He doesn't, like, go back and lick his back paw or anything. He doesn't flinch. He just shows no reaction to it at all. It's just like he doesn't like his back legs touching the ground for some reason. Theory three is the one I feel saddest about because I feel somewhat responsible. But I don't know if you can see this beautiful long grass here that's about to be dug up and turned into Housing Development. Casper absolutely loves jumping around in the grass like a gazelle, and he shows absolutely no pain whatsoever, no difficulty with this kind of leaping. We're wondering if we have maybe damaged him or if he's become damaged from doing this. Look, I'm gonna do this once just to demonstrate, but we're trying not to do this anymore in case it aggravates his condition. Here we go. Watch this. Casper, come here. Ready, go get it. Ready, go get it.

So, what do you think? What would you do in our position? And do you think it's Theory one, two, or three, or maybe some other theory that we should be looking into? I am calling this a Dad Delivers failure. That is, it's not a success yet, but maybe you can help us make it a success. I'd love to hear your ill-informed opinion or gut instinct or expert advice. Feel free to say hi in the comments. Thank you for any thumbs up to help other people see this video, and thanks for hitting the Subscribe button if you want to know what happens to Casper next. And right here is what YouTube thinks you'd love to watch next.

Previous post...
Best microphone for YouTube? DJI MIC wireless dual microphone system


All about me, and getting these by email.

Thursday, 25 May 2023

Best microphone for YouTube? DJI MIC wireless dual microphone system


Microphone: DJI MIC WIRELESS DUAL MICROPHONE, BUY ONE HERE:
As an Amazon Associate I earn from qualifying purchases.
Camera: SONY ZV-1
Second Camera: DJI ACTION 2 CAMERA 

What is the best microphone for making YouTube videos? My favourite microphone for vlogging is now the DJI Mic, which I have been using nearly daily for 3 months. In this video I travel to Brighton to meet my friend and camera expert Gordon Laing from  @cameralabs  ...  and make a vlogging interview with the DJI Mic, using both of the Dual wireless microphones and receiver. I also use the on-board recording for the best audio in the edit.

BEST microphone for YouTube? DJI MIC vlogging test in Brighton!


TRANSCRIPT: (CLICK PLAY ON THE VIDEO ABOVE)

THIS IS THE TRANSCRIPT - CLICK PLAY ON THE VIDEO ABOVE!

I think so. 
Look, - I can't tell - previously - Is it that one?
Previously Neil would buy yellow Post-it notes. 
But today, he can get a same-day MRI, which is much the same thing! 
Hello, welcome back to the channel. My name is Neil Mossey, and I share my YouTube experiments on this channel here to help you with your YouTube channel. 
But today, it's a tech, it's a gear video, and it's this. I'm actually wearing it on me right now. It's the DJI mic, and this thing... Oh, this thing is gorgeous. 
But I've got it plugged into my Sony zv1 camera. But today, I'm not in the happy Hut. 
I'm here in sunny Brighton on the south coast of the UK, and I'm here because for two reasons. Firstly, it was exactly two years ago that I tried to Vlog with my Sony zv1 camera, and I came down here just to see if this camera that Sony said was great for vlogging was actually great for vlogging. 
The biggest downside with it is that the lens isn't wide enough, and all I could see was my big face. And um, I even had a chat with my friend, Gordon Laing, the camera expert, to film with him in some ice cream shops and in the streets, and you just couldn't see both of us at all. 
That all changed when I got this wide-angled lens that you can bolt on from Neewer, so that part of it is fixed. 
But my vlogging has been absolutely transformed by this. 
It's the DJI mic. 
It's a wireless cordless mic, and it means that I don't have... Well, excuse me, it means I can have the microphone close to me but not have to have a cable. 
I had to put a cable up my arm on the last video to reach from the microphone to the camera. Now it's being done electronically with its electricity, and it's sending my voice to the camera wirelessly. 
I have rigged myself up with this other thing here. So that's the microphone. If you're interested in seeing and hearing what this is like in action, that's what this video is about. 
But I've got my DJI action 2 camera to show you what I can see and to actually show you the receiver. And I've got it attached to me by wearing a lanyard, so it's like a magnetic thing going on to hold the camera there, and the microphone is clipped. 
It's kind of pulling to the side because I've clipped it to a shirt, which probably isn't great for sound quality, but that might even be part of the review for you if you are looking to buy a DJI mic. I've got it plugged into my camera with this. 
This doesn't come with the DJI mic. 
The DJI mic comes with a really boring black Straight Lead, but I've put on this Rode curly lead because I like the look of it, and it's just better to have something with a bit of give in it. And also, it looks like a bit of a hairband for the camera, which I kind of like. 
This video is for you if you are thinking of maybe buying a DJI mic for your Sony zv-1 camera. I'm going to walk towards the sea, and this is pretty much the worst place I could think of to film with a microphone because we've got a strong wind. We've got traffic over there.
We’ve got wave noises over there and the wind is picking up a bit.
I've got a little fluffy deadcat that comes with the DJI mic, which is hopefully filtering out a lot of the wind noise. But this was the harshest condition I could think of: a nice sunny beach! 
And I apologize now that this video is going to involve a lot of talking. 
Uh, I'm hoping to say... Sorry, there's all kinds of emergency service action in the background. I don't know if you can hear that, but I wanted to do lots of talking just so that you could get a sense of what this sounds like and the sound quality from a wireless mic.
So even with the wide-angled lens, I've got a selfie stick just so you can see as much of the microphone as possible. 
What is it like, though, with two microphones going into the receiver? 
If only I had someone else who could wear a second microphone, someone that might have appeared on the channel before, and someone that might even have reviewed this kind of equipment before. Oh, it's Gordon Laing! 
Hello, Neil. How are you?
I'm good, I'm good. I was just saying how the last time I came to Brighton to film with the Sony zv-1, um, it wasn't a good vlogging experience. 
It um, we wouldn't be able to get in this shot right now that I can get with the wide-angled lens, so that's a win. But the other new thing is having a second microphone. It does make a huge difference. This is the DJI wireless mic system, isn't it?
Yeah, and you use the Rode one? 
The Rode one, yeah, so there's basically two players in this game, aren't there? 
Two main ones at the consumer end. Rode kind of owned it originally with the wireless Go system, which is great, and they just keep doing new versions of that. We've got to watch out for a very slow-moving comedy train. It's a bit like Austin Powers. 
It could get you, but you'd be very unlucky. 
Look, it's even turned off. He's going, "No!!!” 
Oh no, he's coming back. It's coming back.
Um, but then the Rode system, the first iteration of it had a few shortcomings, and they sort of kept improving it. 
And then DJI came along and went, "Well, look, here's our take on it." And a lot of people seem to prefer it. 
I know that some other, uh, a couple of YouTubers I know prefer it. They've switched to it. 
But isn't it great that we've got the choice, that you've now got an easy two-microphone, completely wireless system without spending a fortune? 
And, you know, whether you're doing, like, a podcast at home in a studio or out and about, and again, because it's a wireless system, we don't have to both be in frame. 
I could be, you know, 20 metres away, and it would still be picking it up just fine.
And the way I've got it set up at the moment, you can set it up two ways. 
The first way is to set it up mono, so that both of our microphones are mixed, so you can hear both of us. 
So if we talk over each other, um, Neil, 
[TALKING OVER EACH OTHER: the thing about you at University, that's where I originally met Neil, and I actually used to have a lot of respect...] 
Why! You're not talking over me! 
But the um, the other downside of mixing, apart from it being much easier to edit because it just all goes into the camera and you can use it, oh, look, there's a train! There's the train that tried to run us over... 
Um, but the other downside with it is that you have two microphones, each with background noise, so it kind of doubles all the noise in the background.

What I can do is flip it in the receiver so that it sounds like this! 
Now, we should sound... I apologize if you've got earphones on, this is going to sound appalling because I'm in your left ear 
and I'm in your right ear, or the other one depending on whether you've got it switched. 
But the beauty of this is, is that if I talk over Neil and I do, the thing is, 
[TALKING OVER EACH OTHER: is that when Neil comes down to Brighton...]
So I can now mix out Gordon, and you can only hear me, you can hear him in the background.
And now, hopefully, you can't hear Gordon. I can keep talking, and I can fade him out in the edit, even though he's talking over me, the cheeky blighter. 
But this isn't CameraLabs! 
It's a typical drama student, not like me, I did a proper degree. 
So Rode have got a couple of microphones out, right? 
Yeah, so the big change came with the Wireless Go II, which gave you two transmitters so you could mic up two people, and then they would both talk to the receiver unit on the camera. 
But then they realized that they had this unit on the camera. 
In a lot of situations, the camera operator might be close to the camera, behind the camera. So, on the latest Wireless Mic system, they built a microphone not just into the transmitter, but into the receiver on the camera. So they only sell it with one transmitter, but it's a two-mic system, a bit like what we have, although one of them is connected. In this case, say Neil would be connected to the camera, but the receiver itself has got the same wireless system, as the Go II, which means you can actually wirelessly connect a second microphone. 
You can have a three-mic setup. 
One of them has to be connected to the camera, but the other two would be completely wireless. And that, again, is just an amazing thing to say. I mean, imagine having a three-person all-miked up interview, a scenario which could be out and about in the mobile environment, let alone in a studio. 
No, it's mind-blowing. And also, I was saying earlier on the video that the reason I didn't want to use a wireless microphone, and I remember you telling me about the Rode microphone. I said, "Yeah, yeah, but wireless, you know, you don't know if there's any interference while you're shooting. You only find out afterwards." 
You said, "No, no, but it records as well." Which was, that's massive! 
Yeah, the Wireless Go does internal recording in the transmitters, so if the wireless link is lost, it doesn't matter. You still have a recording. Whereas the Wireless Me, because it's aimed at more of a budget customer, it doesn't have that internal recording, so that's one of the things that you miss. 
Although it does have Auto levels, which in itself is useful. 
I mean, does the DJI system have Auto levels? I think it does, but I just, I just set everything to Auto. 
You're in." Do you? I was going to say that you're an industry professional
I am! Which is why I set everything into auto... I, I... yeah. 
And I think that's what my channel is about. Um, just whack it. I should call it "Just Whack It into Auto and see what happens”.
Auto-whacker.
Hello, welcome back to Auto Whacker dot com!
Have we got at whacker for you today! 
Yeah, I'm sure also "Auto Whacking" really isn't the best title for it, but, um, yeah...
Would you like to get an ice cream, Neil? 
I would because we did that last time. 
Nothing wrong with two grown men getting an ice cream. 
But, um, I want to recreate that amazing, uh, that amazing moment we had. 
It was amazing, Few years ago.
Was it? 
Yeah, we still had COVID restrictions, I think. You know, it's still, you know, two people in the shop at a time kind of deal. 
Freaked them out a bit. 
It did, it did. And we had to queue outside, and you have to, you know, space out in the queue. 
So, are you pleased with this system? Because didn't you have the Rode? 
No, I've not. I've never used the Rode wireless. No. Um, so I was going to ask you, are you happy with the Rode? 
I love it. It's a bit of a preempt, a bit of a spoiler, but I, yeah, I absolutely love it. 
It's absolutely transformed my vlogging. 
Now, am I correct in thinking that it has removable batteries on the transmitters? 
No, which was a really good... They built in... They're built-in, same as the Rode, then, yeah. So, which is, you know, this is where we're at in current technologies that everyone wants smaller, lighter, smoother shapes like phones, laptops, wireless microphone systems, which means having built-in batteries. 
But environmentally, it's a disaster because, as we all know, eventually, those batteries decondition, and they hold less and less charge until they become not particularly useful. 
But that's the price you pay for something that's small. But hopefully, we'll see a change of that. I wouldn't mind it being a bit bigger if I could accommodate a new battery and to extend its life, you know? 
Yeah, yeah. 
But just wearing this, I think, um, maybe it's just the way it feels, but I'm sure that the Rode is maybe a little bit lighter. 
Do you think? 
Yeah, can you connect to an external lav mic? 
You can. The mini deadcats kind of block up the holes, so... 
Yeah, they do. The way I wear it as well makes it look like you've got some, I don't know, some sort of furry what's-it, a trouble, trouble...
Furry gonk?
Or like, you know, in Gremlins when Gizmo sort of gives birth, and they'll pop out and all those furryballs start flying around. Yeah.
And can you also use it because Rode now lets you use it as a USB microphone, so you could connect it to, again, your MacBook or your iPad or your phone and just use it as a USB mic. 
Yeah, it's a really good point. 
I've used it with the DJI Action 2, and it's... it looks really good on this. 
I don't know, I think we'll just stage the shot of us walking past. 
Alright, here we go. You doing an outside shot? 
Oh yeah, let's do it. So, this is... this is the place, two years on. Boho Gelato. 
Should we go in? I don't know if they will let us film. 
They let us film last time, which was kind of them. 
Oh look, what would you like? 
I'll treat you. 
No, no, please, no, no. 
What would you like? How much? 
Um, I think I'll go for... Whoa! How did that... Hello! 
Hi, how are you? What's your favourite? 
Chocolate strawberry. 
I think I'm gonna go for raspberry dark chocolate. I'm gonna go for that. 
As a foodie, I get the whole chocolate raspberry and strawberry thing. I just don't like it as a combo. It’s just never worked for me. I don't get it. But, you know, like, you have, like, say, basil and tomato. Perfect combinations like that, famous ones. It's just... it's the Black Forest gateau thing. I just don't... I've never liked them. 
So, you've gone caramel cheesecake. 
Yeah, that would be my second choice: the passion fruit white chocolate. 
Can I ask you, have you ever met any YouTubers? It could be anyone that... Yeah, any good ones?
Er sorry do you mean who live here? Yeah, or just general.
Oh well in general she’s in Canada and I met one of my favourite youtubers who’s now a really good friend now.
Oh my God, was that here? 
Yeah, she came here. Um... she’s called Leah’ s Field Notes
[MUSIC SPEECH INDISTINCT]
Oh my God, brilliant.
So you’re a YouTuber are you?
On the side, yeah. It's a... as, yeah, I am, yeah.
What sort of things on your channel?
Uh, well, I've got two. One is how to run a YouTube channel, and so I'm trying out these microphones at the moment, which is why I'm talking a lot more than I usually do. And the other one's a Dad channel where I fix things around the house. It's the only way I can get to do stuff around the house.
Yeah. Oh that’s brilliant thank you.  
You’ve got the same amount don’t worry!
See you later. Thanks so much. Thank you. Thanks.
I think I've got it all over my face, unfortunately. 
So, how is it? What did you get? 
It's gorgeous. Yeah, the raspberry dark chocolate. 
You did that deliberately, did you?
Did you notice... that was the ultimate test when someone says, "Are you a YouTuber?" I couldn't bring myself to say it, myself. 
So, why not, 
Even though... 
It's the shame of it? 
Yeah, it's like you're... Yeah, even though I'd like to think that I am.
Um... 
No. It's like... It's like if you say you're a journalist and people go, "Oh yeah, what do you think about the situation?" Whatever, you’re like, "No, no, you don't... You misunderstand. I review Hi-Fi." 
Yeah, yeah. 
And they're like, "Oh, how disappointing." And if you say to someone you're a YouTuber, they're like, "Oh, have you got 10 million subscribers? Do you do Minecraft?" And you're like, "No, yeah." I do wireless microphones...
Even though it is my life, so I... I, 
Your life is relevant. 
I'm interested that THAT was my reaction to that. 
So, you're happy with your choice? 
I am happy with my choice, naturally. Do you know what thing you sounded like there? You sound like one of those... Do you remember the old washing powder adverts? Some random bloke would knock on the door, and someone, an actor, would open the door but pretend to be a housewife or a husband. "Happy with your wash?" "Naturally. 
Happy with your ice cream?" "Yes, I am. Now, go away."
The problem with filming last time. This was the moment where you broke. Really un-gently, that Paperchase had shut down. Is this... 
Yeah. 
Oh, that's... It's living room Health. Was Paperchase. 
Oh was it? 
I think so. Look!
I can’t tell.
Previously Neil would buy yellow Post-it notes, but today he can get a same-day MRI, which is much the same thing, really! 
That's quite a different service that they're offering, isn't it? 
I think Paperchase would have had to sell a lot of notebooks to make the same money.
So, whose microphone looks less discreet, yours or mine? 
Yeah! 
So I've got mine reversed. This is how I wear the Wireless Go. 
I like it reversed so you can only see the... the clip on the other side. Although, what Rode do is they print their name or emboss their name in big letters on it, and it's not very discreet either way. Which is why I prefer to use this system with... even though they sell it on the convenience of having a mic built in and that you can use it as a lapel mic, I prefer just connecting an actual, just a little lav mic to it. 
It's much more discreet. There's nothing discreet about this. It looks huge. 
Yeah, 
Looks like you're kind of holding a tennis ball onto your chin or something. 
Yeah, it does. And I've got mine outside just so you can see what it looks like. But I would much prefer to... I'd even put this on the other side of my shirt and just use that magnetic clip. 
You've never gone down the shotgun mic route, on top? 
No, I never have. And I... The problem I've got, 
Why not?
Because they are ostentatious and they just draw attention. 
They do draw attention, and I... I, it just does not fit my personality. But I use the shotgun mic now in the... in the happy hut for my sit-down videos. 
But do you cut between that and this, though, because then you're going to hear a sound difference. 
Hm, no. I only ever use the... the Deity shotgun mic when I'm sat down, and I only use this when I'm moving around, and they tend to be two different videos. 
Deity. How fancy!
I'd... um... really terrible at the moment on my trains channel, my embryonic trains channel, where I was filming the doors closing, and I suddenly noticed this... this woman who’d just get really angry and stand up, and then she stood opposite me and held her phone up to me and just filmed me for the next three stops. 
She thought I was filming her, 
Right? 
And obviously, I wasn't, but I didn't... I felt too embarrassed to say anything. 
I was filming the doors. 
You were too embarrassed to tell her you’re a YouTuber? 
Yeah, that I was a trains YouTuber.
That sounds like a really, uh, horribly embarrassing situation. But even under there, you wouldn't admit you were a YouTuber. You'd prefer to be thought of as some sort of pervert filming somebody surreptitiously, rather than admitting what your actual career is. 
That's brilliant! Welcome to YouTube! 
That tells you everything you need to know. 
Do you want a quick photography tip? Always look out for puddles, reflections in the ground, because you can get really nice mirror results. 
And if you are going to do it, try and get as close to the surface because you'll see even more of it. I mean, like really right down to it, and that makes for a really nice picture. 
Are you seeing it? 
I am! Gorgeous! 
I'm talking as the close as you dare, Neil. 
I... I will go closer. But the other good photography tip is to have a battery that doesn't run down. 
Yeah, 
It's going to run out any second, and the memory card... 
Can you please help my dad get to 1 million subscribers? Just click on his face. Thanks! Bye! Can we have dinner now?


Previous post...
How to DELETE YouTube SEARCH and WATCH history


All about me, and getting these by email.
Tuesday, 23 May 2023

How to DELETE YouTube SEARCH and WATCH history


How do you remove items from your YouTube search history or clear your watch history? 
I delete things from my YouTube watch and search history in 3 different ways in this step-by-step tutorial for beginners. The walkthrough shows how to clear your cache for youtube search history as well as your browse history on both desktop and mobile device such as a cell phone.

How to DELETE SEARCH and WATCH history on YouTube


0:00 How to delete your youtube search history and viewing history
0:21 How to delete watch history, on desktop and mobile phone
2:00 How to manage and delete YouTube search history on desktop and phone app

TRANSCRIPT: (CLICK PLAY ON THE VIDEO ABOVE)

THIS IS THE TRANSCRIPT - CLICK PLAY ON THE VIDEO ABOVE!

Hello, I'm Neil. Welcome back to the Happy Hut. How do you remove things from your YouTube history, and how do you delete your browsing history and even search history on YouTube? I'll be taking us through this step by step on both a desktop and a mobile device on my phone. First, let's deal with deleting videos we've been browsing from our watch history. This way is really simple. If we go into YouTube, this is just the regular youtube.com. I'll click on the three lines here in the top left-hand corner and then click on history. Now, we can hover the cursor over the video we want to remove, and you can see this cross appears, and that is for “remove watch history”. So, I'll click on the cross, and all views of this video are removed from history.

If you want to do this on the mobile app, in the bottom right-hand corner, there's this tab here, library, and when you click on that, you'll see history at the top of the screen here. I'm going to click on 'view all,' and this brings up our watch history. We can scroll to the video we want to remove, click on the three dots on the right-hand side, and it brings up this menu. The very first option is 'remove from watch history,' so I'll click on that, and all views of this video are removed from history.

If you want to delete all your YouTube watch history, let's go back to our history on a desktop. On the right-hand side, we have some extra options here. Let's click on this to clear all watch history, and it brings up this warning message that this will delete all our video watching and browsing history. To go ahead with it, we can just click on 'Clear watch history.' But this will be annoying if we want to keep some videos we've watched in the past so that we can find them again. It might be better to use THIS  other option here, 'Manage all history.' 

This shows us everything we've done in date order. We can search for words here by clicking this magnifying glass. So, if I type in 'trains' and click apply, then we can delete the searches and watched videos one by one by clicking on the cross beside each search. So, you just click it there, and it zaps the search from our history. Or we can click on this word here, 'delete,' and choose to wipe the history from today. But be warned, if you click this, it wipes it instantly, no warning. Or we can choose a custom range, and you can choose the dates that you want to delete, or delete all time, which deletes everything. All our search and watch history will be gone.

To do this on your mobile device or phone, click on 'Library,' which is the tab on the bottom right-hand corner. Then on 'History,' next to history in the top right-hand corner, click on 'view all.' And at the top of the history screen, there are these three dots that bring up this menu. So, you could choose an option like 'manage all history,' and that takes us into the YouTube history, which is really similar to the desktop history we just saw. 

Or if I go back to the history page and click on the three dots again, you could just hit 'clear all watch history.' It brings up this warning to confirm that you do want to wipe everything from your YouTube account.

If this video is helping, thanks for being awesome and hitting the thumbs up or the subscribe button. But if you want to go further, the nuclear option and wipe everything, you could delete your entire YouTube channel. I made this video walking you through the process step-by-step and there’s a link in the description.


Previous post...
How to EDIT a YouTube Short AFTER publishing


All about me, and getting these by email.
Monday, 22 May 2023

How to EDIT a YouTube Short AFTER publishing


Do you want to edit your YouTube Short video AFTER you have already published it and gone live? If you're already hit publish on your YouTube shorts, you'll know that you do not want to lose those views... but how can you edit a clip out of the video if it can already be seen?
I walk you through editing YouTube Shorts using the YouTube Editor tab in YouTube Studio, a step by step tutorial for beginners. It works much better and is much easier using the desktop YouTube Studio, but we'll edit the short using only a mobile cell phone and a browser like Chrome or Safari.

How to EDIT a YouTube Short AFTER publishing!


TRANSCRIPT: (CLICK PLAY ON THE VIDEO ABOVE)

THIS IS THE TRANSCRIPT - CLICK PLAY ON THE VIDEO ABOVE!
Hello, welcome back to the Happy Hut, my name is Neil, and I try out experiments on YouTube here on this channel so that you can try them out on your channel. And today, I'm gonna go into the world of shorts, which I don't do a lot, but it's quite a tricky problem. 
Once you have published a short, can you edit that short? 
Can you trim it or even cut out any video from a short that has been published and gone live? 
But also, do it on a phone? 
This is much better and easier to do on desktop, but I'm going to follow the same procedure for editing a short that has been published, on this mobile, AND I'm going to do it in real time in front of you. I'll put the screen up on the screen here.
So the first thing that I've done is I've opened up my browser, which on an Android phone might be Chrome or on an iPhone might be Safari, and the address to put into the browser is studio.youtube.com. 
This is the channel dashboard for your channel. 

And the first problem is that it's really small because it's on a mobile or cell phone screen. I'm going to zoom in to the top left-hand corner, and you can see this menu here with the three lines. That expands all the options that we have. We're going to go into content here, and this opens up the place where all of our videos are stored.
So if I scroll down to the video that I want to edit, and it's quite an annoying video, so I want to make this shorter, and I'm going to click on it. It's this one here, UK emergency alert test. So I'll click on that, and that opens up the edit page for this video. And we have another menu in the top left-hand corner. I have to do a lot of pinching and moving around to get to the right point. 

But if I click here on the three lines again, this expands all of the menu options for this video. So I'm going to click on editor, and that opens up YouTube's own built-in video editor so that you can edit or trim any video that you publish on YouTube. You've just got to do it on desktop. And so we're faking a desktop on our mobile device.

If I zoom in, you can see these options for the video editor. We have trim and cut, blur, there's an audio option, end screen, and info cards. We're going to go for the top option, trim and cut. I need to put my glasses on because this is so small, and I'll try and zoom in so you can see what's going on.
So on this page, you can see the video is on the right-hand side, and that's all this video is. 

It's just a video of this National Emergency alarm test. So it's a really annoying ringing, and it lasts for, if I zoom in, you can see that it lasts for a minute. Guess what? I don't want this video to last for a whole minute. I'm going to take it down to about 15 seconds. And down at the bottom, you can see this whole minute of video is represented by this timeline. So it's laid out. 

The whole minute is laid out. And as the video plays, I'll turn the sound down because it's really annoying. If I press play on the video by pressing the play button here, as the video plays, you can see this playhead plays each second.
I'm going to zoom to underneath the video player, and can you see there's like a plus and a minus magnifying glass? This zooms us in and out of the timeline, and we're quite zoomed in at the moment, so \

I'm going to press the minus icon and zoom out, and we can see more of the timeline there. So, we can see the whole minute there. Now, this is going to be a really easy edit because all I want to do is just to chop it off at the end, anywhere after 15 seconds. So what I'll do is I'll zoom in, and with these grab handles, there's a blue one at the beginning and a blue one at the end. I'm going to grab the one at the end, and I'm going to, can you see, it's now shrinking the video. So this video is currently only 30 seconds long. 

If I drag it to there, I'm going to go further, all the way back to 15 seconds. So, I'll zoom out, and then I'll grab the blue handle at the end of the video clip and just drag it all the way back to 15. Let’s zoom that in there. So now this section is the only section that I want to keep of the video, and I can preview this.

So, scroll up to here. You can see the word preview. I'll click on preview, and you can see the play head, the line that plays the video, is moving along, and it should stop at 15 seconds. There we go. So I'm pretty happy with that edit. So if I zoom out, I'm going to go up to the top right-hand corner where it says save, and I can click save. 

Now, I clicked... accidentally clicked on the three dots here, and it's brought up this menu saying reverts to the original. That means just switch back and remove all of these edits. So, I'm just going to ignore that and press save, and we get this message. And so, this is a warning that the changes don't happen instantly. It takes a while for YouTube to process and to make that cut public. 

So, if you're making a cut because there's something really embarrassing that you want to remove, the advice is to unlist your video, and then you can edit it while it's private. I don't mind how long this takes, so I'm just going to carry on and hit save. Fantastic. So that's happening, and then we'll do a time jump, and we'll see if this edit has worked.

It is now about 20 minutes later, so let's go back into our YouTube studio, and I'm going to find the video here and click on it. As if by magic, if I zoom into the video preview at the top right-hand corner here, you can see that magical figure, that duration, there right there, 16 seconds. This video is now online as 16 seconds. I have got all kinds of tips and tricks for handling your YouTube channel. I've put them all in this playlist here. Thank you for being awesome with the thumbs up or the subscribe button. And hit the subscribe button if you want more tips like this.

Previous post...
How much money does YouTube pay me at 10000 subscribers


All about me, and getting these by email.
Monday, 15 May 2023

How much money does YouTube pay me at 10000 subscribers


I recently hit 10000 subscribers and thought I'd go through all my YouTube Studio analytics, statistics and money... LIVE. 
Say hi in the comments or share your statistics too or ask any questions!

How much money does YouTube pay me now that my channel is at 10000 subscribers?
And also looking at all the Click Through Rates, Impressions, views and watch time after one of my videos went viral (for me) with 300K views!


How much money does YouTube pay me at 10000 subscribers LIVE!


Previous post...
Using baking soda to clean grease from a hand mixer


All about me, and getting these by email.

Friday, 12 May 2023

Using baking soda to clean grease from a hand mixer


Here I try to remove 20 years of grease from our Bodum Electric hand mixer. It's a family heirloom, and so is the dirt on it. So how to clean an electric hand whisk? Here's a cleaning tip using Bicarbonate of Soda (or Baking Soda), water, or white vinegar... But does it work?

Can I get 20 years of grease off THIS?


TRANSCRIPT: (CLICK PLAY ON THE VIDEO ABOVE)

THIS IS THE TRANSCRIPT - CLICK PLAY ON THE VIDEO ABOVE!
We've got this really nice whisker thing, but it's absolutely caked in grease. I don't know if you can see that, it's absolutely sticky. It's like a cooker hood. So, I'm going to try and bring this back from the dead. I don't know if this is going to work, but if you're seeing this video, then it probably does work. This is the Dad Delivers Vlog, by the way, where we try new things to make our family happy. And today I’m making the family happy with this by cleaning this up. And I'm going to use... I only saw this on the internet just now. I don't know if it's going to work, but I'm using baking powder, no, baking soda or bicarbonate of soda. 
I've mixed some up, so this mixture is one part to three parts, and it... I think it's too runny. So, I'm going to try and use a paste first. So, here's some nice clean bicarbonate of soda. 
I'm gonna put the liquid into this, make that into more of a paste. 
I'm going to mix this up, maybe a bit more liquid. I've never done this before. 
If you've done this before, then obviously say hello in the comments and tell me what you would use to get grease off this thing. 
We've tried everything. I guess I'll just use some kitchen tissue, some kitchen roll. 
Look at the paste and spread it on. So, I'll do this side because I've already spread it on like that. 
It's a bit tricky because I've got to get it around the Bodum logo, which is kind of embossed. 
I don't know how long you're supposed to leave it for, but if just the whole thing just feels really sticky when you hold it, I don't know if it comes across on camera. 
I’m going to do the side here, there’s a really horrible bit on there. 
There we've got icing sugar on the side there, so wipe that off. 
There's a really big blob of grease in the corner there, near the power cable. 
Hey, if you like this mixer, I'll leave a link to it down in the description. 
It's funny, it feels funny using a baking ingredient to clean the thing we do baking with. 
Well, I don't do baking with it. 
How long do you think you're supposed to leave it on for? 
Alright, I'll leave this on for a few minutes. Let’s do a time jump... 
...it's now one minute later. I'm gonna keep that doing its business, but I also saw online that you could mix vinegar with the baking soda. So, I'm gonna do that while that is still going. 
Let's try one tablespoon of bicarbonate of soda or baking soda. 
And this isn't very accurate. I'll just put a splash of vinegar in to make the paste again. Wow, look at this. Whoa, what's that? Oh, it stinks.
Oh, this might be the proper stuff.
You can probably hear Casper, the dog in the background, right? 
So, I'm going to smear this. This is just as dirty. I'm not sure the camera does this justice, but it really is sticky with grease. I'm just gonna smear as much of this on as possible, but it's not quite as liquid as the other side. 
Maybe I should get a bit more vinegar in there. Absolutely stinks. It smells like a fish and chip shop in here. Let's put that in.
I can't remember which side is which now. This is the vinegar side. I've got to do the handle as well. Should I do that now?
So, I did a handle with the vinegar. 
Do you know what? This seems to be coming off with the vinegar. 
It seems to just be coming off straight off. 
I'm making a right mess, got bicarbonate of soda all over the floor. I'll show you in a minute. I'll just smear as much on as possible. 
Yeah, that seems to be coming up. 
Look, it's the grease coming off in chunks with the vinegar and baking soda. Yeah, you can see it. All the brown grease just coming straight off. Right, so I think it's the moment of truth. It's that regular time in the video. 
I've got the graphic there. 
I think I need to wipe off what I've done. So, I stink of vinegar now. 
So, this was just the water, the diluted bicarbonate soda, and it's coming up. 
The grease seems to be coming off. I can't really run this under the water because you're not supposed to get it wet. 
My mum gave us this a long, long time ago, and it was pretty much in this condition when she gave it to us. 
Yeah, look, it's coming off. So, it does work, but maybe it's coming off because there's vinegar on this thing. Are these cleaning videos helpful? 
Say hello in the comments if you dig the cleaning vid. Yeah, look, it's really, the grease is really just sliding off. So, I'm already gonna call the bicarbonate soda or baking soda with water a Dad delivers success! 
And then the baking soda with the vinegar, let’s wipe this off now. 
Yeah, it comes off really easily. I've never cleaned something with baking soda, but it's just coming off so easily. 
And this one's tough because of all the bumps and design features. I know if I put vinegar straight onto the tissue, let's give that a try. 
And it's distilled white vinegar or malt vinegar. It won’t come off. The baking soda won't come off. It's just kind of stuck on there.
[Music] 
[Music]
So, I think that's pretty much all the wiping up I can do. And it did really help to use the vinegar as the liquid to brush off the baking soda. 
It probably needs a bit more of a clean up, but I think that is a huge improvement, and it doesn't feel sticky anymore. So, this is definitely a Dad Delivers success, heh heh!
What a state! 
Look, I've got baking powder and vinegar everywhere, but at least my hand doesn't stick to the mixer when I use it. 
I hope this video helps. If it does, leave a comment below. Leave a comment below if you have any tips for cleaning your greasy kitchen appliances. 
And right here is another video that YouTube knows that you are going to love. 
Can you please help my daddy get 10,000 subscribers? Just click on his face. Thanks, bye. Alright, this is gonna be the proper one, right?"


Previous post...
How to find replies to replies on YouTube Studio


All about me, and getting these by email.
Tuesday, 9 May 2023

How to find replies to replies on YouTube Studio


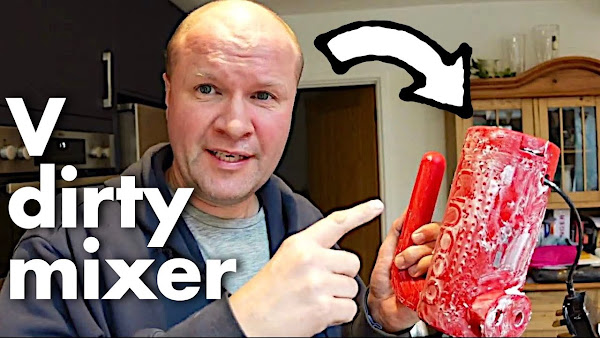
Just spotted this NEW feature on our Youtube comments! We can now search for replies to our replies in comments! If you click in the comments tab on the YouTube Studio app or YouTube Studio, and click on "I haven't replied" - it brings up a hidden menu where you can select Replies to Replies, which shows where viewers have replied to your reply.

NEW FEATURE! Replies to your replies now EASY to find on YouTube!


TRANSCRIPT: (CLICK PLAY ON THE VIDEO ABOVE)

THIS IS THE TRANSCRIPT - CLICK PLAY ON THE VIDEO ABOVE!

Hello, I'm Neil Mossey. Welcome back to the Happy Hut. 
I've come outside today. 
It's a gorgeous day today, but the grass needs cutting, so I'm avoiding that by going through all my comments on my YouTube channel. 
We can now see really easily all the replies to our replies on our comments, but this is a bit of a hidden feature that I've only just found, and I'm finding it extremely useful. 
One way to see comments is to click on the Bell icon at the top of the regular youtube.com page or on the top of the YouTube app, like this one here. 
If I click on that Bell icon, here are all my latest comments, but this just brings up all the comments in time order, so it's really difficult to see what we've replied to or where we should even start with replying. 
If we go into our YouTube Studio, which is at studio.youtube.com or the YouTube Studio mobile app, when you click on comments, that's this button on the bottom there, that tab there, the default setting is to see all the comments that we haven't replied to yet. 
But there is a new extra option. 
On the YouTube Studio app. I'll do mobile first. If you swipe along the top, these are the options for our comments. 
These are filters, and the first button on the top left, if I press that, now that brings up all the filters that we can apply. 
Or I'll close that and go to another tab at the top here. 
I can just jump straight to clicking on "I haven't responded." 
If I click on this, here is down at the bottom "responses with new replies." 
So I'll hit that button. 
It now shows me where people have replied to my replies. 
So I can show you some here. 
There's one from Louie Taylor. 
Subscribe to Louie if you're interested in music and music composition. 
We've got one from Tim Connolly Drums. 
If I click on replies, you can see there's a reply from Tim. 
Hello Tim, if you're into drums, subscribe to Tim Connolly! 
I'm going to click a thumbs up and a heart for that comment. 
Welsh Tony, he's left a reply there that I've not acknowledged or replied to. 
So I've got a heart and thumbs up that - subscribe to Welsh Tony! 
No more newbie, of course, no more newbie. 
Hello, sorry I haven't responded to your kind reply from two weeks ago. 
This system now shows me that you left a comment so I can thumbs up and heart that comment. 
Go and subscribe to no more newbie if you're into PlayStation in particular. 
Now, over on YouTube Studio desktop, to do this on a computer, we'll go back into studio.youtube.com and then click on the comments tab on the left-hand side. 
Then click on the "I haven't responded" button, and it brings up these options. 
I'll click on "responses with new replies," and this brings up where people have replied to me so that I can follow up. 
I think it's a great system, and I'm so glad that YouTube has built this in. 
Is this a comments feature that you think you would use? 
Why not leave me a comment? Of course, I can now reply to it now down below. 


Previous post...
How to get FREE unlimited storage on Google Photos


All about me, and getting these by email.
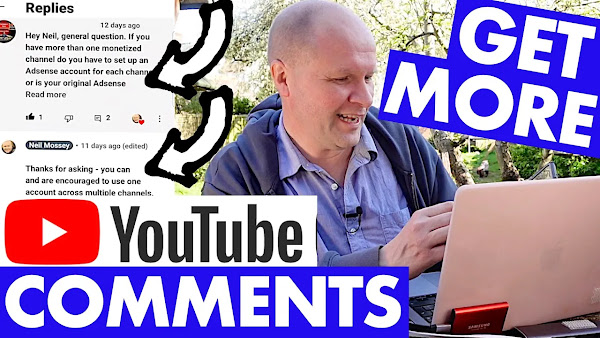
Monday, 1 May 2023

How to get FREE unlimited storage on Google Photos


How to get FREE unlimited storage on Google Photos! 
I think you can also use this to transfer all your Google photos to another Google account.
Have you hit your 15GB storage limit on Google Photos (and Google Drive and Google One)? I try out this easy method to use Partner Sharing in Google Photos to get free online unlimited storage of photos and videos. 

Google Photos partner sharing for FREE unlimited storage?!


The way I'm using is 
1) Create a new Google account. 
2) Share photos and videos with that account within the Google Photos app using the Partner Sharing option. 
3) Accept the Partner Sharing request in BOTH Google accounts
4) Turn on Auto Save in both accounts
5) Delete photos in the new account, the photos will REMAIN undeleted in the shared account.
This might change over time, but I have tested removing the Partner Sharing link, and all the shared photos and videos remain in my other account.

My biggest advice would be - for safety - to download all of your Google Photos and videos to backup locally. This video shows 
HOW TO DOWNLOAD ALL GOOGLE PHOTOS AND VIDEOS:

HOW TO REDUCE GOOGLE PHOTOS STORAGE using JUST your PHONE:

HOW TO REDUCE YOUR GOOGLE PHOTOS AND VIDEOS STORAGE:

TRANSCRIPT: (CLICK PLAY ON THE VIDEO ABOVE)

THIS IS THE TRANSCRIPT - CLICK PLAY ON THE VIDEO ABOVE!
Hello, my name's Neil, and recently I made this video about what to do if you hit your storage limit in Google Photos. 
I showed some ways to reduce the photo and video files in your Google Photos so that you can get your Google accounts working again. 
In that video, which is linked in the description, I said that you can use a feature in Google Photos called partner sharing, and I think there's a way to do this so that you can save unlimited photos and videos. 
I know it's a bit of a bold claim, but this is how I think it works. 
At the moment, if you share your photos and videos with another account using partner sharing, so you've got Google account number one and you create Google account number two... you can share your photos and videos from this account with this account - so that the photos and videos from this account can also be seen and searched and saved in this account. 
Those photos and videos do not take up any storage space in that shared account, which means you can delete them off the original account where they were taken, still have them saved in the shared accounts, and those saved photos and videos do not take up any of your free 15GB of Google storage allowance.
So let me show you how to set up partner sharing step by step. 
I'm going to do this in real-time, and you can try it out for yourself and follow along. 
I'm going to do it on this phone. 
You can do it on the desktop, I'm going to try this on a phone. 
If I go into the Google Photos app, I have created this brand new Google account just for my photos and videos. 
I have all the details of how to make a new Google account in my other video. The link is in the description.
Now I've signed my Google Photos app on my phone into that new account, and to check that you've done that, you just click on the top right-hand corner. 
At the bottom of the app, at the bottom of the screen, there's a tab here called "Sharing," and if I click on that, here is a prompt to share your photos. 
It's right here where it says "Share with partner." 
If partner sharing isn't here, try going into a desktop on a computer and go to photos.google.com. Click on settings, which is the cog at the top here, and partner sharing should be on the list there. If it isn't, you might need to verify your account first.
Back to the Google Photos phone app, I'll click on "Share with partner." 
Get my glasses on. 
It gives you some options here, so it explains that setting up automatic sharing means that you can share your memories. So we can choose the starting date. I'm going to go with "all time." 
I want all photos to be shared with the other account, and you can choose which photos to share. I'm going to share all photos.
Then I guess we'll click on "Select partner," and here we can type in the email address that we want to share the account to, and now we'll click "Confirm." 
So it's told me that it's shared this request, this invitation with the other account. 
Now we can go to that other account to accept the invitation. 
So I'll click on the avatar in the top right-hand corner, and I'll log in to the Google Photos app to my other Google account. 
And here it is right now on screen, and I've got a notification saying, "Neil wants to share with you." So it's instantly told me that the sharing request has been made. 
If it's not showing, make sure you've clicked on the sharing tab at the bottom of the screen here.
I can now click on 'View Invitation'. “Neil wants to start partner sharing with you.” 
You'll be able to view photos shared by Neil. So hit 'Accept'. 
And now, it offers to share back to the other account. 
The questions look exactly the same as before. Choose starting date. We'll have all time. And choose photos to share. Let's hit 'All Photos'. 
And then, I'll click 'Confirm'. 
Now, it's given us an extra option, and this is the important bit to make this work, to make this unlimited. "Auto-save pictures from Neil.” 
So it's offering to show those photos and videos from the other account and save them in this account. And it won't take up any of my storage. 
So I'm going to hit 'Get Started', turn on auto-save so you never miss a photo from myself. 
This is the crucial bit here. 
Can you see where it says “the photos that you save won't count towards your storage as long as your partner continues to share them with you”. So what I will do, I will choose 'Save All Photos'. 
And then I'll hit 'Confirm', “saving automatically all photos”. 
But all of those photos are now going to be saved in my original Google account.
I've now logged into the other account, the new Google account that I created just to take photos and videos. 
And you can see here that partner sharing seems to be working. 
But if I click on “Neil's photos partner sharing”, I've got the same message here to auto-save. So I'm probably going to do this in both directions just for safety. 
It takes up no storage, so I might as well do this. “Auto save pictures from Neil”. 
I'm going to click 'Get Started', turn on auto-save. So I'm going to choose 'Save All Photos', confirm, and that is now saving all my photos from the other account to this account. It doesn't take up any of my storage.
If this video is helping, thanks for leaving a comment or being awesome with a thumbs up. 
And right here is what YouTube knows you're going to love watching next. 
Can you please help my dad get to 1 million subscribers? Just click on his face. Thanks, bye. Can we have dinner now?

Previous post...
Get your PODCAST onto YouTube


All about me, and getting these by email.