How do you REPLACE a Bosch garden trimmer line when it breaks? I share how I change the strimmer line on our EasyGrassCut 26 in under a minute, with step-by-step instructions on how to fit a replacement spool for this grass trimmer. If you're looking for an easy tutorial on
BUY Bosch replacement line for Grass Trimmer (Amazon commissions earned) 👇 👇 👇
THIS IS THE TRANSCRIPT - CLICK PLAY ON THE VIDEO ABOVE!
[Music]
So...
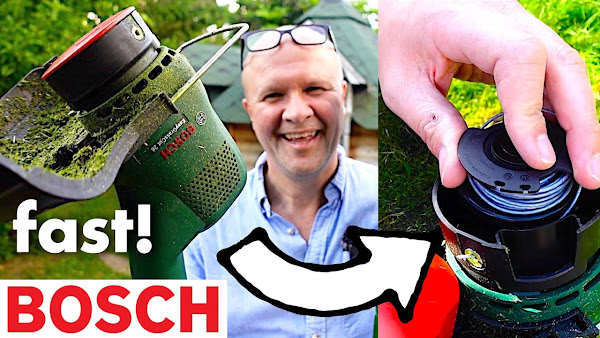
So, your Bosch Grass trimmer or strimmer has snapped the line.
How do you fix the line on a Bosch Garden trimmer?
I need to turn the power off first. There, I don't always remember.
It's really easy. I'm going to go through this step by step, and we'll get your line back up and running.
This is the EasyGrassCut 26, but this is pretty much how all grass strimmers work.
You can see there's like a, obviously, the thing that spins around.
On each side, there are these two buttons.
If we squeeze them together, it lifts the lid off, and then underneath we've got the spool of line.
What we're going to do is we're going to take this out. It's a bit difficult holding this at the same time.
And then we want to feed out just a bit of extra line and make sure that the line in the spool is kind of free running.
It does kind of spill out. If it does, you will have to wind it back up again, otherwise you're going to be doing this a lot.
Inside the spinny thing in the middle—hope this isn't getting too technical for you—on the spinny thing, there's a little hole, an eyelet.
What I'm going to do is feed the line into the eyelet, just over here.
So I just curve that in—whoa, hang on. See that? That is exactly what I didn't want to happen. So we just tighten it up.
I'll show you a close up of that. Can you see? It's gone through. And then we'll set the cartridge back onto the spool holder here, like this. I find it—oh no, it's the wrong way around. Right, so that's another tip. Can you see?
It's got these kind of catches. That's the side that goes down.
And then we can set the cartridge onto this spindle, there, like that. And I'm going to pull it tight just to make sure the line inside is nice and tight.
And then to rewind it back into the cartridge, you just turn it anticlockwise.
You can hear it clicking, and I'll show you why it clicks in a moment.
But that will take the line back in, and we want it to be just about the same length as the protective guard there. So we've got a bit more to go in, but it's okay if it's a bit over because there is a blade or plastic notch on the protective guide.
So when it spins around—let's tuck it in—when it spins around for the first time, it will catch that blade and cut it to the right length.
If you want to feed it out again, there's a black button down here.
If I press that, you can feed it out one notch at a time, and then to wind it back in, just turn the cartridge anticlockwise. So I think we're done there.
So what we need to do is put the lid back on. It's really simple.
Just line up the buttons with the guide holes and just slide it down.
Try and keep it level, otherwise it won't work.
And that clicks on, so that is now good to go.
You can see that the line is not going anywhere.
What we'll do now is turn the power back on, and then watch out, make sure - I'm wearing glasses because it will fly off that excess bit of line on the first turn. Keep your hands and eyes away from it. Here we go, it's going to be noisy.
There, so now it's cut it to exactly the right length, which on this EasyGrassCut 26 is 26 cm diameter.
And away I go around the happy hut.
If you want to buy a replacement line, I have a link, an Amazon link, down in the description to the official Bosch trimmer line.
I personally am using the official products now because I used my dollar store or pound shop trimmer line, and it just melted and just didn't really do the job. So I paid a bit extra, and this does seem to last a bit longer than the cheap alternative lines. But those are on that link as well.
Give me a thumbs up or hit the subscribe button if this video is helping you, or say hi in the comments. I hope this sets you on your way to a bit more garden work. It's lovely to meet you, and right here on screen now is a video that YouTube knows that you are going to love watching next.
How do you use a prompter for YouTube videos? How do you set up a teleprompter on a Sony ZV-1 camera? Which is the best budget autocue on Amazon? I share how I set up my teleprompter in my YouTube home studio, using the DESVIEW T3 prompter on my Sony ZV1 camera. I also use a Desview R5 mkii 7 inch field monitor to put the words on screen with Google Docs from my PC.
Finally there's a full unboxing first impressions review of the Desview T3 autocue straight out of the box from Amazon!
Buy the DESVIEW T3 TELEPROMPTER here! (Commissions earned from Amazon) 👇👇👇👇
THIS IS THE TRANSCRIPT - CLICK PLAY ON THE VIDEO ABOVE!
Hello, welcome back to the Happy Hut, welcome back to the channel.
I'm Neil, and in this video, I'm going to be looking at teleprompters.
Are they any good for your YouTube channel? Do they work?
Which is the best one, and how do I fit a teleprompter to my Sony ZV1 camera?
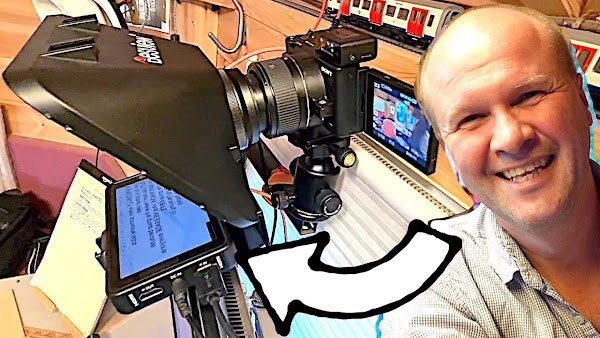
This video is basically an excuse for an unboxing of this: the Desview T3 teleprompter for tablet, smartphone, iPad, or in my case, the Sony ZV-1 camera.
We'll get to the unboxing in a moment, but let me show you my setup because it's working really well for me.
This is the Desview T3 teleprompter.
Down here is the Desview R5 Mark II field monitor. It's a 7-inch field monitor.
Now, I'm not—I've paid for all of this with my own money, so this isn't sponsored and it hasn't been given to me for free—but I do really like this setup. Uh, let me show you how I've attached it to the camera. I'll go through this in detail on the unboxing, but I have a wide view lens adapter—can't even get the words out—attached to my Sony ZV1 camera, and on that, you have a ring where you can attach filters.
Well, that means I can attach a ring that holds the teleprompter to the camera.
Let me show you setting it up.
You take the ring that comes with the teleprompter and screw that onto the filter ring.
Then you can take off the protective cover for the teleprompter, and it reveals this kind of groove thing that you slip over the ring.
So the ring holds the teleprompter on the end of the camera for you, and this is what it looks like through the camera. So you don't get to see what is being projected onto the screen.
Look, I can show you, I've got words on my computer and they go onto the monitor, and they are reflected in the glass.
Now, it looks like the monitor is far away on the camera, but in real life, the way that the optics work is that these words actually fill the screen, so I can see that on there.
But my camera is not showing it because of the way it's—it's the laws of physics—means that I can't actually show you what my eyes can see, but I can see this text really clearly.
The way I've done that is that I have, uh, a PC under my desk, and an HDMI lead comes out from the PC, and you just connect that to the field monitor.
I've also got a power cable going in—it's usually a bit tidier than this—but I've got a power cable going in to power the monitor.
Now, the great thing with a field monitor is you can do this with a phone, but with a field monitor, I can bring up a menu on the monitor, and in the menu, I can set the monitor to reverse the text. So I can flip the image horizontally. So I don't know if I can get the camera close enough, but it's actually projecting backwards what is coming out from my PC.
The great thing with that is that I don't need any other apps.
I can just use Google, Google Plain old Google Docs!
So this is a Google Doc with my script on. I've got the zoom into 200%, and I've zoomed into that on my PC.
And I can even hit F11 here, and that will fill the screen with the text.
And then while I'm talking—so I hold the camera and talk at the same time—I can scroll the text.
So I can say that “WhatsApp can be a complete pain sometimes, especially when someone adds you to a group chat”.
And I can just scroll through my script as I'm reading it.
I can do it at whatever speed I like.
I can make this text bigger or smaller. I've got full flexibility.
The other way that I use this setup is that I can put Zoom calls up onto the monitor, which means I can look at the camera.
I can give full eye contact to the screen throughout the call without having to awkwardly look up and down during the call. So this has been so helpful for me, and it's helped me to make so many more videos because it means that I can project the text or the image that I want to look at while I'm recording actually in my eyeline, and it's really helped.
It's not cheap, but I've been using this every day.
So this setup—I wish I'd gone for this setup earlier, but I tried bodging it with a phone and a cheaper teleprompter. I wanted to treat myself because I was using it so much.
This is how the Desview T3 teleprompter arrives.
I'll just give you shots of all sides of the box.
It's a really nice, uh, bit of packaging, even though it's a plain brown box, actually makes it feel quite premium. So I'll open up the package, and we have a user guide.
I guess this is going to be all the adapters.
Let's open this up.
Yeah, look, all the adapter rings and foam fillers for using it with a smartphone.
I’ll be using mine with a Sony ZV-1.
Cleaner cloth, uh, there's more holders in there.
We have a teleprompter remote, and then the big thing in the box is the teleprompter itself.
This really nice foam packaging. But the main reason I wanted to buy this particular teleprompter is this. This is crucial. This ring here.
I don't have that on my other teleprompter, and other budget teleprompters do not have this.
This—between uses—if that's open—hang on, just trying to open it up to demonstrate—there's like a lip here on it. It says pull. That's really helpful. Not following that at all.
That just slides on.
What happens is, if that's open, dust gets into it, inside it. So I'm constantly having to clean inside the teleprompter screen. So to cover it up for protection, this has a nice tray, nice branded cover that just slides on like that.
So we have the two cold shoe mounts. Again, I'm going to be using that. I'll put a ring light on one, and I can put my—you could put a monitor, or I could put my wireless mic receiver so I can see the levels on there.
The other reason I wanted to buy this one is because of this nice big gap down here.
I've got a nice chunky Desview field monitor that I use for—oh hello, you can see me—I use a field monitor, and the monitor is just too close to the glass on my other budget teleprompter.
The different-sized foam cutouts for pressing against a smartphone if you're using the smartphone to record rather than the smartphone to do the cueing and the word projection.
And we have all these different adapter rings, and they all come individually wrapped, which is a nice touch. Look up here, I have a pretend setup to find your ring. I'll open the 52 mm.
Let's see if this one fits. Like a glove.
So the idea is for this to—sorry, this is to simulate your camera.
This smartphone holder isn't actually a smartphone holder.
You can pull it out this much for a phone, like—I'll demonstrate.
This is a Samsung S20, but you can stretch further by pressing this button here.
It gives you an extra extension, so this can hold up to, I think it says—you'll have to check this, but I think it's an 11-inch tablet.
The instructions aren't very clear, but what we need to do is loosen this, which then drops this holder section like that. And that reveals an area where we can put the bolt in.
So I'll slide the bolt through here, line it up with the bolt, and just screw this in. The holder is firm, and I can now push this back up. But what's great with the T3, the Desview T3, is that you can adjust the height.
We are good to go.
So if I take off this protective holder—hang on, I could just slide it out. There we go.
The way you mount it onto an SLR, DSLR, or mirrorless camera—or I do it with my ZV1 with the ring adapter—slide the teleprompter onto this ring, and that holds it in place like that. Let me show you what it looks like side on, and this looks really good.
So what I want to do now, obviously, is put it on the camera that you're watching right now. So I'm now on my phone. I can do this one-handed. Hopefully, just slide it off the ring. There we go.
And I can now mount the teleprompter onto my ZV-1 so you can see the view from the camera.
But on the side, all I do is line up the teleprompter with this ring and just pull it on into place.
I'm doing this one-handed, which isn't helpful, but here we go.
Click, and on it goes. And oh, that looks so good.
So the greatest thing for me, for the Desview T3, is if I take this off—just slide it up like that—I do not want dust going into that hole.
I can already see some is getting in there, so slide that in, click, and then I can put the protective ring on, and that will stop dust, pollen, and debris from going into the teleprompter while it's in storage.
That unboxing was recorded about 3 weeks ago.
I've been using this setup every day, pretty much every time I put the camera on.
I've used it for Zoom calls for my day job, and I can just read the text straight off the camera, straight down the barrel of the lens, so you get the full effect of me speaking fluently as if I know what I'm talking about because I've planned it in advance and I've put the script on the screen.
If you have any questions, leave a comment down below. Just say hi, it'd be lovely to hear from you.
And thank you for hitting the thumbs up or the subscribe button.
It really helps me to keep this channel going.
I hope this video is useful, and right here is what YouTube knows you want to be watching next.
Why I chose this as my first ever camera bag from Amazon: the PGYTECH Onemo 25L backpack. I'm trading in my bag that piles all my gear on top of each other for this stylish Olivine camoflage backpack.
I'm planning on using this rucksack for my small gear: Sony ZV-1 camera, Lacie hard drives, DJI Action 2 camera and DJI Mic wireless microphone system. I'm also using the bag's extendible section for my Macbook Pro, bulky notepads and scripts.
It's fantastic, and here's my unboxing first impressions review.
THIS IS THE TRANSCRIPT - CLICK PLAY ON THE VIDEO ABOVE!
Hello, welcome back to the channel. This is my unboxing first impressions of the PGYTECH OneMo camera bag, camera backpack, and oh my goodness, this is a big moment for me. I wanted to capture it on camera because I have never bought a camera bag before or backpack for a number of reasons. Firstly, cost. Spending that amount of money on a backpack does feel slightly alien to me, so this is a new experience. But also because I share how I make videos here on YouTube, and I'm not really into that Peter McKinnon, Matti Haapoja Gerald Undone world of cameras. I just, you know, appreciate them, but I've never been into the big cameras with the interchangeable lenses. I know you might feel differently, and this is why you're getting a backpack, but I like my small cameras. But I did need a camera backpack that doesn't just pile everything on top of each other. I've got a lovely rucksack—well, I had a beautiful rucksack, but the zip broke. So then I bought a quite expensive, for me, rucksack, and this rucksack is gorgeous. I love the look of it. I love the build quality and the quality of the zips, but it just means I heap everything into the bag. My bag is just a heap of stuff, which is not good for the equipment. So I ordered this, the PGYTECH OneMo backpack, and look how it comes out of the package. Look at this. So this is what you get when you spend a bit more money on your rucksacks—a new experience for me.
And look, do I have to say this again? But I bought this with my own money. It's on offer at the moment because there's a new model, the OneMo 2. I'm way behind in reviewing this, but it might be an option if you're thinking of stepping into the world of camera backpacks. And wow, would you look at this for an unboxing experience. Look at it, it's gorgeous. I have to now undo the stitching on the top of this paper bag. Oh, that was a lovely few moments though, wasn't it? Let's take this off, so I get rid of that, move that there. This is how it comes out of the bag, and so we've got nice paper packaging, but there is the reassuring plastic packaging here. And I've gone for the olivine camo, or I think it's called olivine camo, olivine camo. When I was checking this out online, I didn't know how this would look. It's the only thing I see you. I like my bags to be slightly plain, and having this kind of Star Trek logo, uh, stitching on it, paneling on it, didn't quite sit comfortably with my wanting to keep things down on the down low. But in real life, it looks really stylish, and with the olivine—or olivine, is it? I call it olivine camo—these pouch edges kind of blend in really, really nicely, and they're magnetic, so you can put things in there. So I can put my knife, my steak knife in there.
The reason I wanted this is the side access. I really miss just being able to reach into the side without having to open everything up or having everything piled on top of each other. So let's open up. This is the first pouch, and there's an RFID-protected zipper pouch here actually in the flap. And I can, like, you can put all kinds of small things there. I'm missing that from my current rucksack, so this is a huge addition. The only thing I'm scared of, having spent my own money on this, is that there are a few reviews that said that the zips have failed, which isn't a good look because obviously, as soon as one zip fails, the bag is pretty much cut. But we've also got these anti-theft loops so that you can just delay anyone wanting to just unzip your bag very quickly while you're out and about. That loop will slow them down. And then there's the bottom pouch here, and we have three battery holders. I don't use batteries, but I'm sure I'll use these for something because I carry a lot of gear around with me.
And inside, let me put it out here. I should open it all up, shouldn't I? Show you what it looks like. But I just wanted to go for the pouches first. There's an olivine camo shoulder bag. Let's open up the shoulder bag and see what's inside. And we have a shoulder strap for the shoulder bag, and that is adjustable, but obviously, it does slide around. This hook goes over this hook, I guess. Tell me in the comments if I'm wrong, but that looks like the strap for the bag fitted. And then inside we have, oh, there's a pouch on the top, so you can store things in there, which is really handy. Acres of room in here. It's another pouch for more gear, and inside we have these adjustable Velcro panels, the dividers that divide up the bag for you. The Velcro or the hook and loop strips are on the side there, so you can configure this whichever way you want. This one has a little shelf so you can have an upper and lower level. There's a really handy handle on the side here, so you can carry it hand-carry it without the shoulder strap. Let's put that back into the OneMo backpack. So this can just slide into the side pouch or the side panel of the backpack. It goes in like that, really snug. What I love already, just first impressions, is the handle on top, which I'll use a lot, but there is also a handle on the side. I haven't seen that on any reviews that I've watched, and I've watched a lot of them, but there is a side handle in case you want one of those, and it blends in really nicely.
The shoulder straps tuck into two pockets here, so you can pull them out. This is going to be a game-changer for me because I leave this on the floor of the living room every night when I bring all my gear down from the happy hut back to the house, and they just flail all over the floor. Dog treads on them, everyone trips up on them. You can just tuck these in, and there's a chest strap for when you're really running for the train. For me, that would be really helpful. But there's also a pouch here, a zippered pocket with really nice lining. I love the colour of it. I'm not into army military-looking stuff, and this doesn't look too, uh, GI Joe. It's just a really tasteful dark green. On the other side, there's elasticated straps for putting, uh, lens caps. Again, I don't really use them, but that might be useful for tucking something in. Plus, do you know what? I really want to wear my Action 2, my DJI Action 2 camera. I've always tried to find a way of attaching it to a shoulder strap, and I think this might be the one where I'll be able to do that. So while I'm walking around, I can film my journeys.
This is the front section that expands. Wow, this really is first impressions. So it looks like that for extra room. And inside this pocket, there's, uh, elasticated—wow, this is elasticated—that can hold gear in place. I'll be using that for stuffing coats and things in, I think. So the main section, I really wanted to be able to slip my laptop in and out, so you can open it partially and tuck your laptop or tablet in there. I'll put my exercise book as well. I do some handwriting, and that section is subdivided as well. Don't know if you can see inside. This is the moment you're wanting to get to, I'm sure. Here it is opened up, and straight out of the box we've got, uh, a sticker. I think it's a PGYTech sticker, and it already comes with the two halves divided, which is lovely. I won't be changing that. That is one key feature of the bag for me. I think I'm going to be using the bag for other things, so I'm going to take out the shoulder bag. Much though I love it, this is going to be so good for keeping my headphones, my wireless mic, my camera, and all the leads that I need. I wasn't, on the videos I've watched, I wasn't too impressed by the way this kind of looks like it was saggy or not put in very well, but actually, I kind of like how it means that this door here, this flap here opens, and there's like a really nice tall section here, so that might work for when I, you know, go out with my ZV1. I have a wide lens attached to my Sony ZV-1 or ZV1, so that's going to be really nice. Just grab and go from the side there.
And we've got all these compartments. We have extra straps, and they're really nicely labeled. Let me show you what comes out of the box. This looks like there are two dividers. Actually, it's just one where that opens up like this, so you can double-tier this compartment. And then there's another loose compartment here, and again, that folds down into a shelf. And then put that here just for a demonstration. That is going to be so good for carrying gear around. You see the rain is falling. Going to test this waterproofness. Let's zip it up. Finally, just on this first impressions explore, just show you underneath. This has got a hard-wearing—it's almost like a rubberized bottom. Don't we all like a rubberized bottom? There we go. And it stands up fresh out of the box. Who knows if it'll do that when it's full of my gear?
And we've got a strap that opens up here. I guess you can use that on luggage. Yeah, this is really nice. Now the big test for me, because I'm really going to use this, I'm not going to put tripods in here so often, but what I will use is my half-litre water bottle. So I've got a giant water bottle, and that goes in super easily. I've not seen this on other videos. This is how it does it. There's an elasticated strap here, an elastic strap. I didn't quite know how this works, so it's lovely to see it in real life. So that will hold the water bottle in place. Absolutely amazing.
I've not opened this side panel. Let's open this up for you. There's an elastic pouch here, or strap for holding cables or other bits of gear. Another zip and another pocket. Well, I don't know if you find this, but you know I carry other things like hand sanitizer and tissues, all of that gear, uh, pens, pencils, Sharpie markers. They can all go in there. At the moment, they just pile into the bottom of my rucksack, so it's so good to have them, give them a home.
I was really, really wary of spending three figures on a backpack. I know this might be second nature to you. You might be in a part of the world where you can afford that quite comfortably, but for me, it's a giant leap to spend this amount of money on a rucksack. And my first impressions review is this is a hit. I absolutely love how this looks. It feels really well-made, and it doesn't really come across either on the PGYTech website or on Amazon. The pictures really don't do it justice. It is really smart looking. The edging on the zips look really waterproof. It's raining now, just throw some water on. Oh, welcome the bag. This is me on the train. Oh no, spilled my coffee, and it just looks really, really waterproof. There's more space down the back behind this pocket. One of the labels is actually the instructions, so I'll give you a quick, uh, squiz through these. It shows you all the different things, things to do, and how to fit those waist straps and equipment straps so you can have different combinations for your gear.
I think I found the rain cover. There's a Velcro section here. There's another pocket, another pouch. Here's the rain cover. Now I need to get this on. I don't know if it's showing up, but the rain is starting to get gradually heavier. But there's this amazing rain bag that fits perfectly. I've never had a rucksack that has been properly waterproof. That is so good. I should wear it, shouldn't I?
The big takeaways for me, the big pros with the OneMo backpack, is just being able to tuck the straps, the rucksack straps, into these pouches at the back is going to be heaven for me. And the other huge things for me are the side access panels, those doors, to just be able to grab pieces of equipment as and when are going to be crucial. And easy access to slip my notebook, my exercise books, and my laptop into the back just from the top is that I'm just going to be using that the most, I think. So wearing it for the first time, stand back. Oh my goodness, that is so comfortable. I know it's empty. I can adjust these exactly how I want them. It does feel really good. It just feels so comfortable. You can pull these straps down to tighten the arm straps there. And this is pretty much the same size as my standard rucksack, so it's not too big, but it does expand at the front. If I did need to put heavy coats or big items on there, I know that I can strap them on and carry them really easily. Oh, that feels really good.
I've put links to the OneMo backpack down in the description. Now, you're probably watching hundreds of camera backpack videos. Thank you for hitting the thumbs up or the subscribe button. It really helps me to keep this channel going, so thank you. And right here is what YouTube knows you are going to love watching next. Can you please help my dad get to 1 million subscribers? Just click on his face. Thanks, bye. Can we have dinner now?
This is my new favourite portable budget power bank: the MAXVOL 4 Multi Cable in one 10000 mAh 22.5w Slimmest Fast Charging with USB-A, USB-C Input and Output plus Lightning and Micro-USB cables. I'm not so sure this is the thinnest battery power packs for my phone but it's a fantastic power bank.
Buy the Maxvol power bank here! 👇👇👇👇 (Amazon commissions earned)
THIS IS THE TRANSCRIPT - CLICK PLAY ON THE VIDEO ABOVE!
Hello, welcome back to the channel. This is going to be a quick video because I am looking for the ultimate power bank. I need a battery for my phone, maybe to top up the laptop as well, but just some kind of charger when I'm out and about. I'm looking for something that's small in size, in physical size, but big in storage and small in weight, but something that has cables built into it because I always grab the power bank and never have the right cable. So I'm hoping this is the solution. This is the Maxvol Hyper Fast Charging. What model number is it? It's the Power Bank MVP1. Ultra slim, ultra powerful. I love how on the Amazon page they had that word—is it thinnest?—that caught my attention because I need something that isn't too huge. Judging by the packaging, this isn't the smallest thing, but let's unbox it. This is just an unboxing, first impressions review. This could be the power bank we're after.
So I bought this on Amazon. It was about $20 or £17 here in the UK, and this is how it comes straight out of the box. It's slightly bigger than the power banks, the cheap power banks, I've been using, but this feels quite premium. It's nice glossy plastic. These are the power banks I've been using. I bought it in a supermarket. It is, uh, 6,000 mAh and has the cables built in, but it's so old now that it's a micro USB. I needed something with USB-C, and look, just compare it with this. This is 10,000 milliamp hours, and I'll, uh, have the satisfying removal of the film. But the thing that captured my attention with this is the built-in different cables. So I have a lightning cable, which is really handy with my daughter's devices. We got micro USB, USB-C, with a nice, uh, flash of purple inside there, and this is an odd-looking square, but this should fit into a regular USB socket. Trying to think of the word for it. It's just a USB port jack. The cables are about 15 cm long, or as big as my hand, um, so I guess I could just hold my phone next to it and plug it in. Should we go for it? Should we just do it?
I've read comments on the Amazon page, reviews that say it comes fully charged. So press the button to see what happens. Power switch is on the side here. Wa, it's on 93%, and is that a light? We'll see. And we've got some other ports here—a USB port, a micro USB port, and a USB-C port there. It's really sleek, and to tuck the cables back, you just squeeze the cable into the groove. They go back really easily. That's really smart, that's great stuff. Right, let's plug it into my phone and see if it works. So I'll probably hold it that way and just plug the jack in. There we go, it's charging, and it looks like it's charging fast. So that's good. Not super fast, but fast. So I will charge my Samsung S20 in about an hour from 19%, so that's pretty good, isn't it? But it's really sleek. I mean, it's glossy, glossy black, so I'm not sure this is—I think this is not going to stay scratch-free for long in my bag, the way I treat my power banks, but this is definitely a massive step up for me. On the display, there's a little green sort of, uh, lightning flash, which I guess shows it's being discharged. Hey, I wonder what would happen if I charge—if I plug this into this? We might see if this charges up. So I'll unplug. So this is just first impressions. I just wanted to show you what it looked like, but let's see what would happen if I plug my power bank into here. Which way around will it go? Yep, it's charging, look at that. So the 92% is flashing. I'm sure that doesn't show up on screen because of the harsh sunlight, but this is charging up. And again, I've read the reviews on Amazon. It's, uh, it's slow to charge, but I think that's the same for all power banks. But all in all, this is a really nifty, nifty thing.
I'll just show you the capacity here and the instruction leaflet, welcome guide, as Maxvol call it. I'll just show you these so you can see how the thing works. To charge the power bank, you can have hyper fast charge. Uh, you need the cable plugged into it to be hyper fast. The other way to charge the power bank is to use a type-C to type-C port, so that would go into here, or you can use the built-in USB-A connector—that was the word I was looking for—so you can charge this from either a charging brick or, I guess, from a laptop or other device, maybe a computer, and it charges through there. Also, I've only discovered this later, but if you press the power button and hold it down, this LED light comes up, so it's got a little torch on, which in the sunshine probably doesn't look that powerful, but that could be quite handy if I ever need a torch when I'm out with my power bank. To turn it off, you just hold the power button down again. I'll also put a link in the description if I hit any problems or if there are any other details that I encounter during the first month of use. I'll put those, all of those, down in the description. I think this could be the power bank I've been looking for. Thank you for hitting the thumbs up or the subscribe button. It really helps me to keep this channel going. I do appreciate it. And right here is what YouTube knows you are going to love watching next. Can you please help my dad get to 1 million subscribers? Just click on his face. Thanks, bye. Can we have dinner now?